
- key "for 8"
- screwdriver
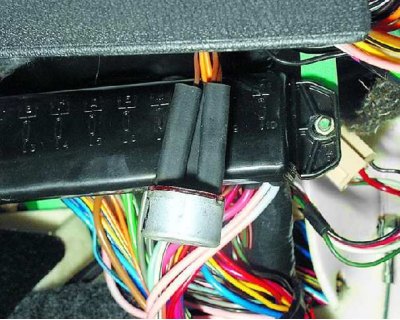
Loosen the nuts securing the fuse box and move it aside (without disconnecting the wire ends) – see subsection 8.1.1.
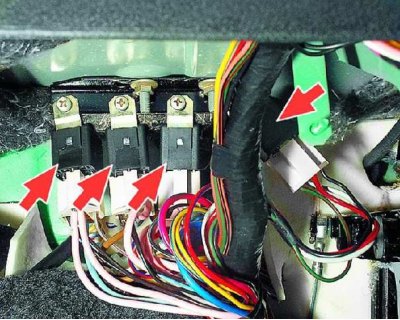
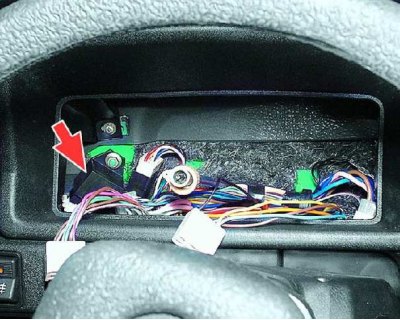
Relays for turning on the starter, dipped and main beam headlights, rear door glass heating, cooling system fan electric motor are installed on the front panel of the car body (in the cabin under the instrument panel, behind the fuse box, to the left of the steering column). The fuse box has been removed for clarity.
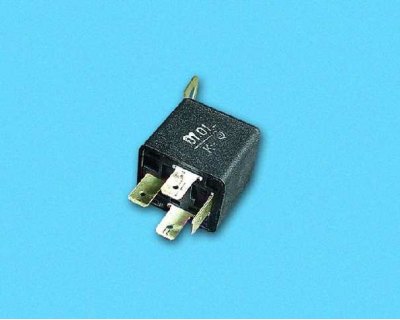
All listed relays are of the same type - 90.3747-10.
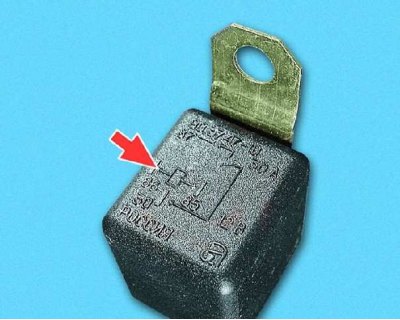
Relay marking (type, manufacturer's trademark and pinout) printed on the housing cover.
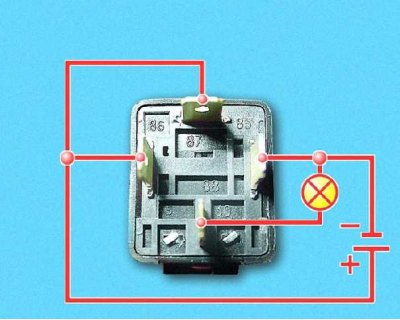
To test the relay, connect it according to the diagram to an external 12 V power supply (e.g. to the battery). With a good relay, the lamp should light up. If the lamp does not light up, replace the relay.
Replacing the relay for starting the starter, dipped and main beam headlights, rear door glass heating, cooling fan motor, ignition
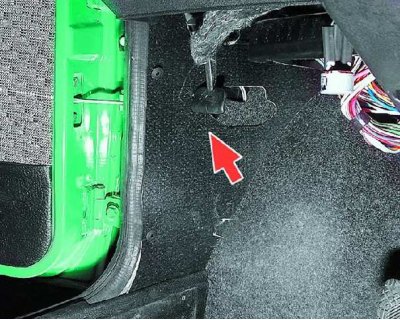
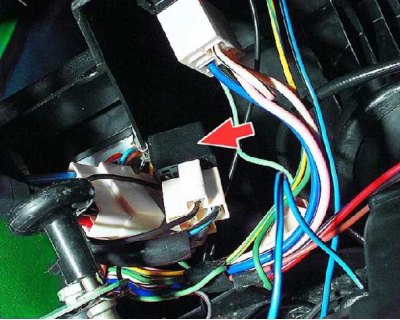
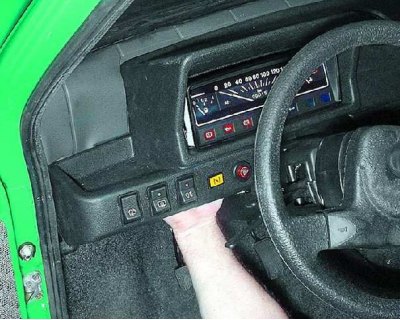
The parking brake warning lamp relay type RS-492 is located under the instrument panel to the left of the steering column.
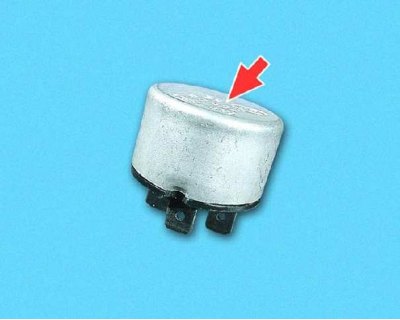
Relay marking (its type and manufacturer's trademark) printed on the housing cover.
You will need a screwdriver.
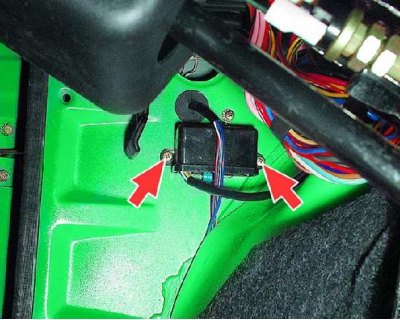
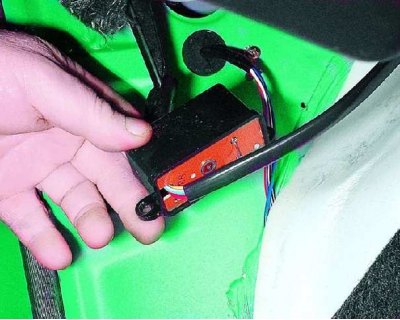
The windshield wiper relay type RS-514 is installed under the upholstery of the left side of the body.

Relay marking (its type, manufacturer's trademark) printed on the housing cover.
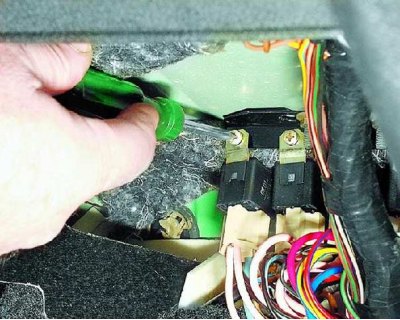
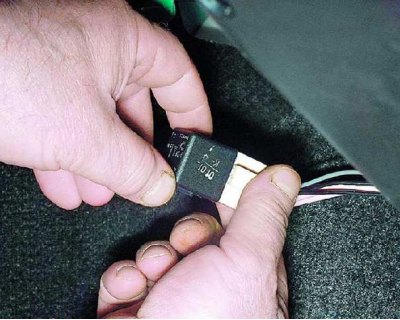
1. Loosen the mounting screw and remove the relay from the body bracket.
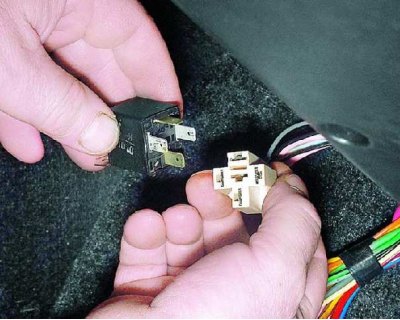
2. Remove the relay from the connector block.
3. Install the new relay on the connector block and secure it to the bracket with the screw.
4. Ignition relay (type 90.3747-10) located under the instrument panel to the right of the steering column. To replace it, follow steps 2 and 3.
Replacing the Parking Brake Warning Lamp Relay
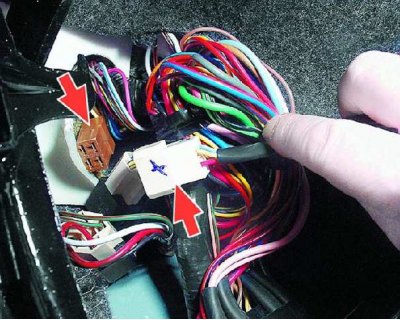
5. Mark the wires and the relay housing cover.
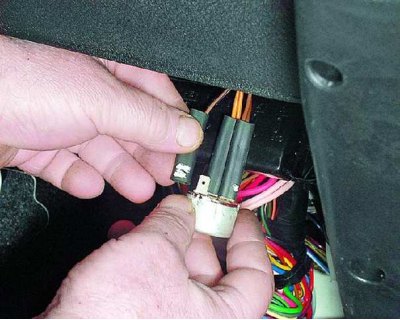
6. Disconnect the wire lugs from the relay and remove it.
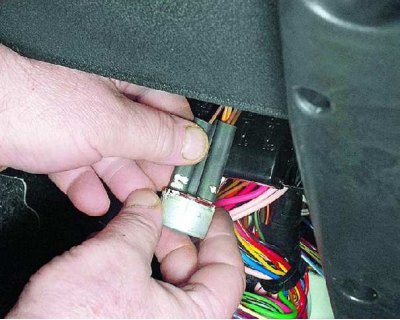
7. Install the relay in the reverse order of removal.
Windshield Wiper Relay Replacement
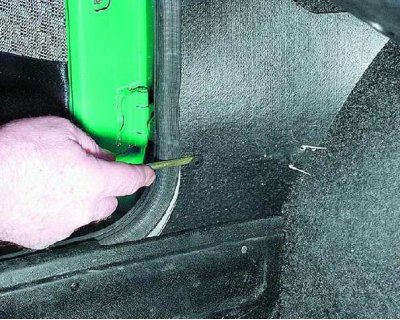
8. Use a screwdriver to pry off the two upholstery fastening clips (shown one) And...
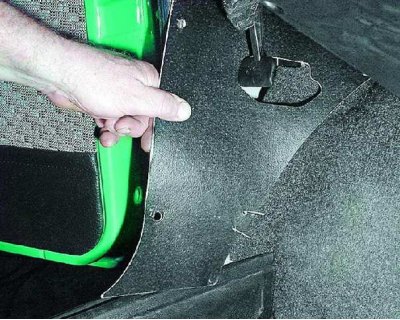
9.... remove the upholstery of the sidewall of the body.
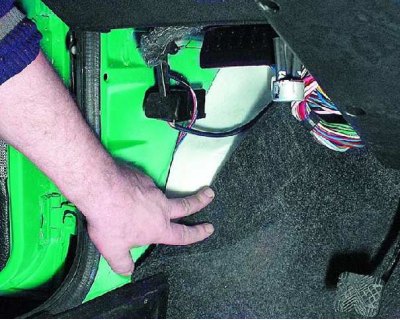
10. Fold the floor mat aside and...
11.... unscrew the two screws securing the relay to the side of the body.
12. Remove the relay from the side of the body.
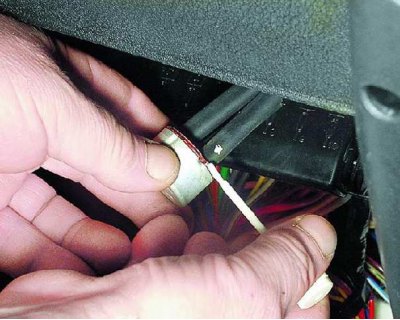
13. Disconnect the connector block of the wires going to the relay (under the dashboard), and remove the relay from the vehicle. Install the relay in the reverse order of removal.
Replacing the relay-interrupter of direction indicators and alarms
You will need a key "on 10".
The relay-interrupter for direction indicators and alarm type 494.3747 is located behind the instrument cluster and is fastened with a nut to the front end shield stud.

The marking of the relay is applied on the cover of its housing.
14. From the inside of the instrument panel, press out the two spring latches located on the sides of the instrument cluster, and...
15.... remove the combination from the instrument panel.
16. Loosen the speedometer cable nut and...
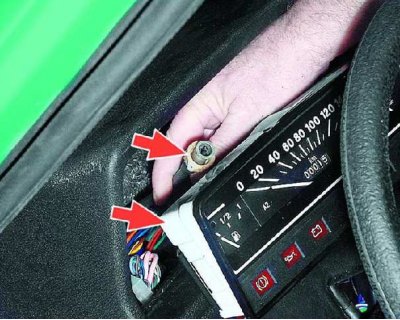
17.... Disconnect the speedometer cable from the instrument cluster.

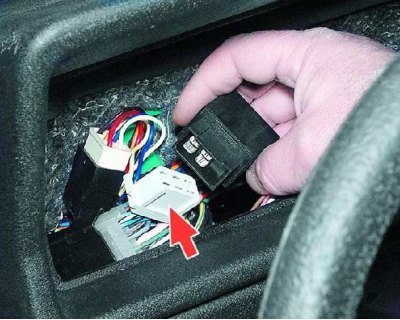
18. Mark the pads and wire connectors.

19. Disconnect blocks from a combination of devices and remove a combination.
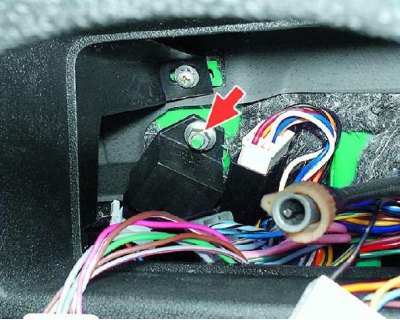
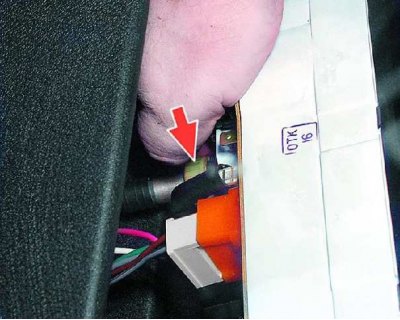
20. Loosen the relay mounting nut and remove the relay from the front end stud.
21. Disconnect the relay from the wiring harness (shown by arrow). Install the relay in the reverse order of removal.