
Examination
1. If the engine does not run or runs erratically at idle, it is possible that as a result of diaphragm leakage, the economizer valve completely or partially shuts off the fuel supply. For checking vacuum hose (from intake manifold to electropneumatic valve) connect to the economizer fitting. We start the engine. In the event that the engine starts to work stably, the economizer valve is working. If not, then its diaphragm is damaged (Or is the hose leaking?).
2. Economizer valve may be stuck open and not cut off fuel supply (in this case, increased fuel consumption is observed). In this case, the engine runs steadily at idle. To check the valve, we start the engine and, in idle mode, disconnect one of the wires from the solenoid valve terminals (see "Electropneumatic valve - check and replacement"). In the event that the engine continues to run, the economizer diaphragm may not be tight (or faulty solenoid valve). To check, remove (see below) and inspect the diaphragm, if there are gaps or cracks, replace it.
Replacement
You can replace the economizer diaphragm without removing the carburetor. For clarity, we show the work on the removed carburetor.
1. Disconnect the hose connecting the economizer with the electro-pneumatic valve and the wire blocks from the microswitch terminals (see "Carburetor - removal and installation").
2. Using a Phillips screwdriver, unscrew the two screws that secure the microswitch and economizer bracket.
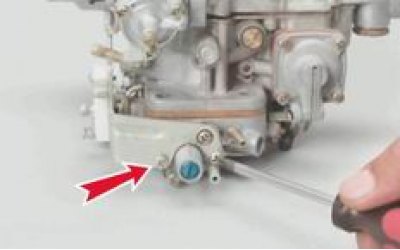
3. Remove the microswitch bracket and remove the economizer from the throttle body.

4. Remove the gasket installed between the economizer and the housing, and check its condition. If the gasket is damaged, replace it.

5. Using a Phillips screwdriver, unscrew the two screws securing the economizer cover.
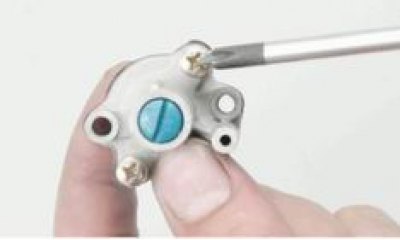
6. Remove the economizer cover.
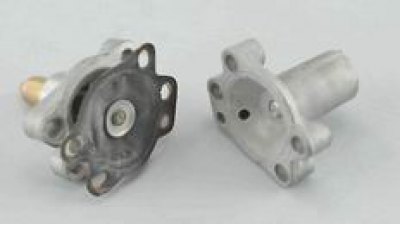
7. Check the condition of the diaphragm. In the presence of gaps and cracks, replace the diaphragm. If the connection between the diaphragm and the needle is non-separable, we replace the economizer assembly.
Installation
1. Install all removed parts in reverse order.
2. After installing the economizer, we adjust the idle (see "Idling - adjustment").