English Русский
Български
Беларускі
Український
Српски
Hrvatski
Română
Polski
Slovenský
Magyar
| Articles | Contacts | Sitemap |   
Repair and maintenance Lada Repair and maintenance Mazda Repair and maintenance Mitsubishi Repair and maintenance Toyota Repair and maintenance Land Rover Repair and maintenance Hyundai Repair and maintenance Nissan
VAZbook.ru


Main     1111   2101   2105   2106   2107   2109   2110   2115   2121  
VAZ-2104 (1984-2012) VAZ-2105 (1979-2010) VAZ-21051 (1979-2010)
  • Main
  • «Zhiguli»
  • VAZ-2104
  • Chassis
  • Front suspension
  • Hub — replacement of seal, grease and bearings

Hub — replacement of seal, grease and bearings (VAZ-2104)

            0

Contents: Disassembly ↓ Assembly ↓
We replace the hub bearing grease according to the maintenance regulations every 20,000 km.

We replace the hub bearings in pairs if increased noise cannot be eliminated by adjustment.

It is not difficult to determine which side of the bearing is worn out. To do this, you need to listen for an increase in noise from the side of the worn bearing when the car turns. If the noise increases when turning the right, the left wheel hub bearing is faulty, and vice versa.

Disassembly


1. Prepare the vehicle for operations (see "Preparing a car for maintenance and repair").

2. Remove the brake caliper (see "Front wheel brake mechanism - disassembly"). To prevent the caliper from hanging on the brake hose, tie it to the upper suspension arm with wire or rope.

3. With a socket wrench by 27 mm unscrew the hub nut (see "Front Wheel Hub Bearings - Adjustment").

We remove the washer and the outer bearing separator with rollers and the inner ring.
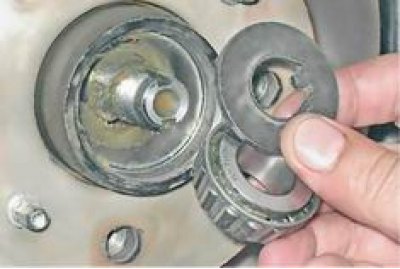
We remove the washer and the outer bearing separator with rollers and the inner ring.


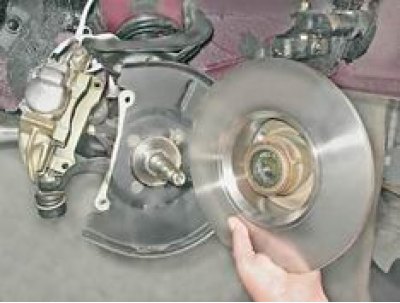
4. Pulling it towards you, remove the hub with the brake disc from the steering knuckle journal.

4. Pulling it towards you, remove the hub with the brake disc from the steering knuckle journal.

5. Using sliding pliers or a screwdriver, remove the oil seal from the hub.
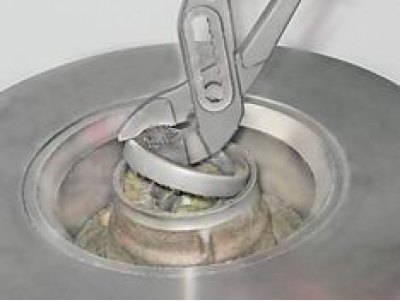


5. Using sliding pliers or a screwdriver, remove the oil seal from the hub.


6. Remove the inner bearing separator with rollers from the hub without the outer ring.
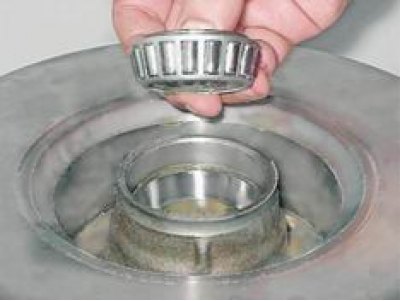
6. Remove the inner bearing separator with rollers from the hub without the outer ring.


7. Clean the hub cavity from old grease and wipe the inner surface of the hub with a rag soaked in kerosene or white spirit.

8. To replace the bearings, use a slotted screwdriver to pry up the split spacer sleeve and remove it.
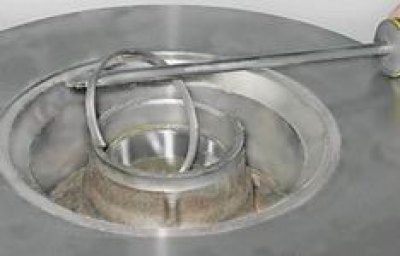
8. To replace the bearings, use a slotted screwdriver to pry up the split spacer sleeve and remove…


9. With a deep-head socket wrench by 7 mm (12 mm - on early production cars) unscrew the two guide pins.
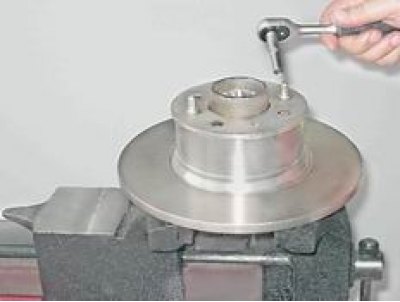

9. With a deep-head socket wrench by 7 mm (12 mm - on early production cars) unscrew the two guide…


10. Remove the spacer ring and brake disc from the hub.
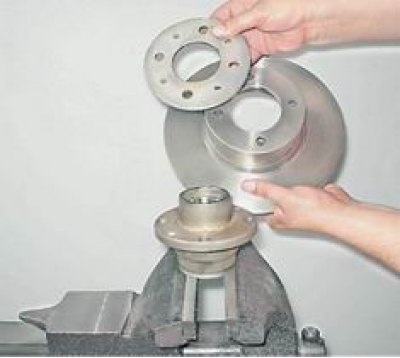
10. Remove the spacer ring and brake disc from the hub.


11. Secure the hub in a vice. Apply light blows with a hammer in a circle through a punch on the outer ring of the inner bearing.
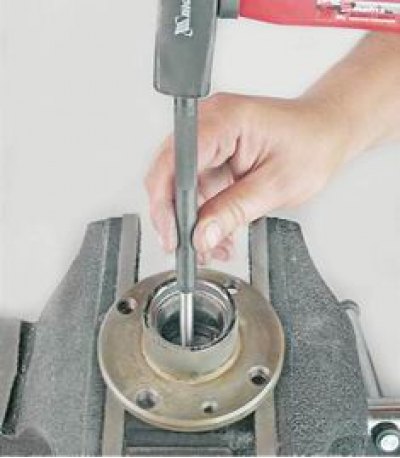
11. Secure the hub in a vice. Apply light blows with a hammer in a circle through a punch on the…


12. Press out the ring.

12. Press out the ring.


13. Turning the hub in a vice, we press out the outer bearing ring in the same way.

Assembly


1. Wash all parts in kerosene or white spirit, apply plastic grease to the bearing seats of the hub.

2. It is convenient to press the outer bearing rings in a vice, through wooden spacers, using rings from old bearings as mandrels, which we orient with the smaller diameter of the cone inside the hub. We press the new rings into the hub until they stop.
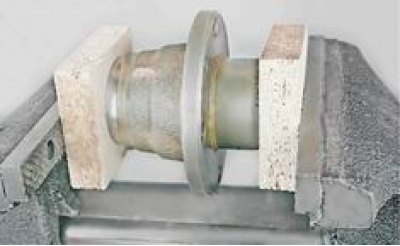
2. It is convenient to press the outer bearing rings in a vice, through wooden spacers, using rings…


3. Apply plastic grease Litol-24 or its analogues to the separator and the inner bearing ring. Place about 40 g of grease in the space between the bearings.
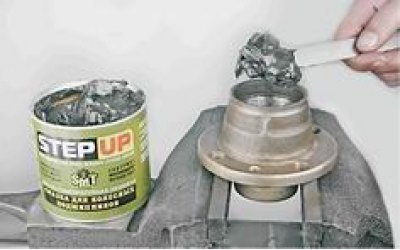
3. Apply plastic grease Litol-24 or its analogues to the separator and the inner bearing ring.…


4. Install the inner bearing separator with rollers and inner ring into the hub, having previously applied grease to it.

5. Install the spacer sleeve.

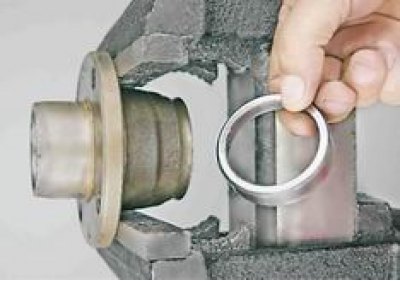
6. Using a hammer and a suitable tool (for example, a mounting blade or the outer ring of the previous bearing) we press a new seal into the hub.
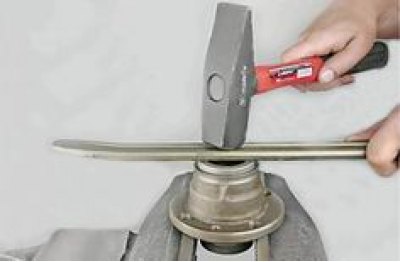
6. Using a hammer and a suitable tool (for example, a mounting blade or the outer ring of the…


7. We secure the brake disc with a spacer ring to the hub with two pins and install the hub on the steering knuckle journal.

8. Apply grease to the outer bearing separator, place the inner ring on the journal, install the washer and screw on the new hub nut.

9. Adjust the clearance in the hub bearings (see "Front Wheel Hub Bearings - Adjustment").


This article is available at russian, bulgarian, belarusian, ukrainian, serbian, croatian, romanian, polish, slovak, hungarian
The text was reviewed by the specialist: Grigory Vologodtsev

Share with friends:

Previous articles
VAZ-2104: Front suspension
Next articles

Front Wheel Hub Bearings — Adjustment
Wheel alignment angles — adjustment
Front suspension — technical condition check
Description of the front suspension design
Front Suspension Shock Absorber — Replacement
Front Suspension Spring — Replacement
Upper arm — removal and replacement of rubber-metal hinges
Rubber-metal hinges of lower arms — replacement on the car
Lower arm — removal and installation

More articles from other manuals on VAZ cars:
➠ Hub — replacement of seal, grease and bearings VAZ-2106 (1976-2006)
➠ Hub — replacement of seal, grease and bearings VAZ-2107 (1982-2012)
➠ Replacing grease in rear wheel hub bearings VAZ-1111 (1988-1996)
➠ Replacing grease in front wheel hub bearings VAZ-2101 (1970-1983)
➠ Replacing grease in front wheel hub bearings VAZ-21213 (1994-2006)
Link in different formats to this page


Visitor comments

No comments yet


How much will 42 + 21 ?


VAZ-2104 (1984-2012) 
  • General information
  • Operation and maintenance
  • Power unit
  • Engine repair
  • Fuel system (carburetor)
  • Fuel system (injector)
  • Control system
  • Cooling system
  • Exhaust system
  • Transmission
  • Clutch
  • Car gearbox
  • Cardan gear
  • Rear axle
  • Chassis
  • Front suspension
  • Rear suspension
  • Wheels and tires
  • Steering
  • Brake system
  • Body
  • Exterior
  • Interior
  • Doors and glass
  • Ventilation and heating
  • Electrical equipment
  • Equipment and devices
  • Headlights and lighting
  • Engine electrics
  • Electrical circuits


VAZ-2105 (1979-2010) 
  • General information
  • Vehicle description
  • Vehicle device
  • Vehicle operation
  • Maintenance
  • Power unit
  • Engine repair
  • Cooling and lubrication system
  • Supply system
  • Transmission
  • Clutch
  • Car gearbox
  • Cardan gear
  • Rear axle
  • Chassis
  • Suspension and shock absorbers
  • Steering
  • Brake system
  • Body
  • Body elements
  • Electrical equipment
  • Engine electrics
  • Equipment and devices


VAZ-21051 (1979-2010) 
  • General information
  • Introduction to guide
  • User manual
  • Troubleshooting
  • Power unit
  • Engine repair
  • Engine repair VAZ-2103
  • Cooling system
  • Lubrication system
  • Power and exhaust system
  • Fuel injection
  • Transmission
  • Clutch
  • Car gearbox
  • Cardan gear
  • Rear axle
  • Chassis
  • Suspension and shock absorbers
  • Steering
  • Brake system
  • Body
  • Exterior
  • Interior
  • Doors and windows
  • Electrical equipment
  • Equipment and devices
  • Engine electrics
  • Ignition system
  • Electrical circuits


VAZbook.ru © 2017 · Mobile version · Contact with administration · Sitemap: EN BG BY UA RS HR RO PL SK HU · Site search · News and articles VAZ-1111 · VAZ-11113 · VAZ-2101 · VAZ-21011 · VAZ-2104 · VAZ-2105 · VAZ-21051 · VAZ-2106 · VAZ-21061 · VAZ-2107 · VAZ-21099 · VAZ-2109 · VAZ-2108 · VAZ-2110 · VAZ-2112 · VAZ-2114 · VAZ-2115 · VAZ-2121 · VAZ-21213 · VAZ-21214 ·
The site stores technical data using cookies to improve the service.