




Contents: Removal ↓ Installation ↓
A centering mandrel is required for this job.
Removal
1. Place the vehicle on an inspection pit or overpass (see "Preparing a car for maintenance and repair").
2. Remove the gearbox (see "Gearbox - removal and installation").
3. Screw one of the clutch housing mounting bolts into the hole in the cylinder block.
Advice: If you do not plan to replace the basket, then use a center punch to mark its position on the flywheel.
(The original source is located on the website: VAZbook.ru)
Attention! When performing the following operation, to avoid deformation of the clutch housing, unscrew the bolts sequentially, no more than one turn per pass.
4. Hold the flywheel from turning with a mounting blade inserted between the teeth of the flywheel ring gear and a socket wrench on 13 mm we unscrew the six bolts that secure the basket to the flywheel.
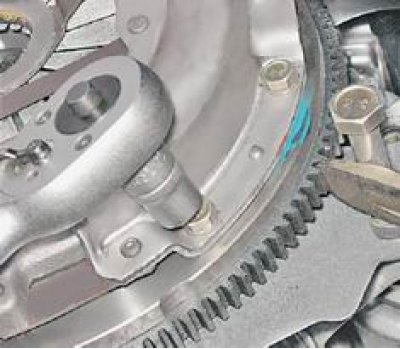
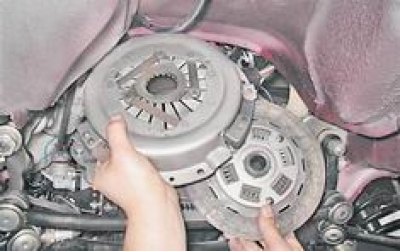
5. Remove the basket and the driven clutch disc.
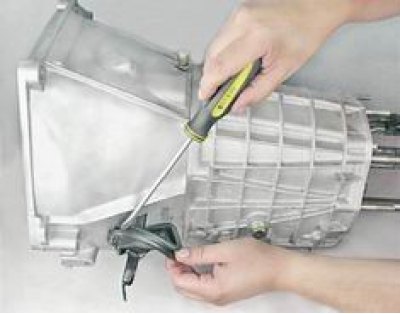
6. Using a slotted screwdriver, bend back the edge of the clutch release fork boot and remove the boot.
7. Disengage the fork from the clutch spring of the release bearing, remove the fork from the ball joint and remove it from the hole in the clutch housing.
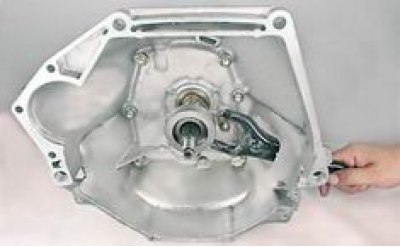
8. Remove the release bearing sleeve with the spring from the guide sleeve.
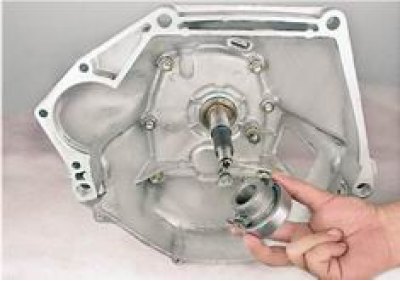
Installation
Before installing the clutch components, carefully check their condition. Deep grooves, burn marks, and cracks are unacceptable on the working surfaces of the flywheel and pressure plate. The friction linings of the driven disk should not have cracks, chips, warping, or severe wear; there should be no visible signs of wear on the rivet heads. The disk hub should move along the splines of the primary shaft without jamming. The release bearing should rotate easily, without extraneous noise. Cracks are unacceptable on the clutch housing.
Replace faulty and damaged parts. It is advisable to install new bolts for fastening the basket to the flywheel.
1. Wipe the working surfaces of the disks, flywheel and primary shaft with a cloth soaked in white spirit.
2. Apply a thin layer of SHRUS-4 grease or similar to the smooth and splined surfaces of the primary shaft, as well as to the ball joint of the fork.
3. Using a mandrel inserted into the hole in the inner bearing ring at the end of the crankshaft, we center the position of the driven disk. The protruding part of the disk hub should be directed toward the basket. In this case, the driven disk will be held by the mandrel.
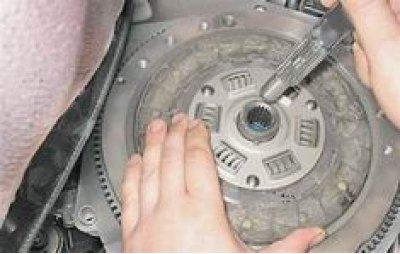
4. Install the clutch basket on the flywheel, aligning the centering holes of the casing with the flywheel pins.
5. Tighten the bolts securing the clutch basket to the flywheel evenly, no more than one turn per pass. The tightening torque of the bolts is 19.1-30.9 N·m. After tightening, the mandrel should be freely removed from the driven disk.
6. Further installation is carried out in reverse order.
7. After installation, adjust the free travel of the working cylinder pusher (see "Clutch release hydraulic drive - checking and adjustment").