




Sequence of work execution
1. Prepare the vehicle for repair work (see points 1 and 2a "Preparing a car for maintenance and repair")
2. Holding the clutch drive adjusting nut with a 13 mm wrench, use a second, identical wrench to loosen the lock nut a few turns.
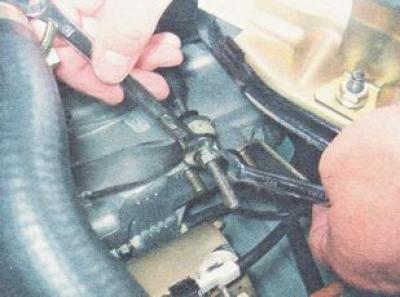
3. By tightening or loosening the adjusting nut, we achieve that the clutch pedal travel is 120-130 mm (see fig.).
4. Having completed the drive adjustment, lock the adjusting nut with a lock nut.
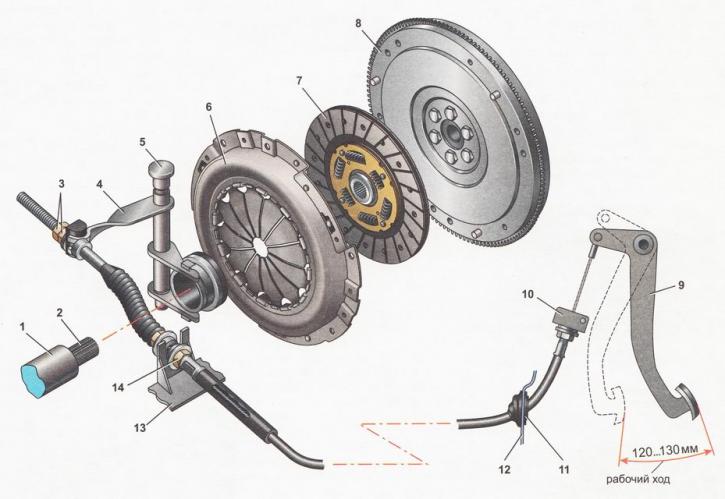
Device, clutch drive diagram on VAZ 2110 cars: 1 - Clutch release bearing guide sleeve; 2 - primary shaft of the gearbox; 3 - cable adjusting nuts; 4 - clutch release fork; 5 - clutch release fork axle bushing; 6 - pressure plate assembly (clutch basket); 7 - driven clutch disc; 8 - engine flywheel; 9 - clutch pedal; 10 - cable sheath bracket; 11 - anther; 12 - Engine compartment partition; 13 - bracket on the gearbox housing; 14 - cable sheath fastening nuts