
English Русский
Български
Беларускі
Український
Српски
Hrvatski
Română
Polski
Slovenský
Magyar
| Articles | Contacts | Sitemap |   
Repair and maintenance Lada Repair and maintenance Mazda Repair and maintenance Mitsubishi Repair and maintenance Toyota Repair and maintenance Land Rover Repair and maintenance Hyundai Repair and maintenance Nissan
VAZbook.ru


Main     1111   2101   2105   2106   2107   2109   2110   2115   2121  
VAZ-2114 (2004-2013) VAZ-2115 (1997-2012)
  • Main
  • «Samara-2»
  • VAZ-2114
  • Chassis
  • Steering
  • Tie Rod End — Replacement

Tie Rod End — Replacement (VAZ-2114)

            0

Contents: Removal ↓ Installation ↓
To perform the work you will need a ball joint puller.

Removal


1. Prepare the car for work (see "Preparing the car for maintenance and repair").

2. For ease of work, remove the front wheel (see "Wheel - replacement").

3. Using a metal brush, clean the tip threads from dirt and treat them with penetrating lubricant.
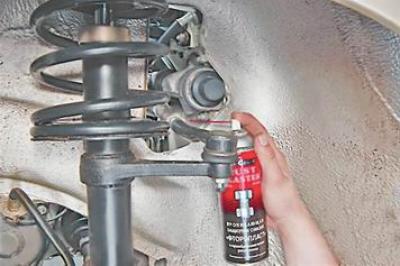
3. Using a metal brush, clean the tip threads from dirt and treat them with penetrating lubricant.


4. Key by 27 mm loosen the outer lock nut, holding the connecting sleeve of the rod with a wrench by 24 mm.
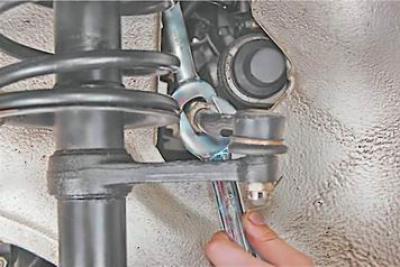
4. Key by 27 mm loosen the outer lock nut, holding the connecting sleeve of the rod with a wrench…


5. Using pliers, straighten and remove the cotter pin from the hole in the ball joint of the tie rod.
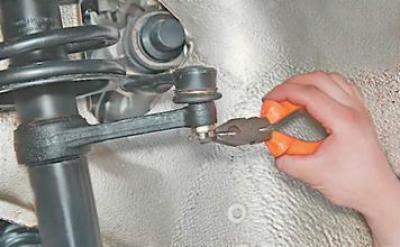
5. Using pliers, straighten and remove the cotter pin from the hole in the ball joint of the tie…


6. With a spanner by 19 mm we unscrew the crown nut of the finger.
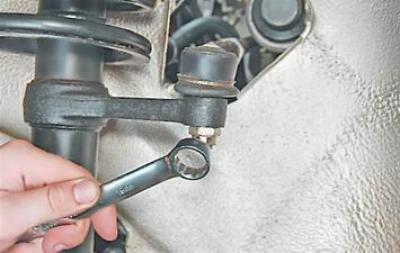


6. With a spanner by 19 mm we unscrew the crown nut of the finger.


7. Using a puller, press the pin out of the hole in the steering knuckle of the front suspension strut.
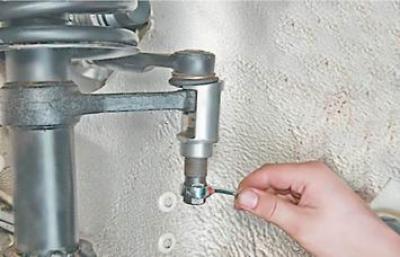
7. Using a puller, press the pin out of the hole in the steering knuckle of the front suspension…


8. Rotate the outer tip to unscrew it from the coupling (the tip has a left-hand thread).
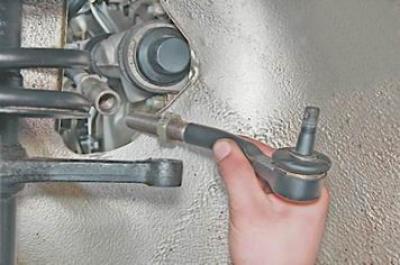
8. Rotate the outer tip to unscrew it from the coupling (the tip has a left-hand thread).


Note: If it is necessary to approximately set the wheel alignment during assembly (for example, to get to the adjustment stand) - we count the number of revolutions made.


Installation


1. Cover the threaded part of the tip with plastic grease Litol-24 or similar.

2. Screw the new tip into the connecting sleeve.

Note: To approximately maintain the wheel alignment, screw the new tip into the coupling with the same number of turns that were made when unscrewing the old tip.


3. Insert the pin into the hole of the strut pivot arm and tighten the crown nut.

4. Tighten the pin nut to a torque of 27.1-33.4 N·m (2.8-3.4 kgf·m) and turn it further until the hole in the pin aligns with the nearest slot in the nut.

5. We cotter the nut (insert the cotter pin into the finger and spread the ends of the cotter pin in different directions).

6. Tighten the traction coupling lock nut to a torque of 121-149.4 N·m (12.3-15.2 kgf·m).

Warning! After replacing the tip, wheel alignment must be adjusted at a service station.


This article is available at russian, bulgarian, belarusian, ukrainian, serbian, croatian, romanian, polish, slovak, hungarian
The text was reviewed by the specialist: Grigory Vologodtsev

Share with friends:

Previous articles
VAZ-2114: Steering
Next articles

Steering column — removal and installation
Steering column locking mechanism — checking and adjustment
Decorative steering column trims — removal and installation
Steering wheel — removal and installation
Steering — checking technical condition
Steering rods — removal and installation
Steering gear — removal and installation
Steering Gear Protective Cover — Replacement

Link in different formats to this page


Visitor comments

No comments yet


How much will 40 + 38 ?


VAZ-2114 (2004-2013) 
  • General information
  • Operation and maintenance
  • Power unit
  • Engine repair
  • Cooling system
  • Supply system
  • Control system
  • Exhaust system
  • Transmission
  • Clutch
  • Car gearbox
  • Front wheel drives
  • Chassis
  • Wheels and tires
  • Front suspension
  • Rear suspension
  • Steering
  • Brake system
  • Body
  • Exterior
  • Interior
  • Doors and glass
  • Tailgate
  • Ventilation and heating
  • Electrical equipment
  • Equipment and devices
  • Headlights and lighting
  • Engine electrics
  • Electrical circuits


VAZ-2115 (1997-2012) 
  • General information
  • Vehicle device
  • Operation manual
  • Vehicle malfunctions
  • Car care
  • Power unit
  • Engine repair
  • Cooling system
  • Supply system
  • Control system
  • Exhaust system
  • Transmission
  • Clutch
  • Car gearbox
  • Front wheel drives
  • Chassis
  • Front suspension
  • Rear suspension
  • Steering
  • Brake system
  • Body
  • Exterior
  • Interior
  • Doors, covers and windows
  • Electrical equipment
  • Equipment and devices
  • Headlights and lighting
  • Engine electrics
  • Anti-theft system


VAZbook.ru © 2017 · Mobile version · Contact with administration · Sitemap: EN BG BY UA RS HR RO PL SK HU · Site search · News and articles VAZ-1111 · VAZ-11113 · VAZ-2101 · VAZ-21011 · VAZ-2104 · VAZ-2105 · VAZ-21051 · VAZ-2106 · VAZ-21061 · VAZ-2107 · VAZ-21099 · VAZ-2109 · VAZ-2108 · VAZ-2110 · VAZ-2112 · VAZ-2114 · VAZ-2115 · VAZ-2121 · VAZ-21213 · VAZ-21214 ·
The site stores technical data using cookies to improve the service.