
English Русский
Български
Беларускі
Український
Српски
Hrvatski
Română
Polski
Slovenský
Magyar
| Articles | Contacts | Sitemap |   
Repair and maintenance Lada Repair and maintenance Mazda Repair and maintenance Mitsubishi Repair and maintenance Toyota Repair and maintenance Land Rover Repair and maintenance Hyundai Repair and maintenance Nissan
VAZbook.ru


Main     1111   2101   2105   2106   2107   2109   2110   2115   2121  
VAZ-1111 (1988-1996) VAZ-11113 (1996-2003)
  • Main
  • «Oka»
  • VAZ-1111
  • General information
  • Maintenance
  • Checking the efficiency of the vacuum booster

Checking the efficiency of the vacuum booster (VAZ-1111)

            0

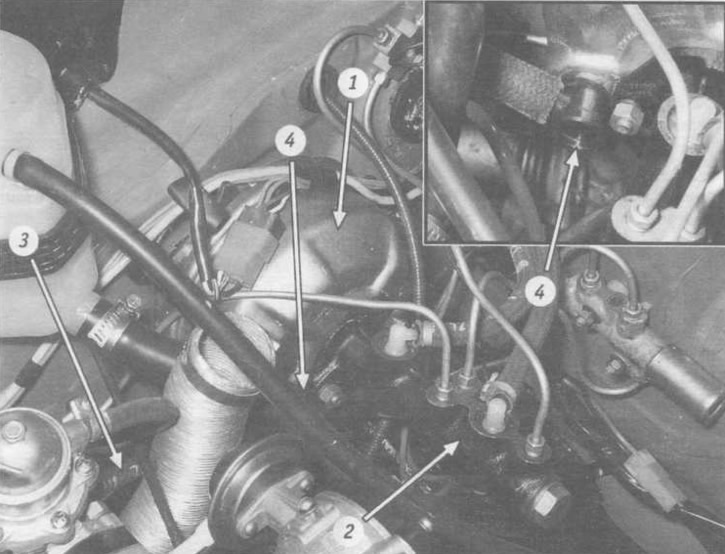
Location of the vacuum booster (spare tire removed): 1 - vacuum booster; 2 - master brake cylinder;…

Location of the vacuum booster (spare tire removed): 1 - vacuum booster; 2 - master brake cylinder; 3 - vacuum hose; 4 - check valve.


You will need: Screwdriver, rubber bulb.

Before starting work, remove the spare tire.

When the vacuum booster fails, the force on the brake pedal increases significantly, which negatively affects vehicle control.

If you are unable to eliminate the defects associated with the operation of the vacuum booster, contact specialists.


With the engine off, press the brake pedal 5-6 times. Keep the brake pedal depressed and start the engine. The brake pedal should move forward. If this does not happen, check...

...the tightness of the vacuum hose fit on the intake pipe fitting and...
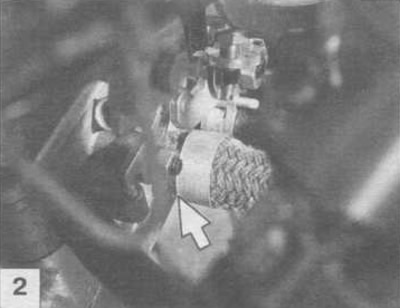
...the tightness of the vacuum hose fit on the intake pipe fitting and...


...on the check valve. If necessary, depending on the defect, tighten the hose clamp, replace the clamp or the hose.
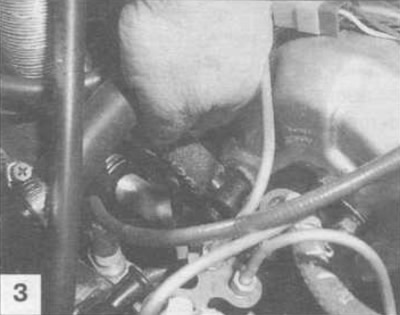


...on the check valve. If necessary, depending on the defect, tighten the hose clamp, replace the…


To check the check valve, disconnect the vacuum hose from the valve.
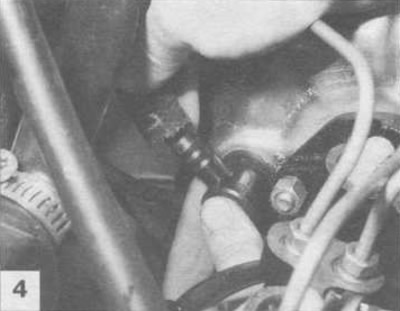
To check the check valve, disconnect the vacuum hose from the valve.


Remove the valve from the amplifier body.
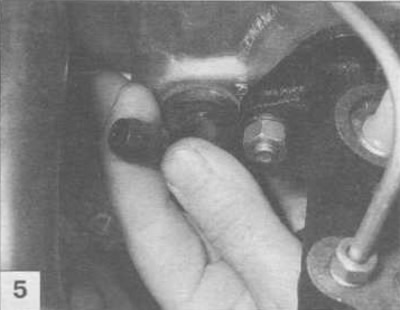
Remove the valve from the amplifier body.


Put it on a larger diameter nipple (which the valve is inserted into the amplifier) rubber bulb and squeeze it. In doing so...
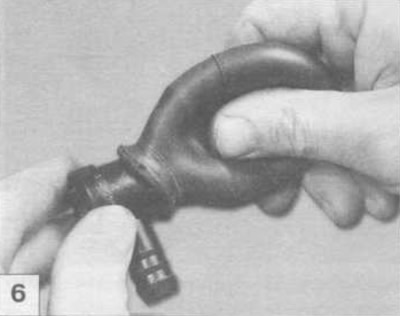
Put it on a larger diameter nipple (which the valve is inserted into the amplifier) rubber bulb and…


...the air should come out through the valve. Release the bulb. If it remains compressed, the valve is OK. Otherwise, replace the valve. If there is no bulb, you can blow through the valve with your mouth.
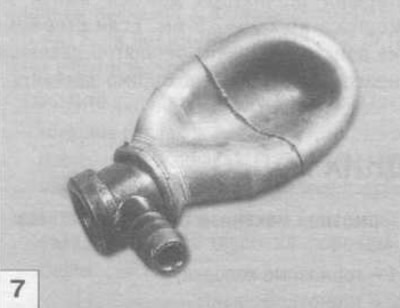

...the air should come out through the valve. Release the bulb. If it remains compressed, the valve…


The original can be found on the website [VazBook]


This article is available at russian, bulgarian, belarusian, ukrainian, serbian, croatian, romanian, polish, slovak, hungarian
The text was reviewed by the specialist: Grigory Vologodtsev

Share with friends:

Previous articles
VAZ-1111: Maintenance
Next articles

Adjusting the brake pedal free travel
Replacing brake fluid
Bleeding the brake system
Checking the efficiency of the working brake system
Checking the steering wheel play
Checking the pressure regulator
Replacing the front brake pads
Replacing rear brake pads
Adjusting the clearances between the brake shoes and the brake drum
Adjusting clearances in rear wheel hub bearings

More articles from other manuals on VAZ cars:
➠ Vacuum brake booster — checking the functionality VAZ-2104 (1984-2012)
➠ Vacuum brake booster — checking the functionality VAZ-2106 (1976-2006)
➠ Vacuum brake booster — checking the functionality VAZ-2107 (1982-2012)
➠ Checking the performance of the vacuum booster VAZ-2109 (1984-1997)
➠ Checking the operation of the vacuum booster check valve VAZ-2115 (1997-2012)
Link in different formats to this page


Visitor comments

No comments yet


How much will 45 + 32 ?


VAZ-1111 (1988-1996) 
  • General information
  • Vehicle description
  • Vehicle device
  • Vehicle operation
  • Maintenance
  • Applications
  • Power unit
  • Engine repair
  • Cooling system
  • Lubrication system
  • Supply system
  • Transmission
  • Clutch
  • Transmission
  • Chassis
  • Front suspension and wheels
  • Rear suspension
  • Steering
  • Brake system
  • Body
  • Exterior
  • Interior
  • Electrical equipment
  • Engine electrics
  • Equipment and devices


VAZ-11113 (1996-2003) 
  • General information
  • Introduction to the guide
  • User manual
  • Maintenance
  • Power unit
  • Engine repair
  • Cooling and lubrication system
  • Fuel system
  • Exhaust system
  • Transmission
  • Car gearbox
  • Clutch and drive shafts
  • Chassis
  • Front suspension
  • Rear suspension
  • Steering
  • Brake system
  • Body
  • Exterior
  • Interior
  • Doors and locks
  • Electrical equipment
  • Equipment and devices
  • Lighting and signaling
  • Engine electrics
  • Ignition system


VAZbook.ru © 2017 · Mobile version · Contact with administration · Sitemap: EN BG BY UA RS HR RO PL SK HU · Site search · News and articles VAZ-1111 · VAZ-11113 · VAZ-2101 · VAZ-21011 · VAZ-2104 · VAZ-2105 · VAZ-21051 · VAZ-2106 · VAZ-21061 · VAZ-2107 · VAZ-21099 · VAZ-2109 · VAZ-2108 · VAZ-2110 · VAZ-2112 · VAZ-2114 · VAZ-2115 · VAZ-2121 · VAZ-21213 · VAZ-21214 ·
The site stores technical data using cookies to improve the service.