
English Русский
Български
Беларускі
Український
Српски
Hrvatski
Română
Polski
Slovenský
Magyar
| Articles | Contacts | Sitemap |   
Repair and maintenance Lada Repair and maintenance Mazda Repair and maintenance Mitsubishi Repair and maintenance Toyota Repair and maintenance Land Rover Repair and maintenance Hyundai Repair and maintenance Nissan
VAZbook.ru


Main     1111   2101   2105   2106   2107   2109   2110   2115   2121  
VAZ-1111 (1988-1996) VAZ-11113 (1996-2003)
  • Main
  • «Oka»
  • VAZ-11113
  • Chassis
  • Rear suspension
  • Replacing the suspension spring

Replacing the suspension spring (VAZ-11113)

            0

You will need:
  • suspension spring tensioner
  • body stand (preferably height adjustable)
  • key "19"

The rear suspension springs are replaced if they break or settle excessively, as evidenced by frequent "breakdowns" of the suspension to the limiting buffers.

Recommendation: If one of the suspension springs is subsiding or breaking, replace both springs if possible to avoid body distortion.

Recommendation: If one of the suspension springs is subsiding or breaking, replace both springs if…


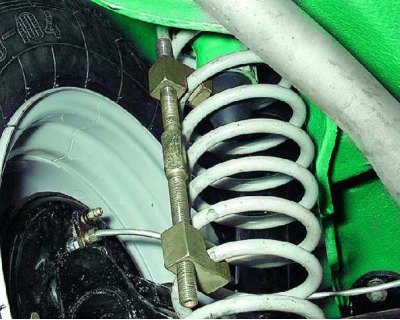
1. Install a tie on the spring to be replaced and compress the spring slightly. If there is no tie, the spring can be tied in a compressed state with strong wire.
1. Install a tie on the spring to be replaced and compress the spring slightly. If there is no tie,…


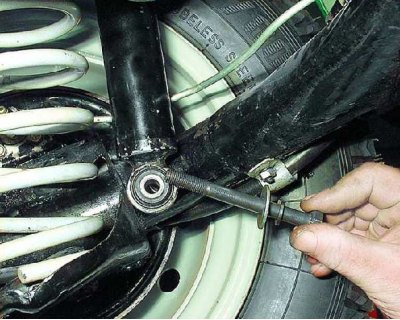
2. Disconnect the lower end of the shock absorber on the side of the spring being replaced (for more details, see subsection 5.2.1.), lift the rear of the car on the side of the spring being replaced until the wheel is off the ground and place the body on a support.


2. Disconnect the lower end of the shock absorber on the side of the spring being replaced (for…


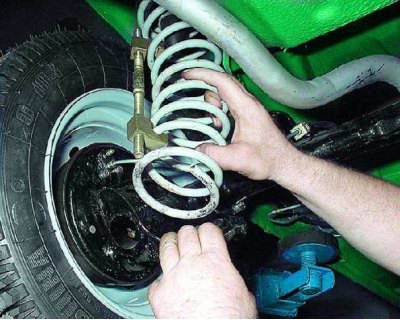
3. By pressing down the rear suspension arm within the elasticity of the silent block, remove the spring and dismantle the clamp from the spring.
3. By pressing down the rear suspension arm within the elasticity of the silent block, remove the…


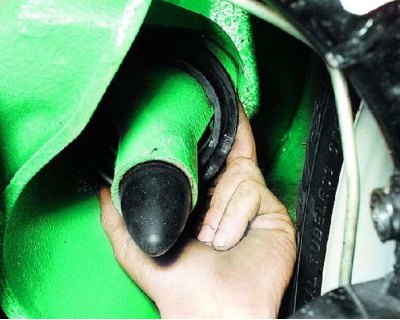
4. Remove the spring insulating pad in the wheel well if it remains on the body.
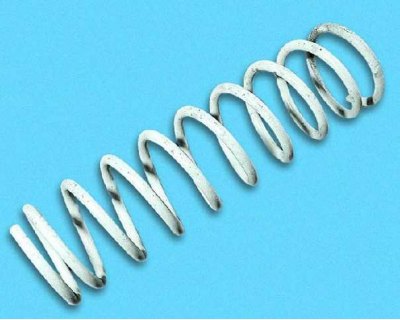
4. Remove the spring insulating pad in the wheel well if it remains on the body.


5. Inspect the removed spring. If the spring has deformed or cracked coils and traces of their contact are visible on the coils, replace the spring.
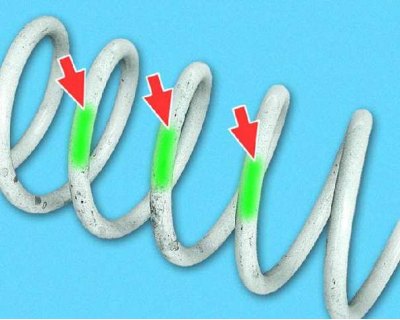

5. Inspect the removed spring. If the spring has deformed or cracked coils and traces of their…


6. Pay attention to the paint marking on the spring coils. It can be yellow - normal rigidity group A or green - increased rigidity group B. Both springs of the rear suspension of the car must be of the same rigidity group.
6. Pay attention to the paint marking on the spring coils. It can be yellow - normal rigidity group…


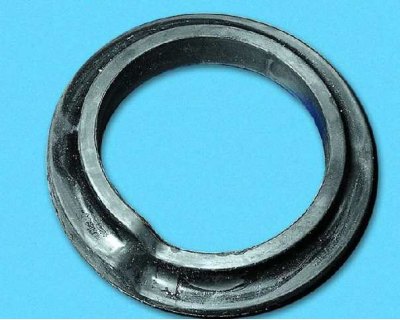
7. Inspect the insulating gasket. Replace any gasket that is severely deformed or hardened.
7. Inspect the insulating gasket. Replace any gasket that is severely deformed or hardened.


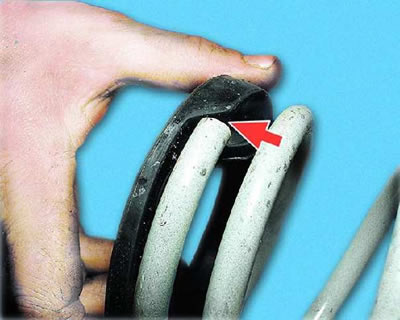
8. Before installing the spring, place an insulating gasket on it so that the end of the last turn is located in the recess of the gasket, and...
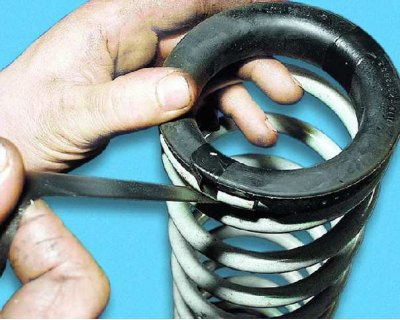
8. Before installing the spring, place an insulating gasket on it so that the end of the last turn…


9....secure the gasket to the spring with insulating tape or scotch tape. Then compress the spring with a tie.
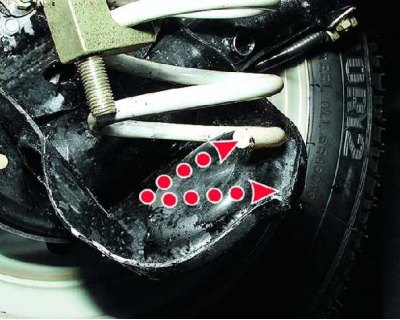
9....secure the gasket to the spring with insulating tape or scotch tape. Then compress the spring…


[The original source is published on the website: VazBook.ru]

10. Install the spring in the reverse order of removal. Place the straightened end of the lower coil in the recess of the suspension arm cup.


This article is available at russian, bulgarian, belarusian, ukrainian, serbian, croatian, romanian, polish, slovak, hungarian
The text was reviewed by the specialist: Grigory Vologodtsev

Share with friends:

Previous articles
VAZ-11113: Rear suspension
Next articles

Replacing the shock absorber
Replacing the rear wheel hub bearings
Adjusting clearances in the rear wheel hub bearings
Removal and installation the rear suspension beam

More articles from other manuals on VAZ cars:
➠ Replacing the shock absorber and rear suspension spring VAZ-2115 (1997-2012)
➠ Front Suspension Spring — Replacement VAZ-2104 (1984-2012)
➠ Front Suspension Spring — Replacement VAZ-2106 (1976-2006)
➠ Front Suspension Spring — Replacement VAZ-2107 (1982-2012)
➠ Replacing the ball joint of the suspension arm VAZ-21099 (1990-2004)
Link in different formats to this page


Visitor comments

No comments yet


How much will 38 + 44 ?


VAZ-1111 (1988-1996) 
  • General information
  • Vehicle description
  • Vehicle device
  • Vehicle operation
  • Maintenance
  • Applications
  • Power unit
  • Engine repair
  • Cooling system
  • Lubrication system
  • Supply system
  • Transmission
  • Clutch
  • Transmission
  • Chassis
  • Front suspension and wheels
  • Rear suspension
  • Steering
  • Brake system
  • Body
  • Exterior
  • Interior
  • Electrical equipment
  • Engine electrics
  • Equipment and devices


VAZ-11113 (1996-2003) 
  • General information
  • Introduction to the guide
  • User manual
  • Maintenance
  • Power unit
  • Engine repair
  • Cooling and lubrication system
  • Fuel system
  • Exhaust system
  • Transmission
  • Car gearbox
  • Clutch and drive shafts
  • Chassis
  • Front suspension
  • Rear suspension
  • Steering
  • Brake system
  • Body
  • Exterior
  • Interior
  • Doors and locks
  • Electrical equipment
  • Equipment and devices
  • Lighting and signaling
  • Engine electrics
  • Ignition system


VAZbook.ru © 2017 · Mobile version · Contact with administration · Sitemap: EN BG BY UA RS HR RO PL SK HU · Site search · News and articles VAZ-1111 · VAZ-11113 · VAZ-2101 · VAZ-21011 · VAZ-2104 · VAZ-2105 · VAZ-21051 · VAZ-2106 · VAZ-21061 · VAZ-2107 · VAZ-21099 · VAZ-2109 · VAZ-2108 · VAZ-2110 · VAZ-2112 · VAZ-2114 · VAZ-2115 · VAZ-2121 · VAZ-21213 · VAZ-21214 ·
The site stores technical data using cookies to improve the service.