

Controls of the car VAZ-1111: 1 - instrument panel; 2 - cigarette lighter; 3 - heater casing; 4 - gearshift lever; 5 - parking brake lever; 6 – the handle of a cover of a casing of a heater; 7 - ashtray; 8 - carburetor air damper control knob; 9 - accelerator pedal; 10 - switch (lock) ignition; 11 – brake pedal; 12 - wiper switch lever; 13 – clutch pedal; 14 – sound signal switch; 15 - alarm switch; 16 - control lamp for covering the air damper of the carburetor; 17 - fog light switch; 18 – the switch of heating of back glass; 19 – hood lock drive handle; 20 – the switch of a cleaner of back glass; 21 – the lever of the switch of light of headlights; 22 – the lever of the switch of indexes of turn; 23 – a combination of devices; 24 - outdoor lighting switch; 25 - heater fan switch; 26 - deflector; 27 – heater tap control lever; 28 - control lever for the air intake hatch cover

1. The shift pattern is printed on the shift knob. Engage reverse gear only when the vehicle is completely stopped.
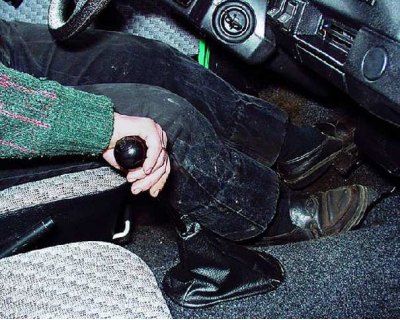
2. To engage reverse gear, press the lever all the way down and move it to the extreme right position. Then push the lever back.

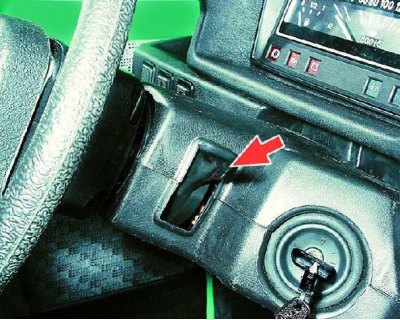
3. Switch (lock) ignition, combined with an anti-theft device, is located on the right side of the steering column. The key in the lock can take one of four positions.
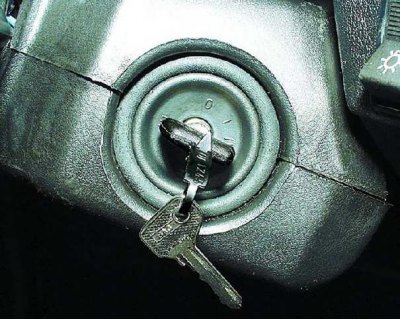
4. Position "III" – the ignition is switched off. The key is removed. With the key removed, the steering is locked. To turn off the anti-theft device, insert the key into the ignition switch and, turning the steering wheel slightly to the right and left, turn the key from the position "III" clockwise.
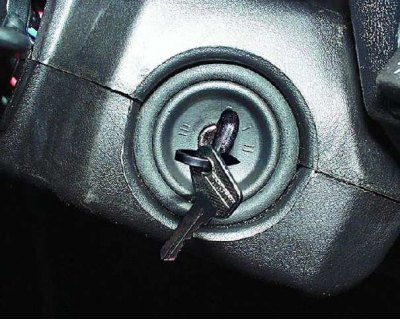
5. Position "0"- everything is off. The key cannot be removed, the steering is unlocked.
6. Position "I" – the ignition is switched on. The key cannot be removed, the steering is unlocked.
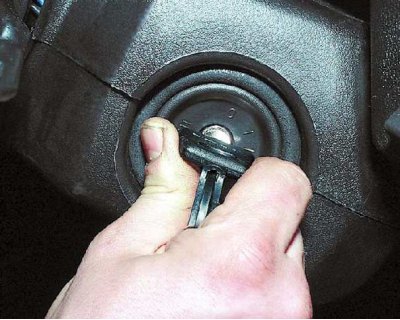
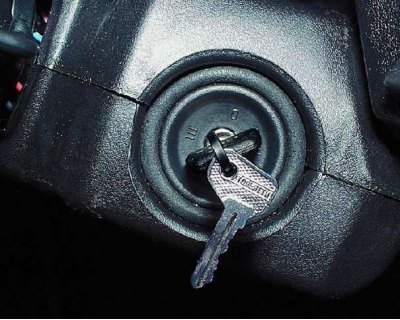
7. Position "II"– Ignition and starter included. The key cannot be removed, the steering is unlocked. It is achieved by turning the key clockwise against the force of the spring. In this position, the key is not fixed - for the starter to work, it must be held by hand.
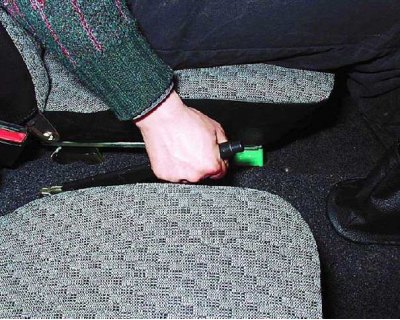
8. To brake the vehicle with the parking brake, lift the lever all the way up (with a properly adjusted brake no more than 7 clicks). At the same time, the control lamp on the instrument panel will light up with a flashing red light.
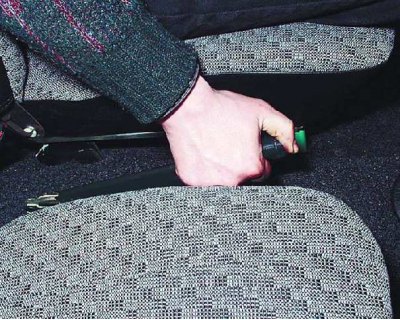
9. To brake the car, pull the lever up a little, press the button on the end of the lever handle and lower it all the way down. The control lamp should go out.
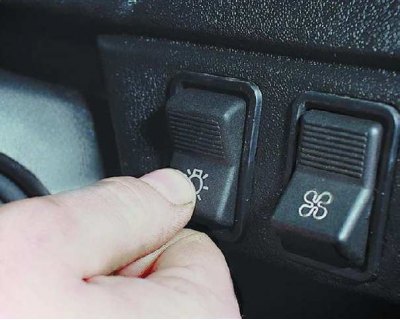
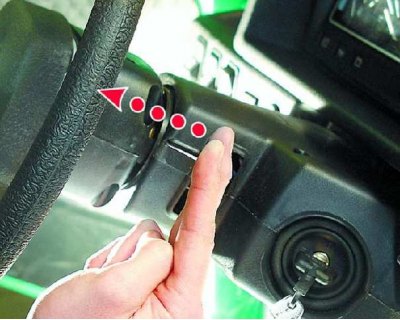
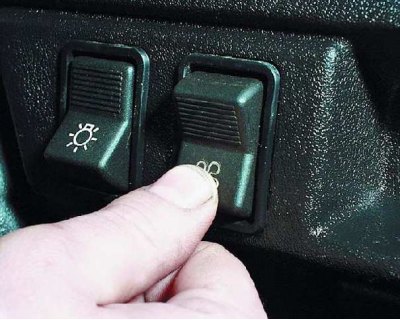
10. By pressing the button of the outdoor lighting switch to the first fixed position, the side lights and license plate lights are turned on. At the same time, the control lamp in the instrument cluster lights up green.
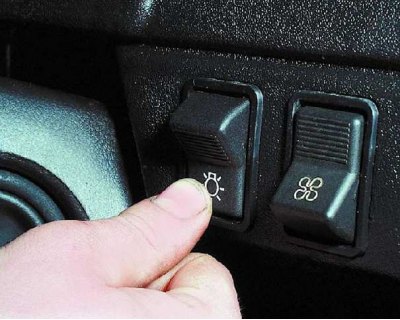
11. By pressing the button to the second fixed position, the dipped or main beam headlights are additionally switched on (depending on the position of the steering column switch).
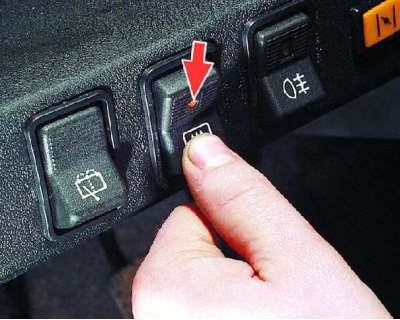
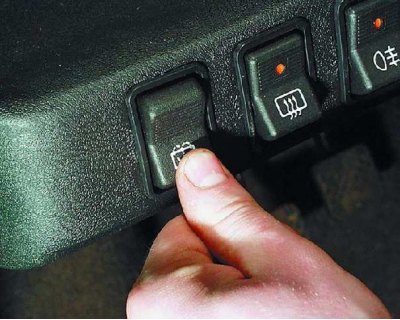
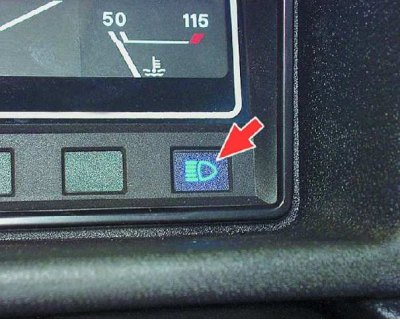
12. Heated rear door glass is activated by pressing the switch with the ignition on (to the left of the steering column on the instrument panel). At the same time, the control lamp in the upper shoulder of the key will light up (shown by arrow).

13. To turn on the rear fog light, press the switch (to the left of the steering column on the instrument panel) with the dipped or high beam headlights on. At the same time, the control lamp in the upper shoulder of the key will light up (shown by arrow).
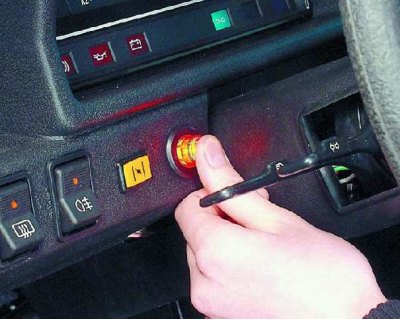
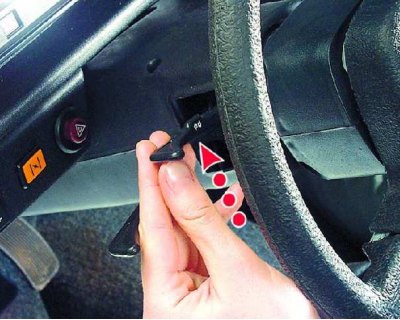
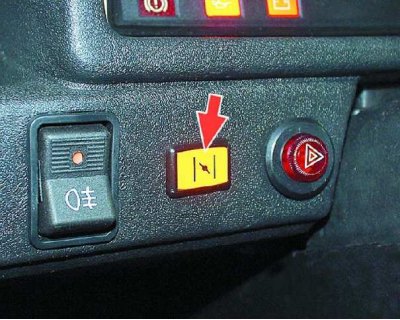
14. To turn on the alarm, press the switch button (to the left of the steering column on the instrument panel). At the same time, all direction indicators and the control lamp installed in the switch light up with a flashing light...
15.... as well as a warning lamp for turning on the alarm and direction indicators on the instrument cluster. Pressing the button again turns off the alarm.
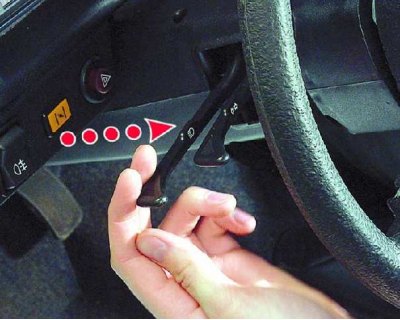
16. If you need to signal with high beam headlights, move the stalk lever towards you several times. In this position, the lever is not fixed.
17. To turn on the low beam headlights, move the stalk switch to the up position (the outdoor light switch must be in the second position).
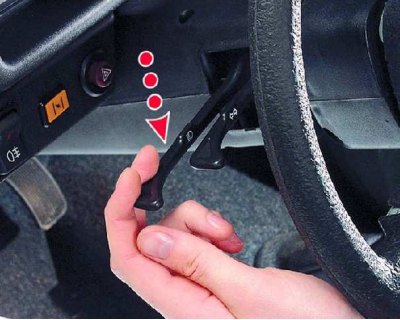
18. To turn on the high beam headlights, move the stalk switch to the lower position (outdoor lighting switch - in the second position).
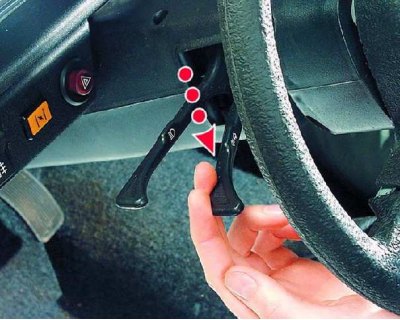
19. If you need to turn on the left turn signal, move the stalk lever down to the stop. When the steering wheel is returned to the straight ahead position, the lever will automatically return to the neutral position.
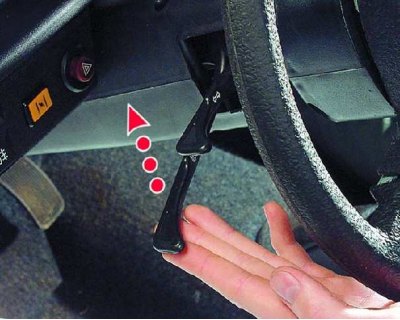
20. If you need to turn on the right turn signal, move the stalk lever up to the stop. When the steering wheel is returned to the straight ahead position, the lever will automatically return to the neutral position.
21. The windshield wiper and washer switch lever is located on the steering column on the right. in neutral (top) lever position is off.
22. Move the lever down a little and turn on the first fixed position - the windshield wiper will work intermittently.

23. Move the lever all the way down to the lower fixed position - the wiper will operate continuously.
24. If you need to turn on the windshield washer, push the lever towards you.
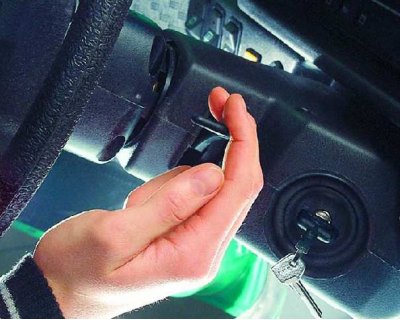
25. To turn on the rear door glass cleaner, press the switch (to the left of the steering column on the instrument panel) and move it to the first fixed position.

26. Further pressing the key (transferring it to the second non-fixed position) the rear window washer is switched on.

27. To turn on the horn, press the button located on the steering wheel.

28. When pulling the carburetor choke control knob towards you (closing the carburetor choke)...
29.... the control lamp on the instrument panel lights up (to the left of the steering column).
30. To turn on the heater fan motor at low speed, press the fan switch button, moving it to the first fixed position.
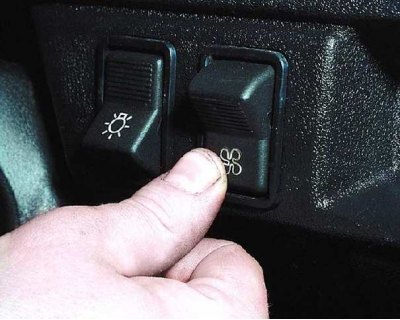
31. To turn on the heater fan motor at high speed, move the key to the second fixed position.
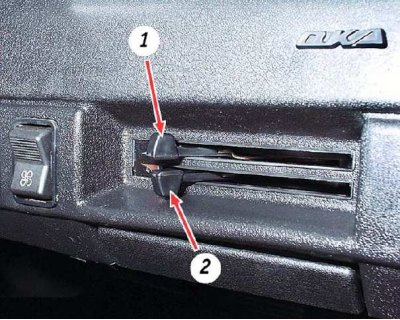
32. Lever 1 is used to control the air intake hatch cover (when it is moved to the right position, the manhole cover opens), lever 2 - to control the heater tap (when it is moved to the right position, the valve opens). The operation of the interior ventilation and heating system is discussed in more detail in subsection 1.12..
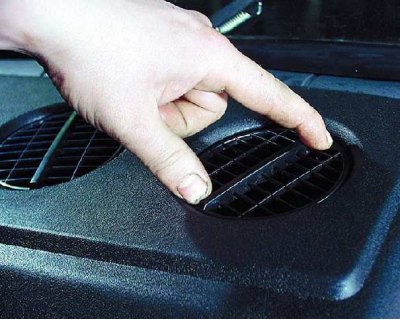
33. To adjust the direction of air flow, deflectors are located at the top center of the instrument panel. By turning them, you can change the direction of air flow (on the windshield, in the passenger compartment, on the glass of the side doors).
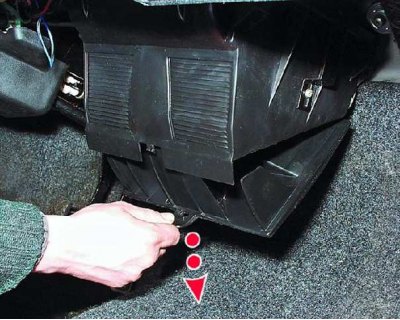
34. By opening the heater cover, you will provide air to the driver's and passenger's feet and to the windshield. To direct the airflow to the windshield only, the cowl cover must be closed.
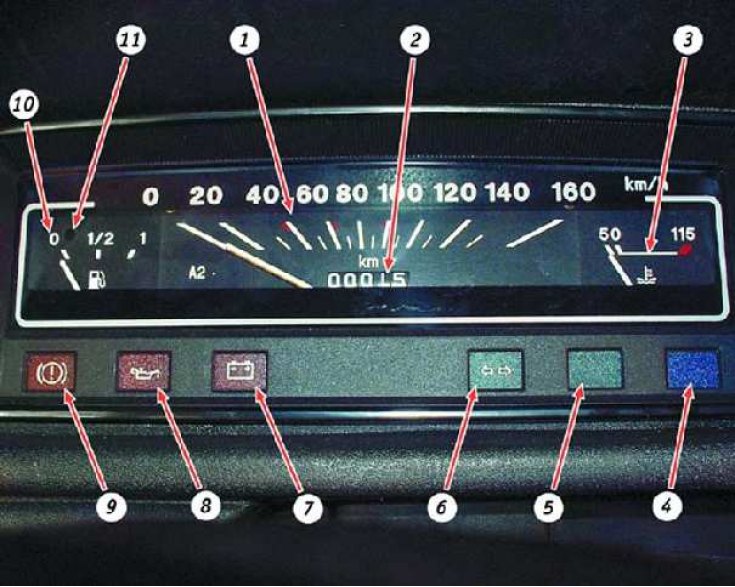
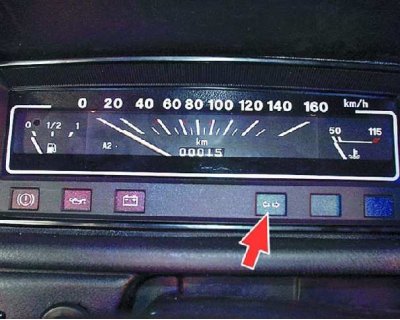
Instrument cluster: 1 - speedometer; 2 – distance traveled counter; 3 - coolant temperature gauge; 4 – a control lamp of inclusion of a high beam of headlights; 5 – a control lamp of inclusion of external illumination; 6 – a control lamp of inclusion of indexes of turn and the alarm system; 7 – a control lamp of a charge of the accumulator battery; 8 - control lamp of insufficient oil pressure; 9 – a control lamp of inclusion of a lay brake and insufficient level of a brake liquid; 10 - fuel gauge; 11 – a control lamp of a reserve of fuel
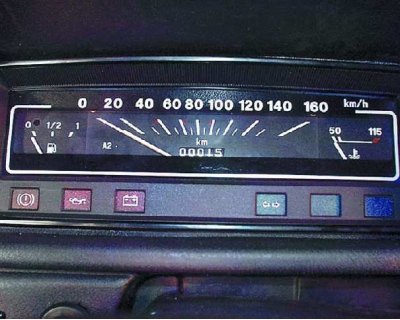
35. The speedometer shows the vehicle's speed in kilometers per hour. The car's mileage counter is built into the speedometer.
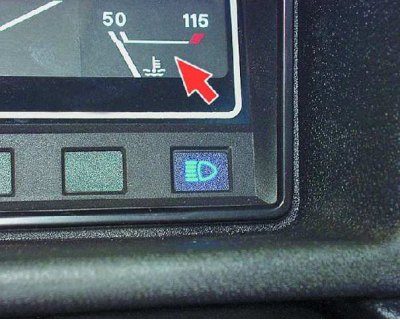
36. On the scale of the coolant temperature indicator in the engine cooling system, divisions corresponding to temperatures of 50 and 115°C are applied. The red zone warns of engine overheating. If the arrow goes into the red zone, you should stop, let the engine cool down and eliminate the cause of overheating.
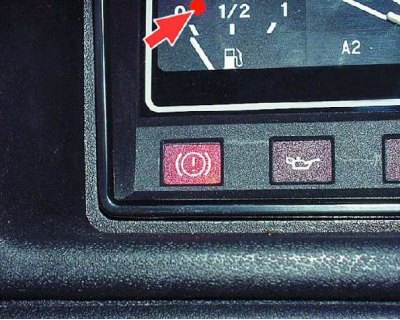
37. The fuel gauge can be used to determine the approximate amount of fuel in the tank. Divisions are marked on the indicator scale: 0 - empty tank; 1/2 - half a tank; 1 - full tank. Next to the gauge scale is a fuel reserve control lamp (shown by arrow). It lights up red if there are 4–6 liters of gasoline left in the tank.
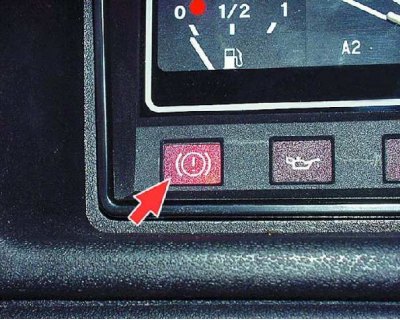
38. The control lamp of the parking brake and insufficient level of brake fluid lights up with a red flashing light when the parking brake lever is raised and lights up continuously when the level of brake fluid in the reservoir drops.
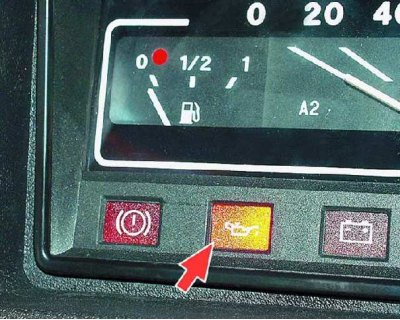
39. The low oil pressure indicator lamp lights up red when the pressure in the lubrication system drops below the allowable level.
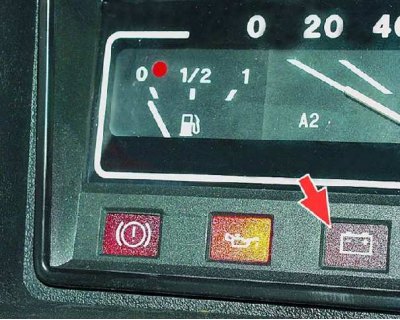
40. The battery charge control lamp lights up red when there is no charging current.
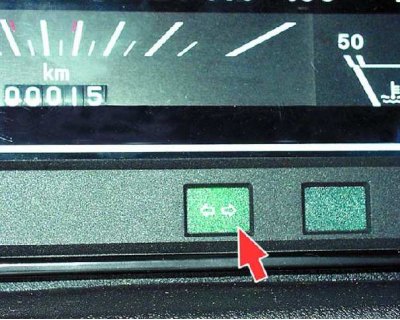
41. The control lamp of inclusion of indexes of turn and the alarm system lights up with the green blinking light at inclusion of these signals.
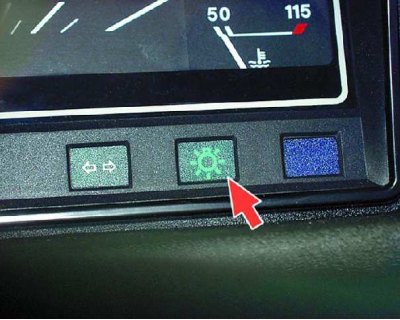
42. The control lamp of inclusion of external illumination lights up green light at its inclusion.
43. When you turn on the high beam headlights, the control lamp lights up blue (right in instrument cluster).

44. To connect a carrying lamp, compressor, vacuum cleaner and other electrical appliances designed for an operating voltage of 12–14 V to the vehicle’s on-board network, a socket is installed on the front end shield bracket.
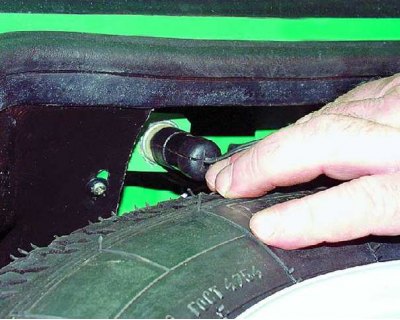
45. To connect an electrical appliance, insert the plug of its wire into the socket.