




Contents: Procedure ↓ Installation ↓
The need to remove the carburetor cover arises when adjusting the fuel level in the float chamber, checking and replacing the needle valve, blowing out and cleaning the jet channels and fuel channels of the carburetor body.
To complete the job, you will need a carburetor cleaner in an aerosol can.
Procedure
1. Prepare the vehicle for operations (see "Preparing a car for maintenance and repair").
2. Remove the air filter housing (see "Air filter housing - removal and installation").
3. Using a rag and brush, clean off any dirt and wash the outer surface of the carburetor with white spirit or engine cleaner.
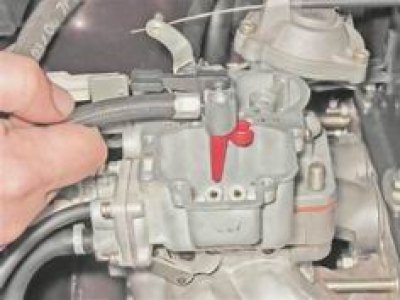
4. Disconnect the air damper drive cable from the carburetor cover and remove the fuel hose from the fitting (see "Carburetor - removal and installation").
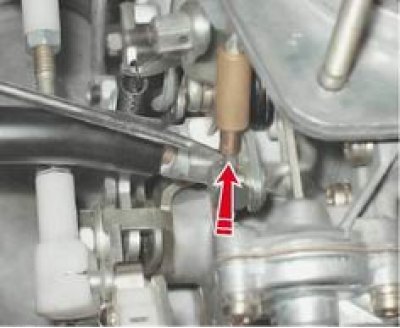
5. Using a screwdriver, disconnect the telescopic rod from the three-arm lever.
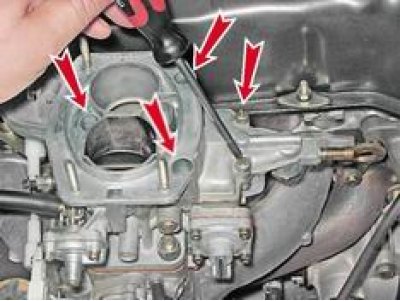
6. Using a Phillips screwdriver, unscrew the five screws securing the cover to the carburetor body.
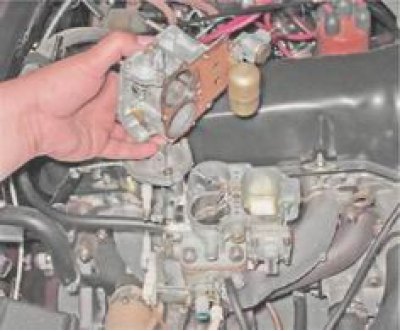
7. Remove the carburetor cover.
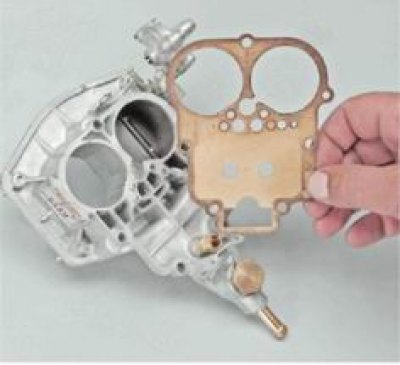
There is a sealing gasket installed between the body and the carburetor cover. If there are any breaks or tears, replace the gasket.
8. To replace the gasket, it is necessary to remove the needle valve (see above, "Needle valve and float - replacement").
Note: The starting device can be removed without removing the cover or carburetor from the vehicle. To access the starting device, simply remove the air filter housing (see "Air filter housing - removal and installation").
9. Using a Phillips screwdriver, unscrew the two screws securing the starting device.
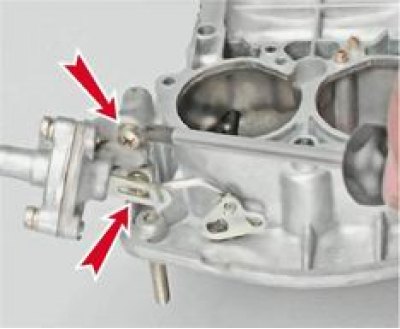
10. Remove the starting device by removing the rod from its rod. Using tweezers, carefully remove the sealing ring from the groove of the vacuum supply channel.
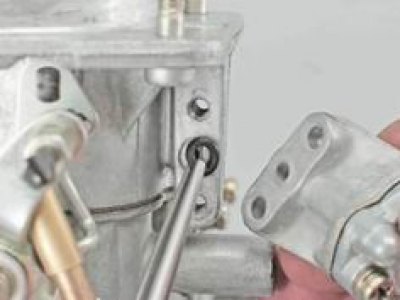
11. Check the serviceability of the diaphragm of the starting device. Having sunk the rod, close the vacuum supply hole with your finger and release the rod. If the rod does not return to its original position, the diaphragm is serviceable. Otherwise, the diaphragm must be replaced.
12. To replace the diaphragm, use a Phillips screwdriver to unscrew the three screws that secure the starter cover to its body.
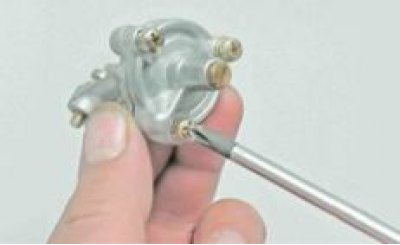
13. After removing the cover, take out the rod with the diaphragm.
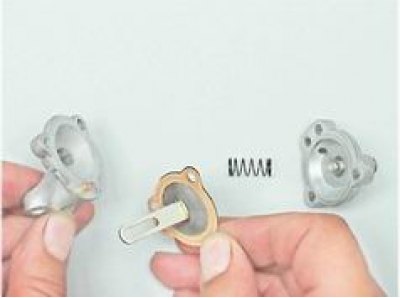
14. Check the condition of the diaphragm, no breaks or cracks are allowed. Replace the diaphragm if necessary.
Installation
1. Before assembling and installing the cover, wash all its parts with carburetor cleaner.
2. Using a rubber bulb, remove fuel from the carburetor body float chamber. Wash the inner surface of the carburetor body and the chamber diffusers with carburetor cleaner. Having unscrewed the fuel and air jets and the accelerator pump (see below, "Carburetor body - disassembly"), we blow out the body channels with compressed air.
(View the original on the internet resource: VAZBOOK)
3. Assembly of the cover and subsequent installation is performed in the reverse order.