
Disassembly
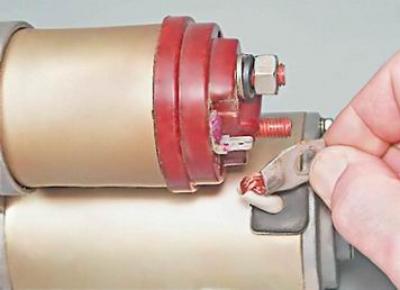
1. socket wrench by 10 mm unscrew the nut that secures the wire end to the terminal (contact bolt) traction relay.
2. Remove the wire tip from the contact bolt of the traction relay.
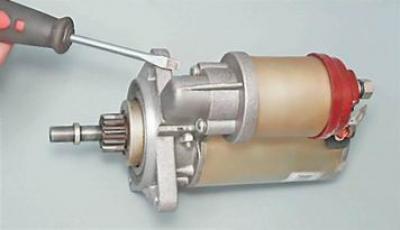
3. Using a slotted screwdriver, unscrew the two screws securing the traction relay.
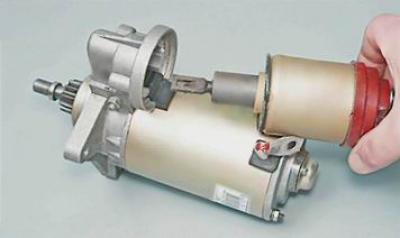
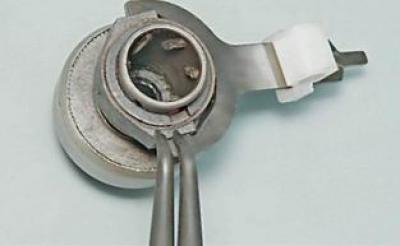
4. Remove the traction relay from the starter (in this case, it is necessary to disconnect the earring of the relay core from the upper end of the drive lever).
Recommendation: Check the ease of movement of the core of the traction relay. Connect an ohmmeter to the terminals of the traction relay and, sinking the armature to the stop, make sure that the contact bolts close (electrical resistance close to zero). A defective traction relay must be replaced.
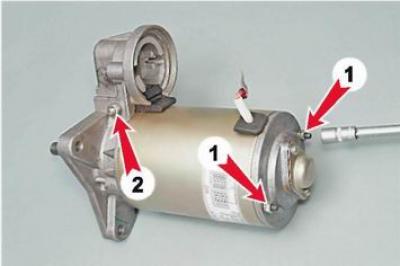
5. socket wrench by 10 mm unscrew the two nuts of the tie rods (1) and a nut of an axis of the lever of a drive (2).
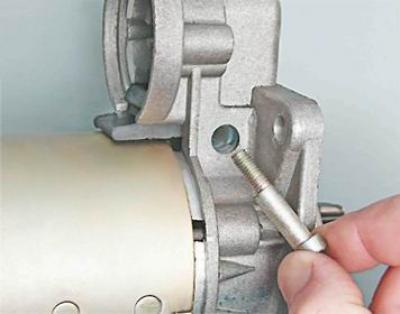
6. Using a slotted screwdriver, turn out the axis of the lever.
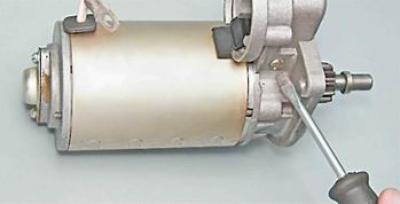
7. We take out an axis from a cover.
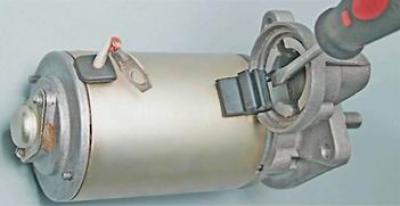
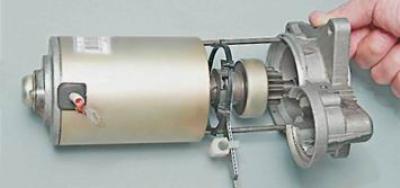
8. With a screwdriver, resting against the top of the starter front cover, pry off the drive lever support.
9. Having carefully disconnected the stator from the front cover, remove the stator from the studs together with the drive shaft, drive lever, lever support.
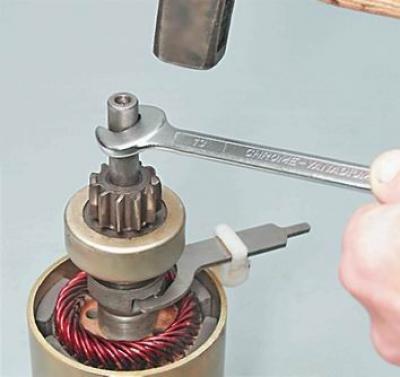
10. Hammer through open end wrench by 13 mm knock off the starter drive travel limiter ring (at the same time, a wooden block or a piece of dense rubber should be placed under the gear of the gearbox).
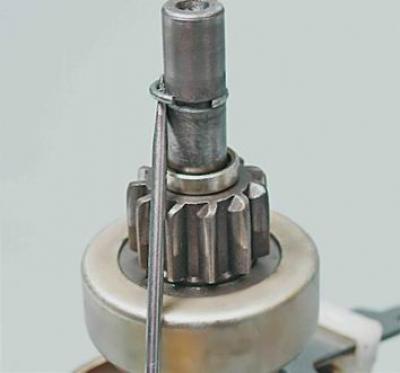
11. With a slotted screwdriver, remove the stop ring of the drive travel stop from the groove of the shaft and remove the stop ring and travel stop ring from the shaft.
12. Remove the drive assembly with the lever and the clutch from the shaft.
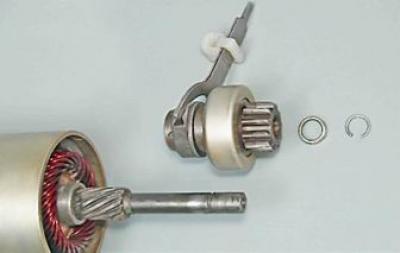
Recommendation: Check the condition of the drive. The drive must move freely without jamming along the splines of the shaft. The drive gear must turn freely in only one direction, chipping of the teeth and strong nicks on the lead-in part of the teeth are unacceptable. Minor defects can be eliminated with a diamond file or an abrasive stone. It is necessary to replace a faulty and badly worn drive (or starter assembly).
13. With a puller, remove the retaining ring of the drive lever coupling.
14. Remove from the drive (1) retaining ring (6), washer (5), clutch (3) complete with drive lever (4) and washers (2).

Note: When replacing only the drive, further work on disassembling the starter can be omitted.
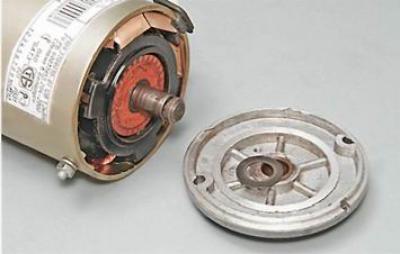
15. Using a Phillips screwdriver, unscrew the two screws securing the cap.
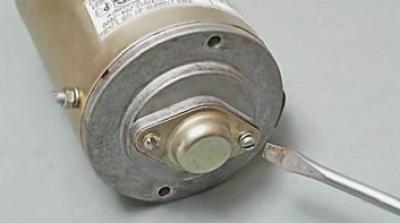
16. Remove the cap and gasket.
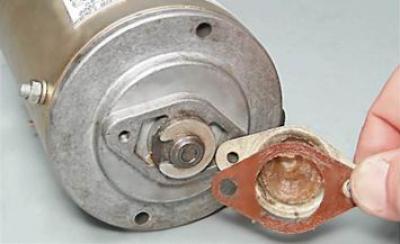
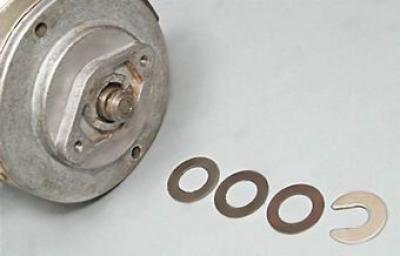
17. Using a slotted screwdriver, pry off and remove the retaining ring.
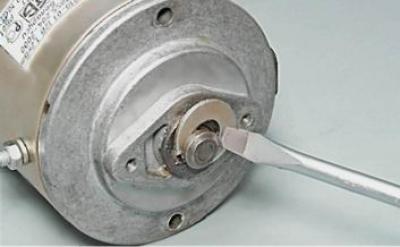
18. Remove the shims from the shaft.
19. Remove the back cover and spacer.
20. Remove the outer part of the brush guide.
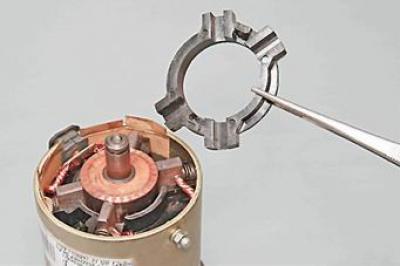
21. Remove the front armature shaft support.
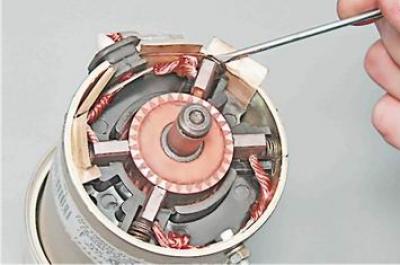
22. Pry off with a thin slotted screwdriver...
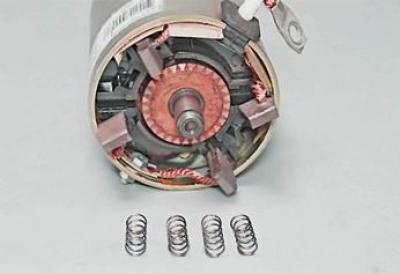
... and take out the four brush springs.
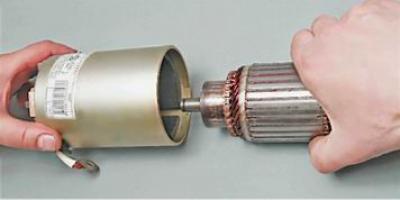
23. Overcoming the force of the magnets, we remove the anchor from the stator.
24. Check the collector and armature windings (see more details. "Starter 5712.3708 and its modifications").
Assembly
We assemble the starter in the reverse order of disassembly. Before installing the drive, dip it in engine oil and let the oil drain. The bushings in which the armature and drive shafts rotate, as well as the screw splines of the drive, are lubricated with engine oil.
Before installing the starter, make sure it is working (see beginning of section).