
English Русский
Български
Беларускі
Український
Српски
Hrvatski
Română
Polski
Slovenský
Magyar
| Articles | Contacts | Sitemap |   
Repair and maintenance Lada Repair and maintenance Mazda Repair and maintenance Mitsubishi Repair and maintenance Toyota Repair and maintenance Land Rover Repair and maintenance Hyundai Repair and maintenance Nissan
VAZbook.ru


Main     1111   2101   2105   2106   2107   2109   2110   2115   2121  
VAZ-2114 (2004-2013) VAZ-2115 (1997-2012)
  • Main
  • «Samara-2»
  • VAZ-2115
  • Chassis
  • Front suspension
  • Repair of telescopic stand

Repair of telescopic stand (VAZ-2115)

            0

Helpful Hint: Repairing a telescopic stand usually does not produce the desired result, so it is recommended to replace it if necessary.


1. Remove the telescopic strut from the vehicle (see "Removal and installation the front pillar").

2. Clamp the telescopic strut in a vice, compress the spring with special clamps and unscrew the shock absorber rod nut using a device, holding the shock absorber rod from turning.
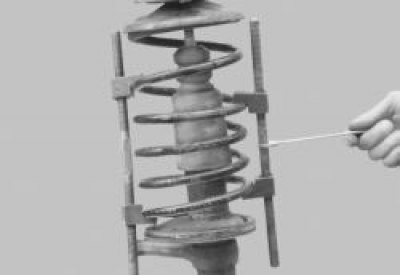
3. Remove the upper strut support.


3. Remove the upper strut support.

4. Remove the top cup and then the spring.
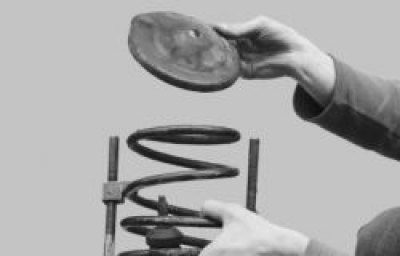

4. Remove the top cup and then the spring.

5. Remove the protective cover with the compression stroke buffer from the telescopic strut.
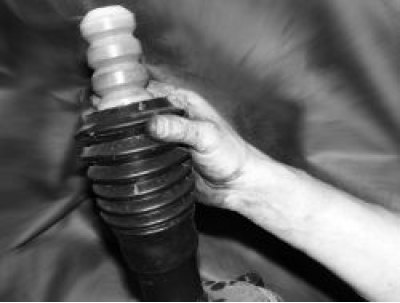

5. Remove the protective cover with the compression stroke buffer from the telescopic strut.


If cracks, deformations or damage are found on the strut body, lower spring cup, pivot arm and…


If cracks, deformations or damage are found on the strut body, lower spring cup, pivot arm and bracket, replace the strut. Welding work on the strut is prohibited, as this may affect its functionality.

6. Install the telescopic strut vertically and lower and raise the shock absorber rod several times until it stops. When moving the rod, make sure that it moves without any dips, jams or knocks. Otherwise, replace the strut. In addition, replace the telescopic strut if you find traces of fluid leakage (slight fogging in the upper part of the rack body is allowed) and if the threads at the top of the rod are damaged.
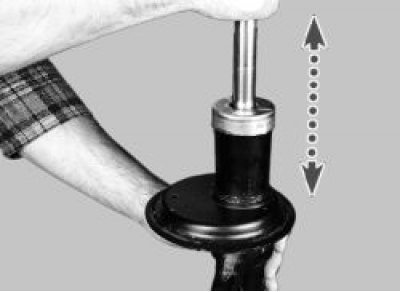
7. The telescopic stand can be repaired, but this requires special tools and skills. Therefore, it…


7. The telescopic stand can be repaired, but this requires special tools and skills. Therefore, it is recommended to disassemble it in a specialized workshop.


8. The car may be equipped with shock absorbers, all elements of which are assembled in a non-separable housing (cartridge). To replace the cartridge, knock down the compression buffer support, unscrew the strut housing nut with a special key, remove the old cartridge and install a new one. When replacing a conventional hydraulic shock absorber with a cartridge, remove the rod with the working cylinder from the housing and drain the liquid. Rinse the cavity of the housing and install the cartridge in it in accordance with the manufacturer's instructions.
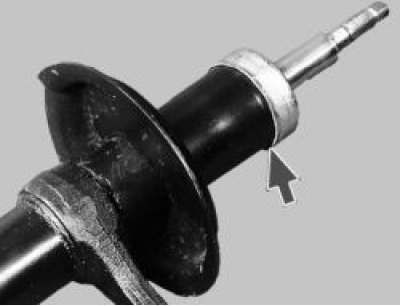
9. Replace the damaged compression buffer and the protective cover that is cracked, torn or has…


9. Replace the damaged compression buffer and the protective cover that is cracked, torn or has lost its elasticity. Also replace the cover if the metal reinforcement has separated from the rubber.

10. Replace the bearing if it has axial movement in the support housing, there are traces of grease leakage from under the protective rings, the bearing is seized when turning and there is corrosion. If cracks are found on the upper support housing, replace the housing or the support assembly. Also replace the studs with damaged threads (see "Replacing the upper support of the telescopic stand").

11. Replace the spring if cracks are found or the coils are deformed.

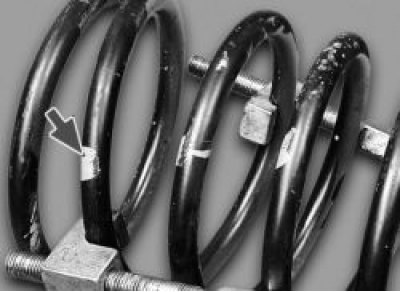
To check the spring settlement, compress it three times until the coils touch. Then apply a load of 3187 N (325 kgf) to the spring. The length of the spring under the specified load must be at least 201 mm (182 mm for export vehicles). Compress the spring along its axis; the support surfaces must correspond to the surfaces of the support cups on the telescopic strut.

If the length of the spring with yellow (white - for cars supplied for export) marking (class A) is less than 207 mm (188 mm - for cars supplied for export), replace it with a spring with green marking (blue - for cars supplied for export) (class B). It is recommended to replace both front suspension springs, the springs must be of the same group.

Replace the damaged upper spring cup.
Replace the strut mounting bolts with damaged threads.


Replace the strut mounting bolts with damaged threads.

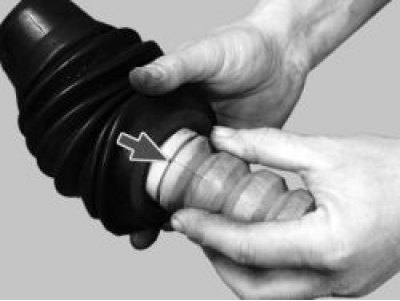
12. Assemble the telescopic strut in the reverse order of disassembly. Put the protective cover on the annular groove of the compression stroke buffer.
13. Install the spring so that its end rests against the protrusion of the lower cup.
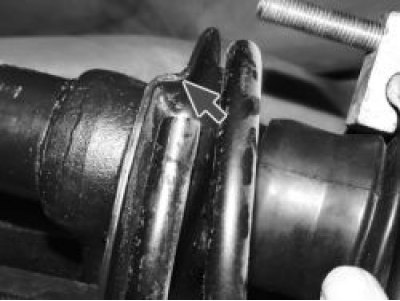

13. Install the spring so that its end rests against the protrusion of the lower cup.

14. Install the upper cup onto the spring in the same way.


14. Install the upper cup onto the spring in the same way.

15. Install the front strut onto the vehicle in the reverse order of removal.

16. Finally tighten the shock absorber rod nut with the vehicle on the ground and adjust steering wheel alignment angles.


This article is available at russian, bulgarian, belarusian, ukrainian, serbian, croatian, romanian, polish, slovak, hungarian
The text was reviewed by the specialist: Grigory Vologodtsev

Share with friends:

Previous articles
VAZ-2115: Front suspension
Next articles

Removal and installation a telescopic stand
Checking the technical condition of suspension parts on a car
Possible faults of the front suspension
Features of the front suspension design
Replacing the upper support of the telescopic stand
Replacing the ball joint
Replacing the front suspension arm
Replacing the stretch
Replacement of anti-roll bar components

More articles from other manuals on VAZ cars:
➠ Repair of telescopic stand VAZ-11113 (1996-2003)
➠ Disassembly and assembly of a telescopic stand VAZ-2108 (1984-2003)
➠ Checking the technical condition and repair of pistons and… VAZ-2101 (1970-1983)
➠ Maintenance and repair of the car VAZ-2105 (1979-2010)
➠ Preparing the car for maintenance and repair VAZ-2106 (1976-2006)
Link in different formats to this page


Visitor comments

No comments yet


How much will 29 + 48 ?


VAZ-2114 (2004-2013) 
  • General information
  • Operation and maintenance
  • Power unit
  • Engine repair
  • Cooling system
  • Supply system
  • Control system
  • Exhaust system
  • Transmission
  • Clutch
  • Car gearbox
  • Front wheel drives
  • Chassis
  • Wheels and tires
  • Front suspension
  • Rear suspension
  • Steering
  • Brake system
  • Body
  • Exterior
  • Interior
  • Doors and glass
  • Tailgate
  • Ventilation and heating
  • Electrical equipment
  • Equipment and devices
  • Headlights and lighting
  • Engine electrics
  • Electrical circuits


VAZ-2115 (1997-2012) 
  • General information
  • Vehicle device
  • Operation manual
  • Vehicle malfunctions
  • Car care
  • Power unit
  • Engine repair
  • Cooling system
  • Supply system
  • Control system
  • Exhaust system
  • Transmission
  • Clutch
  • Car gearbox
  • Front wheel drives
  • Chassis
  • Front suspension
  • Rear suspension
  • Steering
  • Brake system
  • Body
  • Exterior
  • Interior
  • Doors, covers and windows
  • Electrical equipment
  • Equipment and devices
  • Headlights and lighting
  • Engine electrics
  • Anti-theft system


VAZbook.ru © 2017 · Mobile version · Contact with administration · Sitemap: EN BG BY UA RS HR RO PL SK HU · Site search · News and articles VAZ-1111 · VAZ-11113 · VAZ-2101 · VAZ-21011 · VAZ-2104 · VAZ-2105 · VAZ-21051 · VAZ-2106 · VAZ-21061 · VAZ-2107 · VAZ-21099 · VAZ-2109 · VAZ-2108 · VAZ-2110 · VAZ-2112 · VAZ-2114 · VAZ-2115 · VAZ-2121 · VAZ-21213 · VAZ-21214 ·
The site stores technical data using cookies to improve the service.