
English Русский
Български
Беларускі
Український
Српски
Hrvatski
Română
Polski
Slovenský
Magyar
| Articles | Contacts | Sitemap |   
Repair and maintenance Lada Repair and maintenance Mazda Repair and maintenance Mitsubishi Repair and maintenance Toyota Repair and maintenance Land Rover Repair and maintenance Hyundai Repair and maintenance Nissan
VAZbook.ru


Main     1111   2101   2105   2106   2107   2109   2110   2115   2121  
VAZ-2114 (2004-2013) VAZ-2115 (1997-2012)
  • Main
  • «Samara-2»
  • VAZ-2115
  • Power unit
  • Engine repair
  • Replacing valve stem seals

Replacing valve stem seals (VAZ-2115)

            0

You can replace the oil seals without removing the head from the cylinder block.

You will need: a tin rod with a diameter of about 8 mm (for example, solder), tweezers, screwdriver, mandrel for pressing on caps, removers for oil scraper caps and valve springs.

1. Disconnect the wire from the "-" terminal of the battery.

2. Remove the cylinder head cover (see "Replacing the cylinder head cover gasket".

3. Remove the toothed pulley from the camshaft (see "Replacing the cylinder head gasket".
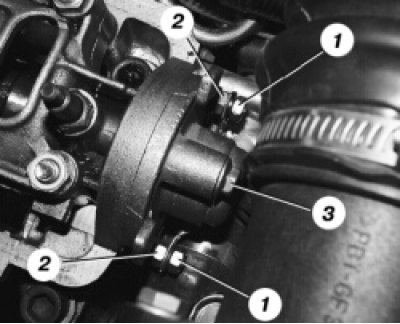
4. Unscrew the two nuts 1 securing the ground wires and remove the wire tips from the studs. Then…


4. Unscrew the two nuts 1 securing the ground wires and remove the wire tips from the studs. Then unscrew the two nuts 2 and bolt 3 securing the rear cover of the cylinder head. Note: there is a sealing ring under the bolt head. Remove the rear cover from the cylinder head.
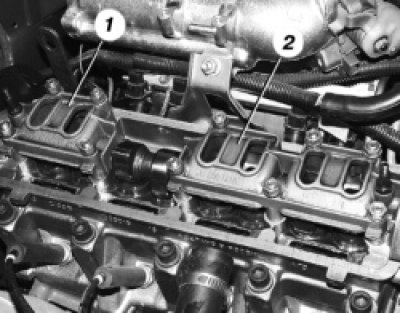
5. Unscrew the four nuts securing the front 1 and six nuts securing the rear 2 camshaft bearing…


5. Unscrew the four nuts securing the front 1 and six nuts securing the rear 2 camshaft bearing housings evenly and remove the washers. Then remove both housings.


6. If the key does not fit tightly in the camshaft groove, remove it so as not to lose it.

6. If the key does not fit tightly in the camshaft groove, remove it so as not to lose it.

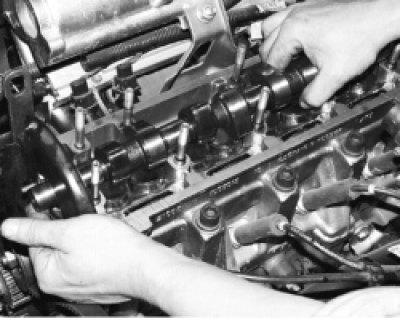
7. Remove the camshaft from the cylinder head.
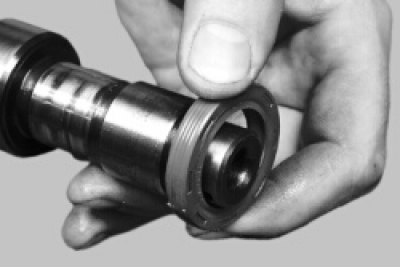

7. Remove the camshaft from the cylinder head.

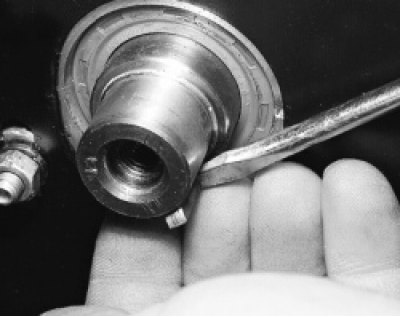
8. Remove the oil seal from the camshaft.
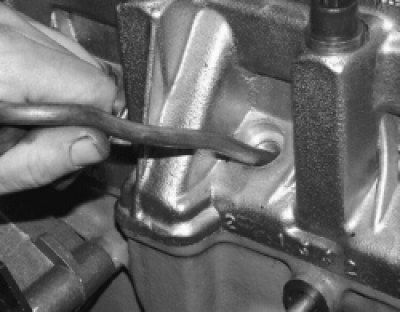

8. Remove the oil seal from the camshaft.

9. Turn the crankshaft so that the piston corresponding to the caps being replaced is at top dead…


9. Turn the crankshaft so that the piston corresponding to the caps being replaced is at top dead center. With the spark plug removed, insert a tin rod through the spark plug hole between the piston and the valve (to prevent the valve from falling down).
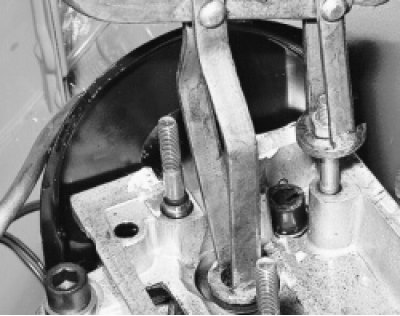

10. Install the valve spring compressor as shown in the photo using a nut without a serrated…


10. Install the valve spring compressor as shown in the photo using a nut without a serrated flange. Compress the valve springs with the compressor.
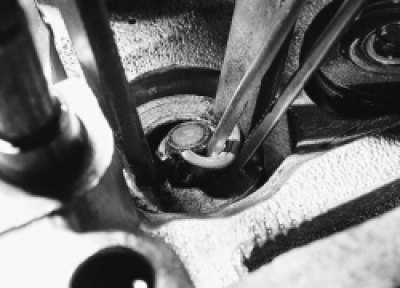
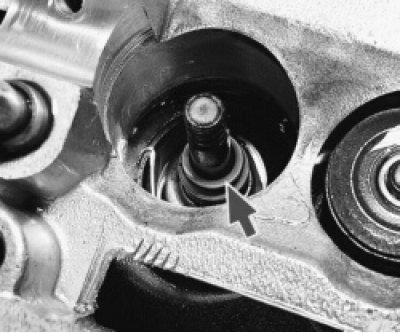
11. Remove the two crackers with tweezers. Then remove the device.

11. Remove the two crackers with tweezers. Then remove the device.

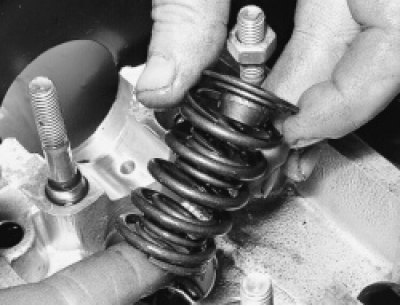
12. Remove the upper spring plate, inner and outer valve springs.

12. Remove the upper spring plate, inner and outer valve springs.

13. Press the valve stem seal off the valve guide.
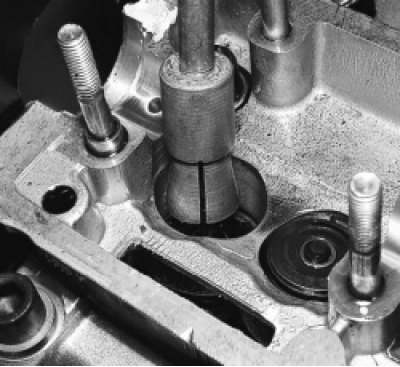

13. Press the valve stem seal off the valve guide.

14. To do this, install the collet of the valve stem seal remover onto the cap…

14. To do this, install the collet of the valve stem seal remover onto the cap…

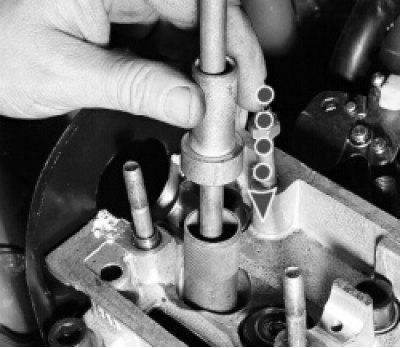
15. …and hit the device's sleeve with the striker sharply. Then hit the device's handle striker…


15. …and hit the device's sleeve with the striker sharply. Then hit the device's handle striker sharply…
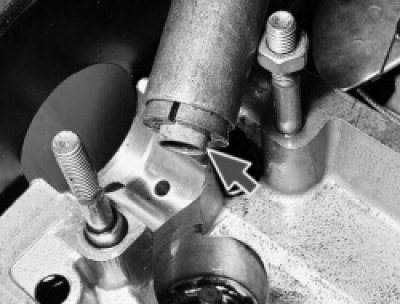
16. … thereby pressing the cap off the bushing. Remove the cap from the collet of the device. If…


16. … thereby pressing the cap off the bushing. Remove the cap from the collet of the device. If there is no device for removing caps, remove them with pliers. In this case, the force must be applied strictly upwards and the caps must not be turned so as not to damage the valve guide bushings.
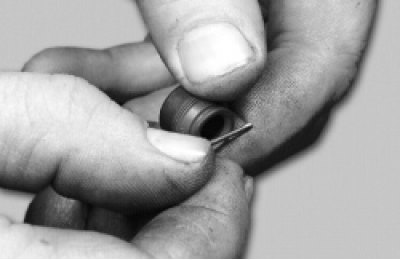
17. Before installing new valve stem seals, it is recommended to remove the springs from them,…


17. Before installing new valve stem seals, it is recommended to remove the springs from them, otherwise the seals can be damaged when they pass through the grooves for the crackers on the valves.
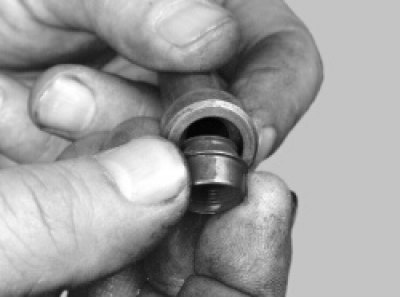
18. Lubricate the valve stem seal with engine oil and insert it into the mandrel.
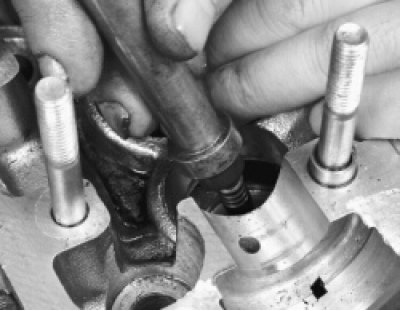

18. Lubricate the valve stem seal with engine oil and insert it into the mandrel.

19. Carefully press the cap into the lower plate until it stops.
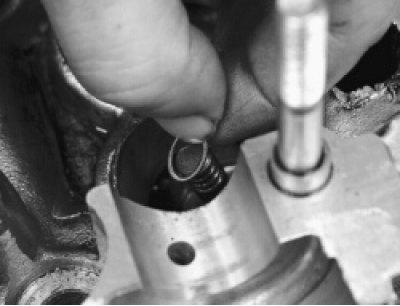

19. Carefully press the cap into the lower plate until it stops.

20. Install the spring on the cap if it was removed. Replace the remaining oil seals in the same…


20. Install the spring on the cap if it was removed. Replace the remaining oil seals in the same manner.
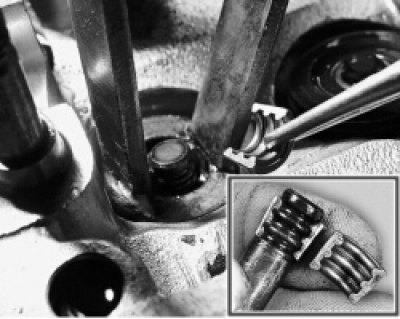
21. Install the springs and valve plate in the reverse order of removal. Install the crackers using…


21. Install the springs and valve plate in the reverse order of removal. Install the crackers using the device so that they fit into the grooves of the valve stem. Remove the tin rod from the spark plug hole. After installing the crackers, hit the ends of the valves with a hammer through the metal rod so that the crackers fit into place.
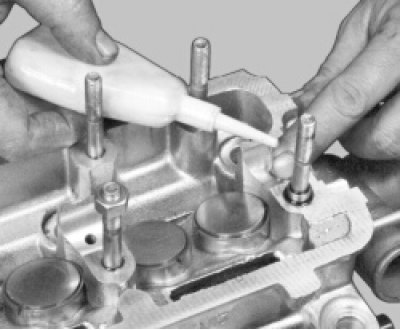
22. Lubricate the camshaft bearings in the cylinder head and the tappet adjusting washers with…


22. Lubricate the camshaft bearings in the cylinder head and the tappet adjusting washers with engine oil.
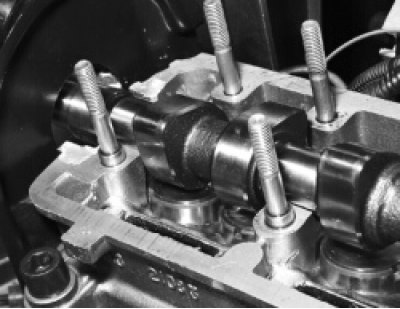
23. Install the camshaft in the cylinder head supports so that the cams of the 1st cylinder are…


23. Install the camshaft in the cylinder head supports so that the cams of the 1st cylinder are directed away from the valve lifters.
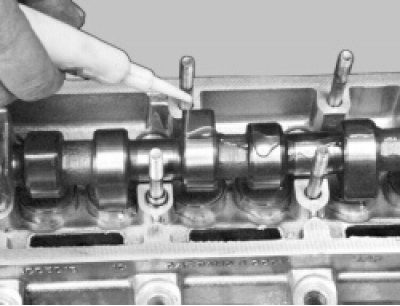
24. Lubricate the camshaft journals and cams with engine oil.
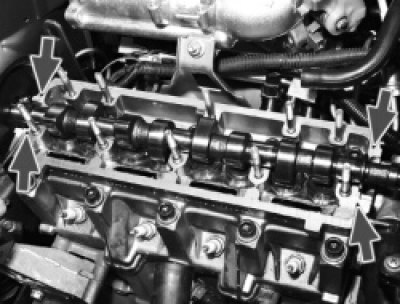

24. Lubricate the camshaft journals and cams with engine oil.

25. Apply sealant to the cylinder head in the area of the outer camshaft supports.
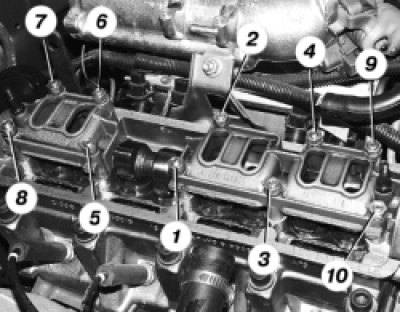

25. Apply sealant to the cylinder head in the area of the outer camshaft supports.

26. Install the camshaft bearing housings, place the washers on the studs and tighten the nuts in…


26. Install the camshaft bearing housings, place the washers on the studs and tighten the nuts in two stages in the order shown:

- tighten the nuts until the bearing housings touch the cylinder head surface, making sure that..
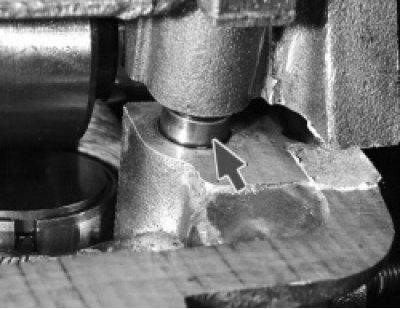
27. …the guide bushings entered the holes of the bearing housings;


27. …the guide bushings entered the holes of the bearing housings;

- finally tighten the nuts in the specified sequence.

28. Install the camshaft oil seal (see "Replacing the camshaft oil seal" in the "Replacing engine sealing components" subsection),

29. Check the valve clearances and adjust them if necessary (see "Adjusting valve clearances"). Next, install all the parts, connect the hoses and wires in the reverse order of removal.

The information can be read on the website VAZBOOK


This article is available at russian, bulgarian, belarusian, ukrainian, serbian, croatian, romanian, polish, slovak, hungarian
The text was reviewed by the specialist: Grigory Vologodtsev

Share with friends:

Previous articles
VAZ-2115: Engine repair
Next articles

Replacing the engine oil pan gasket
Replacing the intake manifold and exhaust manifold gaskets
Replacing the cylinder head gasket
Replacing the cylinder head cover gasket
Removal and installation the flywheel
Replacing crankshaft seals
Replacing the camshaft seal
Cylinder head repair
Lapping valves
Adjusting valve clearances

More articles from other manuals on VAZ cars:
➠ Replacing valve stem seals VAZ-11113 (1996-2003)
➠ Valve stem seals — replacement VAZ-2110 (1995-2007)
➠ Valve timing oil seals — replacement VAZ-2104 (1984-2012)
➠ Valve timing oil seals — replacement VAZ-2106 (1976-2006)
➠ Valve timing oil seals — replacement VAZ-2107 (1982-2012)
Link in different formats to this page


Visitor comments

No comments yet


How much will 30 + 24 ?


VAZ-2114 (2004-2013) 
  • General information
  • Operation and maintenance
  • Power unit
  • Engine repair
  • Cooling system
  • Supply system
  • Control system
  • Exhaust system
  • Transmission
  • Clutch
  • Car gearbox
  • Front wheel drives
  • Chassis
  • Wheels and tires
  • Front suspension
  • Rear suspension
  • Steering
  • Brake system
  • Body
  • Exterior
  • Interior
  • Doors and glass
  • Tailgate
  • Ventilation and heating
  • Electrical equipment
  • Equipment and devices
  • Headlights and lighting
  • Engine electrics
  • Electrical circuits


VAZ-2115 (1997-2012) 
  • General information
  • Vehicle device
  • Operation manual
  • Vehicle malfunctions
  • Car care
  • Power unit
  • Engine repair
  • Cooling system
  • Supply system
  • Control system
  • Exhaust system
  • Transmission
  • Clutch
  • Car gearbox
  • Front wheel drives
  • Chassis
  • Front suspension
  • Rear suspension
  • Steering
  • Brake system
  • Body
  • Exterior
  • Interior
  • Doors, covers and windows
  • Electrical equipment
  • Equipment and devices
  • Headlights and lighting
  • Engine electrics
  • Anti-theft system


VAZbook.ru © 2017 · Mobile version · Contact with administration · Sitemap: EN BG BY UA RS HR RO PL SK HU · Site search · News and articles VAZ-1111 · VAZ-11113 · VAZ-2101 · VAZ-21011 · VAZ-2104 · VAZ-2105 · VAZ-21051 · VAZ-2106 · VAZ-21061 · VAZ-2107 · VAZ-21099 · VAZ-2109 · VAZ-2108 · VAZ-2110 · VAZ-2112 · VAZ-2114 · VAZ-2115 · VAZ-2121 · VAZ-21213 · VAZ-21214 ·
The site stores technical data using cookies to improve the service.