
English Русский
Български
Беларускі
Український
Српски
Hrvatski
Română
Polski
Slovenský
Magyar
| Articles | Contacts | Sitemap |   
Repair and maintenance Lada Repair and maintenance Mazda Repair and maintenance Mitsubishi Repair and maintenance Toyota Repair and maintenance Land Rover Repair and maintenance Hyundai Repair and maintenance Nissan
VAZbook.ru


Main     1111   2101   2105   2106   2107   2109   2110   2115   2121  
VAZ-2114 (2004-2013) VAZ-2115 (1997-2012)
  • Main
  • «Samara-2»
  • VAZ-2115
  • Power unit
  • Engine repair
  • Replacing the cylinder head gasket

Replacing the cylinder head gasket (VAZ-2115)

            0

If you detect a leak of engine oil or coolant at the joints of the head and the cylinder block, remove the head and replace its gasket. A leak may also occur due to warping of the cylinder head due to overheating.

You will need: a torque wrench, 13, 17, 19 keys, 10, 13, 17, Torx socket heads, and a screwdriver.

Warning! The cylinder head gasket is a single-use gasket, so it is necessary to replace the gasket every time the cylinder head is removed.


1. Disconnect the wire from the "-" terminal of the battery.

2. Set the piston of the 1st cylinder to the TDC position of the compression stroke (see "Setting the piston of the first cylinder to the TDC position of the compression stroke").

3. Drain the coolant (see "Replacing the coolant").

4. Reduce the pressure in the fuel system if work is carried out immediately after a ride (see "Reducing pressure in the fuel system".

5. Disconnect the exhaust pipe from the exhaust manifold (see "Replacing the inlet pipe".

6. Remove the cylinder head cover (see "Replacing the cylinder head cover gasket").
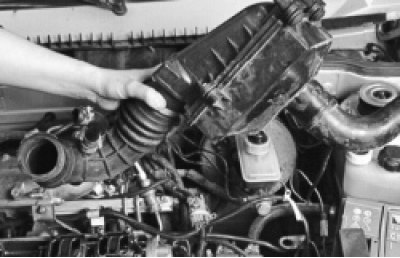
7. Disconnect the wiring harness connector from the mass air flow sensor, loosen the clamp securing…


7. Disconnect the wiring harness connector from the mass air flow sensor, loosen the clamp securing the air inlet pipe to the throttle assembly and remove the pipe with the air filter housing and air intake hose from the throttle assembly (see "Removal and installation the air filter").
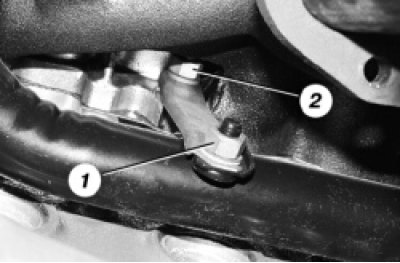


8. Unscrew nut 1 securing the water pump inlet pipe bracket. Loosen nut 2 securing the inlet pipe…


8. Unscrew nut 1 securing the water pump inlet pipe bracket. Loosen nut 2 securing the inlet pipe bracket to the exhaust manifold.
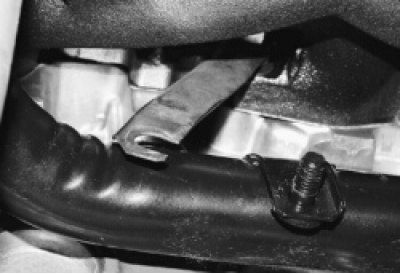
9. Move the bracket to the side.

9. Move the bracket to the side.

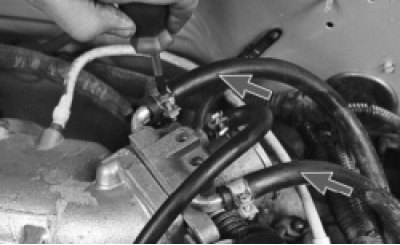
10. Loosen the clamps.
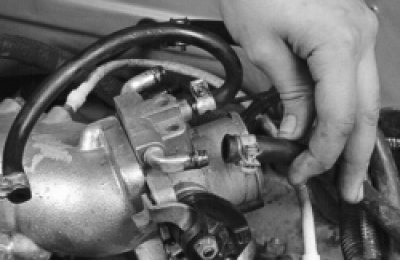

10. Loosen the clamps.

11. …and disconnect the inlet and outlet hoses of the cooling system from the throttle assembly.
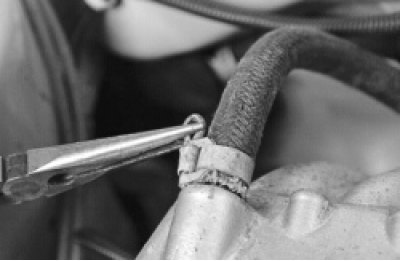

11. …and disconnect the inlet and outlet hoses of the cooling system from the throttle assembly.


12. Loosen the clamp securing the brake booster hose to the fitting on the receiver…
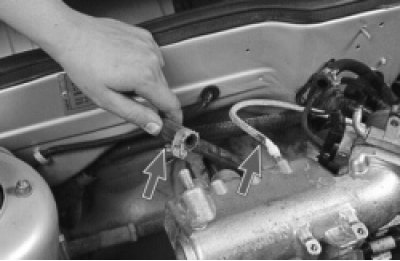

12. Loosen the clamp securing the brake booster hose to the fitting on the receiver…

13. …and remove the hose.
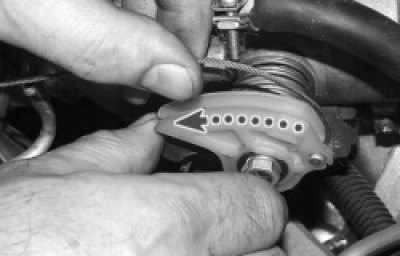

13. …and remove the hose.

14. Turn the throttle drive sector all the way and disconnect the throttle drive rod from it.
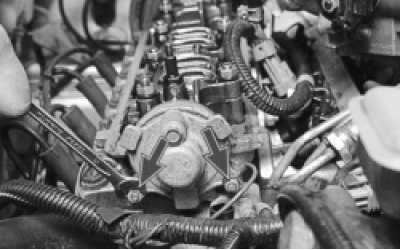

14. Turn the throttle drive sector all the way and disconnect the throttle drive rod from it.

15. Unscrew the two nuts securing the ground wire tips to the rear cover of the cylinder head…
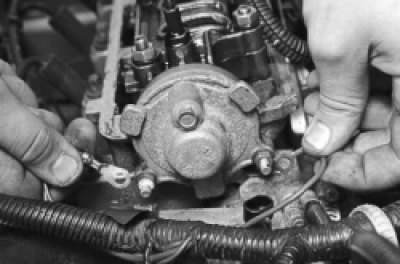

15. Unscrew the two nuts securing the ground wire tips to the rear cover of the cylinder head…

16. …and remove the wires from the studs.
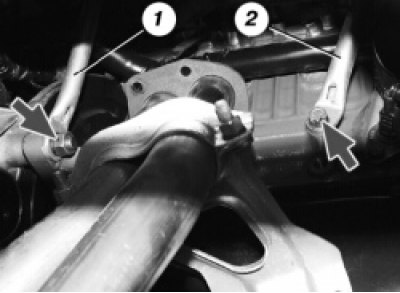

16. …and remove the wires from the studs.

17. Unscrew the nut of the lower strut mount 1 and unscrew the bolt of the lower strut mount 2…
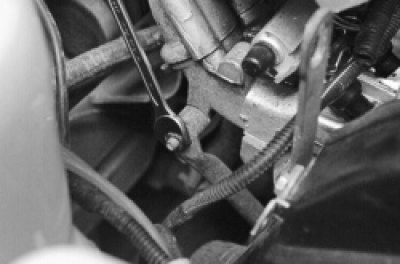

17. Unscrew the nut of the lower strut mount 1 and unscrew the bolt of the lower strut mount 2…

18. …unscrew the nuts of the upper fastenings of the intake manifold spacers on the right…
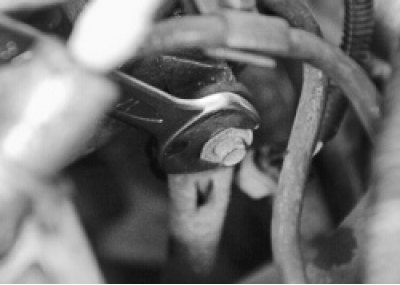

18. …unscrew the nuts of the upper fastenings of the intake manifold spacers on the right…

19. …and on the left side, remove the spacers.
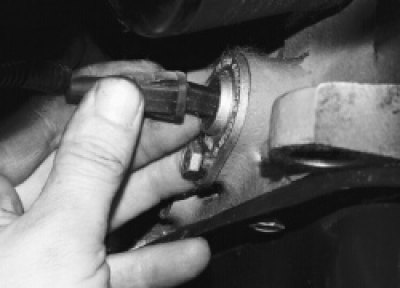

19. …and on the left side, remove the spacers.

20, Disconnect the wiring harness connectors from the oil level sensors in the engine crankcase…
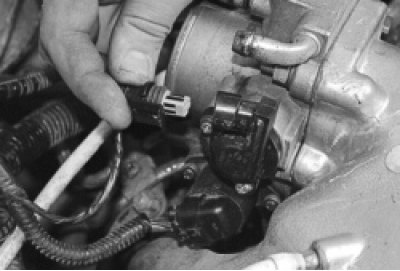

20, Disconnect the wiring harness connectors from the oil level sensors in the engine crankcase…

21. …from the throttle position sensor…
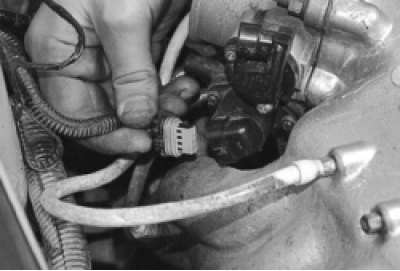

21. …from the throttle position sensor…

22. …from the idle speed controller…
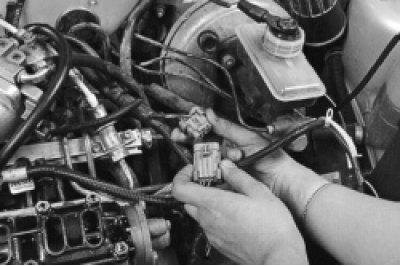

22. …from the idle speed controller…

23. …from the injector wiring harness…
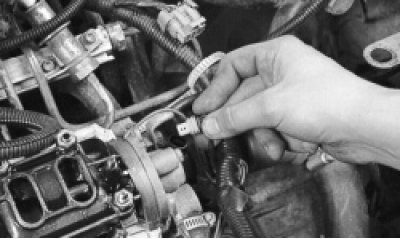

23. …from the injector wiring harness…

24. …from the coolant temperature sensor…
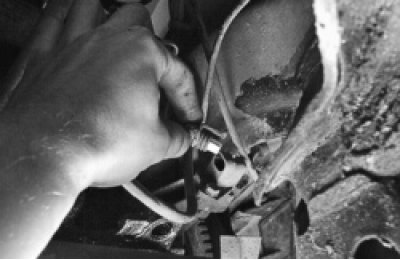

24. …from the coolant temperature sensor…

25. …from the crankshaft position sensor and the knock sensor.
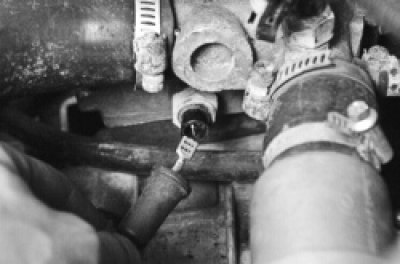

25. …from the crankshaft position sensor and the knock sensor.

26. Disconnect the wire connectors from the coolant temperature gauge sensor…
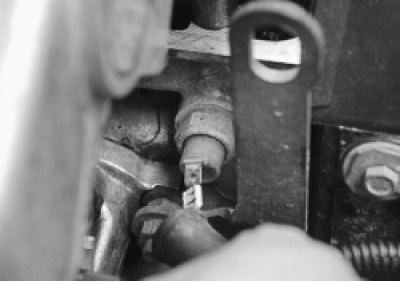

26. Disconnect the wire connectors from the coolant temperature gauge sensor…

27. …and from the oil pressure sensor.
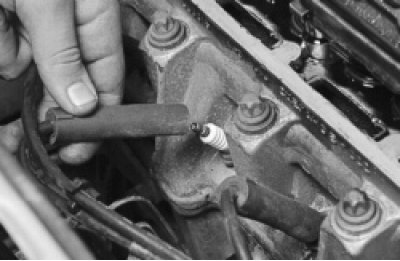

27. …and from the oil pressure sensor.

28. Disconnect the high-voltage wire ends from the spark plugs.
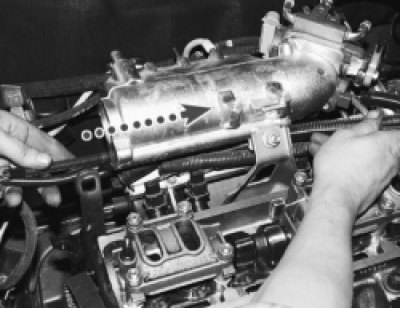

28. Disconnect the high-voltage wire ends from the spark plugs.

29. Pull the wire harness out from under the receiver.
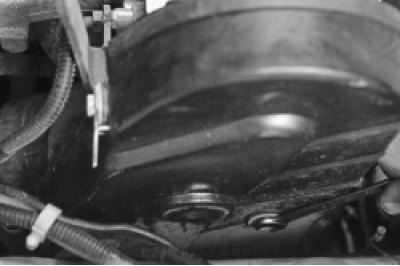

29. Pull the wire harness out from under the receiver.

30. Remove the three screws securing the front camshaft drive belt cover, remove the cover…
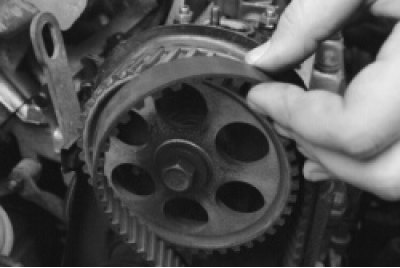

30. Remove the three screws securing the front camshaft drive belt cover, remove the cover…

31. …and a belt (see «Replacing the camshaft drive belt and adjusting the belt tension»).


31. …and a belt (see "Replacing the camshaft drive belt and adjusting the belt tension").

Warning! Do not turn the crankshaft or camshaft until the camshaft drive belt is installed.
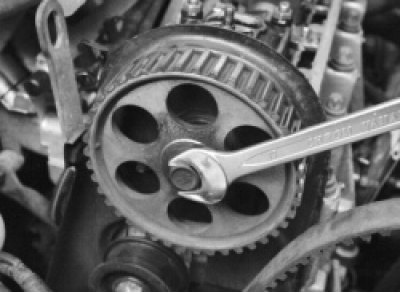

32. Secure the camshaft toothed pulley from turning, unscrew the bolt securing the pulley to the…


32. Secure the camshaft toothed pulley from turning, unscrew the bolt securing the pulley to the camshaft…
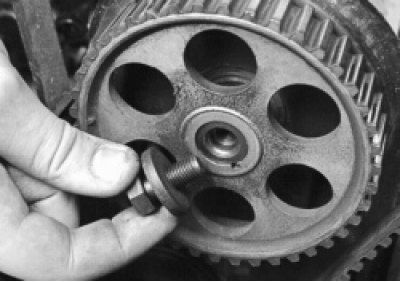
33. …and remove the bolt together with the washer.
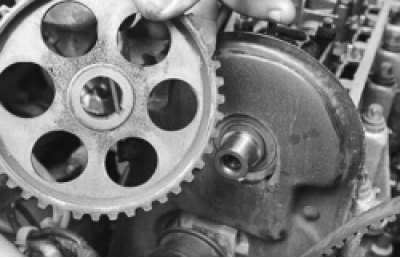

33. …and remove the bolt together with the washer.

34. Remove the pulley from the camshaft. Be careful not to damage the camshaft seal.


34. Remove the pulley from the camshaft. Be careful not to damage the camshaft seal.

Note: If the key is not seated tightly in the groove of the camshaft nose, remove it to avoid losing it.
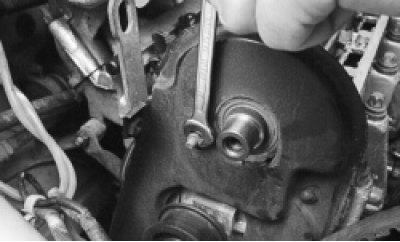

35. Unscrew the nut securing the rear cover of the camshaft drive at the top of the cylinder head.


35. Unscrew the nut securing the rear cover of the camshaft drive at the top of the cylinder head.

36. Remove four bolts (three of them also have a water pump attached) and remove the rear cover (see "Engine repair (disassembly, defect detection, assembly)").
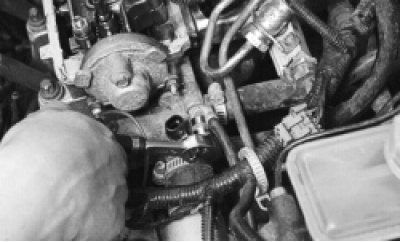
37. Unscrew the nut securing the ground wire…
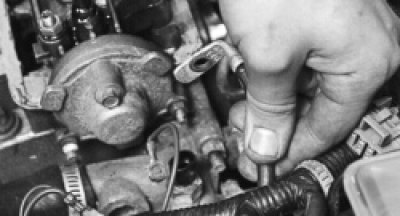

37. Unscrew the nut securing the ground wire…

38. …and remove the wire from the stud securing the cooling system outlet pipe to the cylinder head.
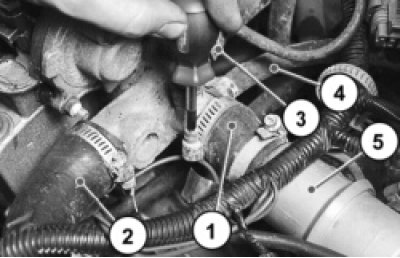

38. …and remove the wire from the stud securing the cooling system outlet pipe to the cylinder head.

39. Loosen the clamps and remove the radiator inlet pipe 2, the throttle assembly 4 and heater 3…


39. Loosen the clamps and remove the radiator inlet pipe 2, the throttle assembly 4 and heater 3 inlet hoses from the outlet pipe, disconnect thermostat 5 together with hose 1.
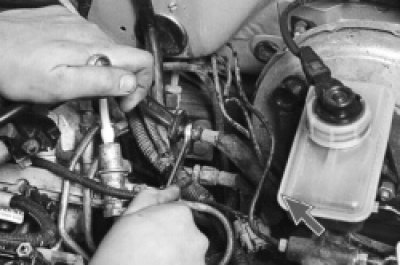
40. Loosen the mounting nuts and disconnect the fuel supply and drain hoses from the fuel pipes,…


40. Loosen the mounting nuts and disconnect the fuel supply and drain hoses from the fuel pipes, holding the hoses from turning with a second wrench.

41. Please note that the fuel pipes are fitted with sealing rings.


41. Please note that the fuel pipes are fitted with sealing rings.

After disconnecting each hose, remove the O-ring from the tube. Replace any rings that are too tight or torn.
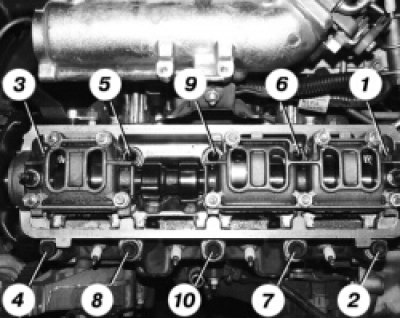
42. Loosen the ten cylinder head mounting bolts in the order shown, then completely unscrew the…


42. Loosen the ten cylinder head mounting bolts in the order shown, then completely unscrew the cylinder head mounting bolts, remove them together with the washers and remove the head.

Note: The cylinder head mounting bolts must be removed using a special Torx socket head.


Warning: Do not insert a screwdriver or other tool between the head and the cylinder block.


Helpful Hint: To pry the cylinder head off the gasket, insert a screwdriver under the exhaust manifold. Use it as a lever to lift the head.
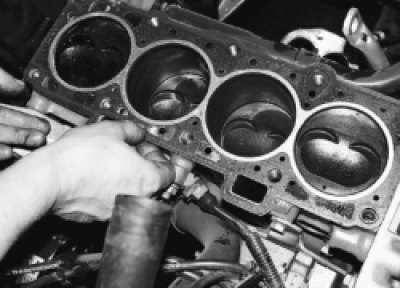

43. Remove the cylinder head gasket.


43. Remove the cylinder head gasket.

Note: Cylinder head bolts tend to stretch with repeated use. Replace with new bolts longer than 135.5 mm. Apply a thin coat of engine oil to the bolts before installing the cylinder head.


44. Clean the mating surfaces (they must be dry and clean) cylinder head and cylinder block and remove oil from the threaded holes in the block under the head mounting bolts.
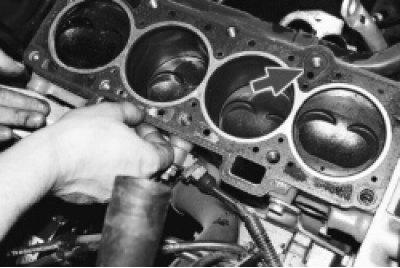
45. Install a new head gasket on the block (the gasket must be dry and clean) along the mounting…


45. Install a new head gasket on the block (the gasket must be dry and clean) along the mounting bushings so that the hole for the oil passage in the gasket (with copper edging) was located between the 3rd and 4th cylinders.
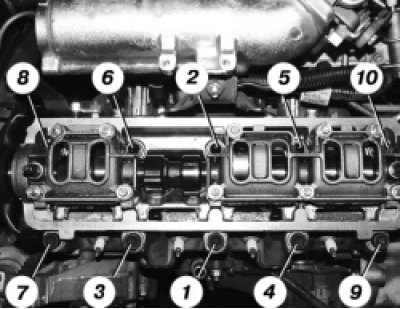
46. Install the head on the block, after making sure that the crankshaft and camshaft are in the…


46. Install the head on the block, after making sure that the crankshaft and camshaft are in the TDC position (both valves of the 1st cylinder must be closed). Tighten the head bolts in the following four steps in the sequence shown:

1 — torque 20 Nm (2 kgf·m);

2 — torque 69.4-85.7 N·m (7.1-8.7 kgf·m);

3 - tighten the bolts by 90°;

4 - finally tighten the bolts by 90°.
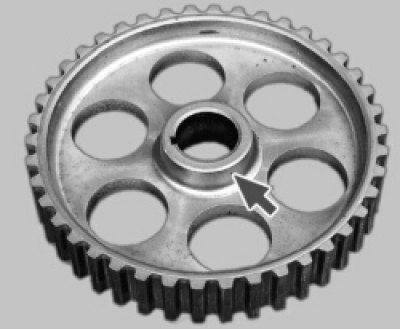
47. Install the parts on the cylinder head and connect the hoses and wires to it in the reverse…


47. Install the parts on the cylinder head and connect the hoses and wires to it in the reverse order of removal. Install the camshaft pulley with the protruding part of the hub towards the engine.

Check and, if necessary, adjust the valve clearances (see "Adjusting valve clearances"). Adjust the tension of the camshaft drive belt (see "Replacing the camshaft drive belt and adjusting the belt tension").


This article is available at russian, bulgarian, belarusian, ukrainian, serbian, croatian, romanian, polish, slovak, hungarian
The text was reviewed by the specialist: Grigory Vologodtsev

Share with friends:

Previous articles
VAZ-2115: Engine repair
Next articles

Replacing the cylinder head cover gasket
Removal and installation the flywheel
Replacing the tension roller
Replacing the camshaft drive belt
Setting the piston of the first cylinder to the TDC position of the compression stroke
Replacing the intake manifold and exhaust manifold gaskets
Replacing the engine oil pan gasket
Replacing valve stem seals
Replacing crankshaft seals
Replacing the camshaft seal

More articles from other manuals on VAZ cars:
➠ Replacing the cylinder head gasket VAZ-11113 (1996-2003)
➠ Replacing the cylinder head gasket VAZ-21061 (1976-2006)
➠ Replacing the cylinder head cover gasket VAZ-21214 (1994-2006)
➠ Cylinder Head Gasket — Check VAZ-21011 (1974-1983)
➠ Cylinder Head Gasket — Check VAZ-21051 (1979-2010)
Link in different formats to this page


Visitor comments

No comments yet


How much will 25 + 38 ?


VAZ-2114 (2004-2013) 
  • General information
  • Operation and maintenance
  • Power unit
  • Engine repair
  • Cooling system
  • Supply system
  • Control system
  • Exhaust system
  • Transmission
  • Clutch
  • Car gearbox
  • Front wheel drives
  • Chassis
  • Wheels and tires
  • Front suspension
  • Rear suspension
  • Steering
  • Brake system
  • Body
  • Exterior
  • Interior
  • Doors and glass
  • Tailgate
  • Ventilation and heating
  • Electrical equipment
  • Equipment and devices
  • Headlights and lighting
  • Engine electrics
  • Electrical circuits


VAZ-2115 (1997-2012) 
  • General information
  • Vehicle device
  • Operation manual
  • Vehicle malfunctions
  • Car care
  • Power unit
  • Engine repair
  • Cooling system
  • Supply system
  • Control system
  • Exhaust system
  • Transmission
  • Clutch
  • Car gearbox
  • Front wheel drives
  • Chassis
  • Front suspension
  • Rear suspension
  • Steering
  • Brake system
  • Body
  • Exterior
  • Interior
  • Doors, covers and windows
  • Electrical equipment
  • Equipment and devices
  • Headlights and lighting
  • Engine electrics
  • Anti-theft system


VAZbook.ru © 2017 · Mobile version · Contact with administration · Sitemap: EN BG BY UA RS HR RO PL SK HU · Site search · News and articles VAZ-1111 · VAZ-11113 · VAZ-2101 · VAZ-21011 · VAZ-2104 · VAZ-2105 · VAZ-21051 · VAZ-2106 · VAZ-21061 · VAZ-2107 · VAZ-21099 · VAZ-2109 · VAZ-2108 · VAZ-2110 · VAZ-2112 · VAZ-2114 · VAZ-2115 · VAZ-2121 · VAZ-21213 · VAZ-21214 ·
The site stores technical data using cookies to improve the service.