English Русский
Български
Беларускі
Український
Српски
Hrvatski
Română
Polski
Slovenský
Magyar
| Articles | Contacts | Sitemap |   
Repair and maintenance Lada Repair and maintenance Mazda Repair and maintenance Mitsubishi Repair and maintenance Toyota Repair and maintenance Land Rover Repair and maintenance Hyundai Repair and maintenance Nissan
VAZbook.ru


Main     1111   2101   2105   2106   2107   2109   2110   2115   2121  
VAZ-1111 (1988-1996) VAZ-11113 (1996-2003)
  • Main
  • «Oka»
  • VAZ-11113
  • General information
  • Maintenance
  • Checking and replacing spark plugs

Checking and replacing spark plugs (VAZ-11113)

            0

The car uses A17DVR or FE65CPR spark plugs.

You will need:
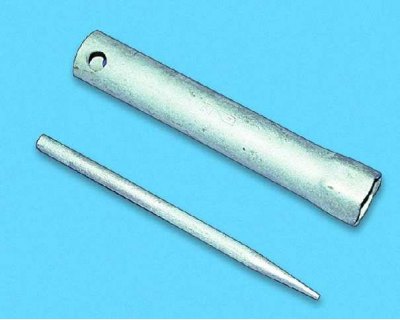
  • spark plug wrench
  • beard
  • round feeler gauge
  • spark plugs

Spark plug wrench with a barb

Spark plug wrench with a barb


Before you start working disconnect the wire from the "–" terminal of the battery.

Replace spark plugs every 30,000 km, even if they are still in good working order: old spark plugs can contribute to increased fuel consumption.

When preparing for winter use, replace the spark plugs with new ones.

Regularly check the reliability of the connections of the high-voltage wires to the spark plugs and ignition coil. Keep the high-voltage wires clean by periodically wiping them with a rag. Contamination on the wire insulation can lead to current leakage.

Warning! When checking and replacing spark plugs, be careful: if the engine is hot, you can get burned.


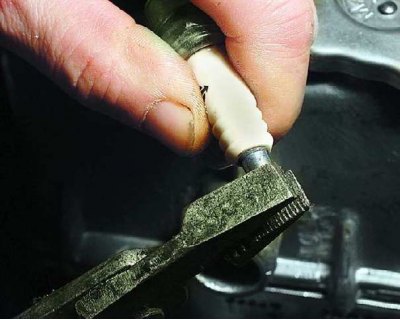
Caution: Do not tighten the spark plugs too much: the ceramic insulator of the spark plug may crack, which will lead to poor engine performance.

Caution: Do not tighten the spark plugs too much: the ceramic insulator of the spark plug may…


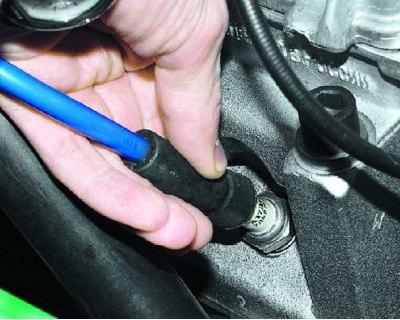
1. Remove the tip from the spark plug (do not pull the wire).


1. Remove the tip from the spark plug (do not pull the wire).


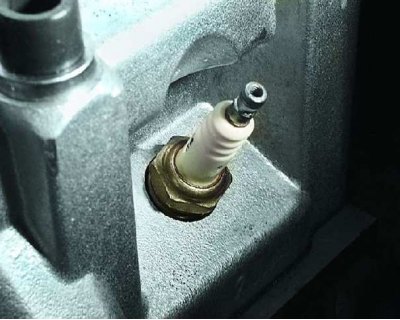
2. Clean the spark plug and the area around it from dirt so that no dirt gets into the cylinder when you unscrew the spark plug.
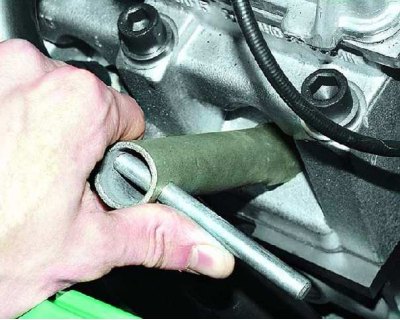
2. Clean the spark plug and the area around it from dirt so that no dirt gets into the cylinder…


3. Carefully tap the spark plug with the key and then...

Recommendation for surgery 3: If the spark plug is difficult to unscrew after the first start due to the carbon deposits that have formed, do not apply much force so as not to damage the threads in the cylinder head. By slightly screwing and unscrewing the spark plug, gradually unscrew it from the head.
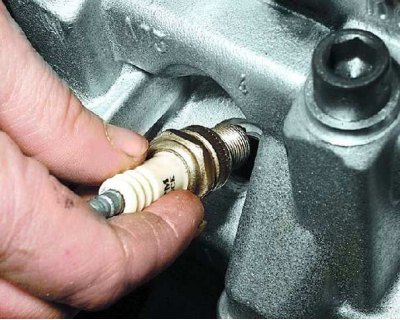
Recommendation for surgery 3: If the spark plug is difficult to unscrew after the first start due…


4....finally unscrew the candle by hand.
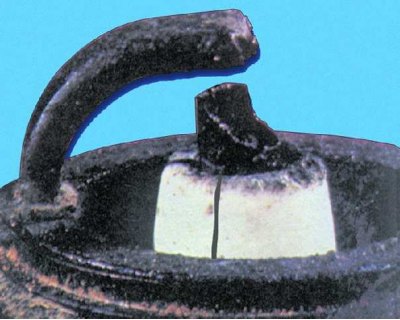

4....finally unscrew the candle by hand.


5. Inspect the spark plug. If there are cracks in the insulator, damaged threads or electrodes, the spark plug must be replaced.
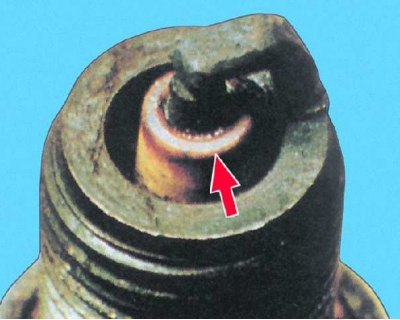
5. Inspect the spark plug. If there are cracks in the insulator, damaged threads or electrodes, the…


6. Light brown carbon deposits, which evenly cover the lower part of the spark plug with a thin layer, do not affect the operation of the ignition system and do not need to be cleaned off.
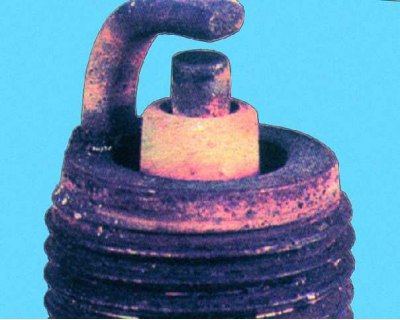
6. Light brown carbon deposits, which evenly cover the lower part of the spark plug with a thin…


7. The absence of carbon deposits on the spark plug indicates either that the engine is running on a lean mixture, or that the ignition timing is set incorrectly, or that the spark plug brand does not match the engine type.
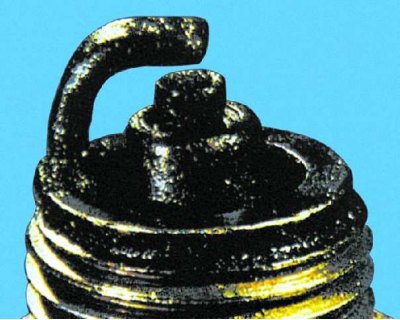
7. The absence of carbon deposits on the spark plug indicates either that the engine is running on…


8. A shiny black deposit indicates that oil has entered the engine cylinder. Such a spark plug must be cleaned.
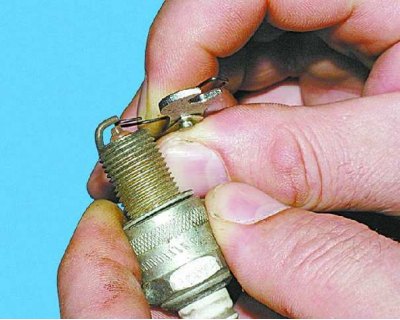
8. A shiny black deposit indicates that oil has entered the engine cylinder. Such a spark plug must…


9. Check the gap between the spark plug electrodes (only with a round feeler gauge). The gap should be 0.7–0.8 mm.
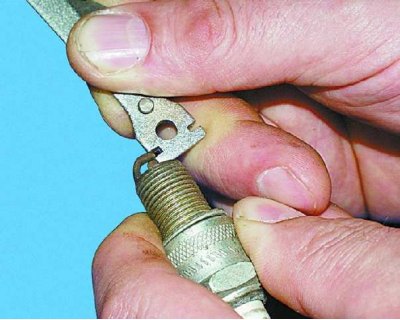
9. Check the gap between the spark plug electrodes (only with a round feeler gauge). The gap should…


10. If the gap differs from the specified one, adjust it by bending the side electrode.
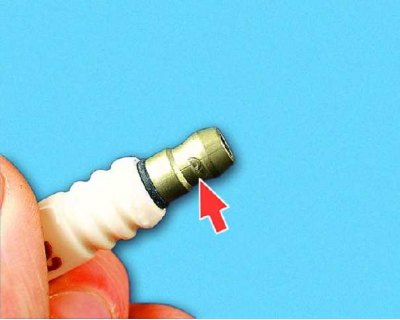
10. If the gap differs from the specified one, adjust it by bending the side electrode.

11. Tighten the spark plug tip if it is loose on the threads.
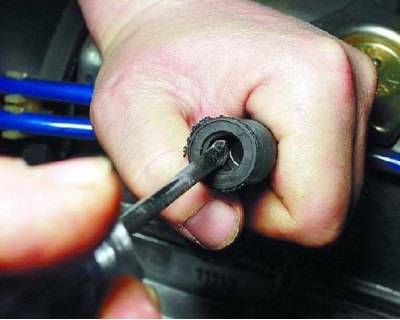
11. Tighten the spark plug tip if it is loose on the threads.


12. Clean the oxidized contact in the high-voltage wire tip. If necessary, adjust the contact so that it fits tightly on the spark plug tip.
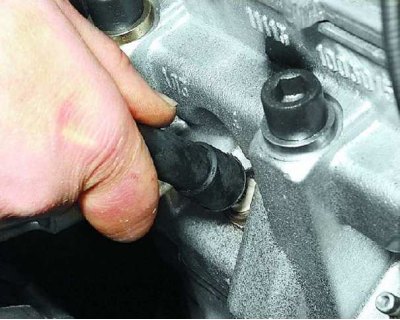
12. Clean the oxidized contact in the high-voltage wire tip. If necessary, adjust the contact so…


13. Screw the spark plug into the cylinder block and tighten it with a wrench. Install the tip onto the spark plug until it stops. Check that it fits tightly.


This article is available at russian, bulgarian, belarusian, ukrainian, serbian, croatian, romanian, polish, slovak, hungarian
The text was reviewed by the specialist: Grigory Vologodtsev

Share with friends:

Previous articles
VAZ-11113: Maintenance
Next articles

Replacing the camshaft drive belt
Adjusting the tension of the camshaft drive belt
Setting the piston of the first cylinder to the TDC position of the compression stroke
Replacing the alternator drive belt
Adjusting the alternator drive belt tension
Setting the ignition timing
Checking the exhaust system
Gearbox oil change
Checking the protective covers of the hinges
Checking the condition of the front and rear suspension parts

More articles from other manuals on VAZ cars:
➠ Checking and replacing spark plugs VAZ-21099 (1990-2004)
➠ Checking and replacing spark plugs VAZ-2115 (1997-2012)
➠ Spark plugs — checking VAZ-21011 (1974-1983)
➠ Spark plugs — checking condition and replacement VAZ-2104 (1984-2012)
➠ Spark plugs — checking condition and replacement VAZ-2106 (1976-2006)
Link in different formats to this page


Visitor comments

No comments yet


How much will 27 + 21 ?


VAZ-1111 (1988-1996) 
  • General information
  • Vehicle description
  • Vehicle device
  • Vehicle operation
  • Maintenance
  • Applications
  • Power unit
  • Engine repair
  • Cooling system
  • Lubrication system
  • Supply system
  • Transmission
  • Clutch
  • Transmission
  • Chassis
  • Front suspension and wheels
  • Rear suspension
  • Steering
  • Brake system
  • Body
  • Exterior
  • Interior
  • Electrical equipment
  • Engine electrics
  • Equipment and devices


VAZ-11113 (1996-2003) 
  • General information
  • Introduction to the guide
  • User manual
  • Maintenance
  • Power unit
  • Engine repair
  • Cooling and lubrication system
  • Fuel system
  • Exhaust system
  • Transmission
  • Car gearbox
  • Clutch and drive shafts
  • Chassis
  • Front suspension
  • Rear suspension
  • Steering
  • Brake system
  • Body
  • Exterior
  • Interior
  • Doors and locks
  • Electrical equipment
  • Equipment and devices
  • Lighting and signaling
  • Engine electrics
  • Ignition system


VAZbook.ru © 2017 · Mobile version · Contact with administration · Sitemap: EN BG BY UA RS HR RO PL SK HU · Site search · News and articles VAZ-1111 · VAZ-11113 · VAZ-2101 · VAZ-21011 · VAZ-2104 · VAZ-2105 · VAZ-21051 · VAZ-2106 · VAZ-21061 · VAZ-2107 · VAZ-21099 · VAZ-2109 · VAZ-2108 · VAZ-2110 · VAZ-2112 · VAZ-2114 · VAZ-2115 · VAZ-2121 · VAZ-21213 · VAZ-21214 ·
The site stores technical data using cookies to improve the service.