
English Русский
Български
Беларускі
Український
Српски
Hrvatski
Română
Polski
Slovenský
Magyar
| Articles | Contacts | Sitemap |   
Repair and maintenance Lada Repair and maintenance Mazda Repair and maintenance Mitsubishi Repair and maintenance Toyota Repair and maintenance Land Rover Repair and maintenance Hyundai Repair and maintenance Nissan
VAZbook.ru


Main     1111   2101   2105   2106   2107   2109   2110   2115   2121  
VAZ-2104 (1984-2012) VAZ-2105 (1979-2010) VAZ-21051 (1979-2010)
  • Main
  • «Zhiguli»
  • VAZ-2104
  • Electrical equipment
  • Engine electrics
  • Spark plugs — checking condition and replacement

Spark plugs — checking condition and replacement (VAZ-2104)

            0

To perform the work you will need a round feeler gauge.

1. Prepare the vehicle for operations (see "Preparing a car for maintenance and repair").

Caution! When performing the following operation, do not pull on the high-voltage wire. Force should only be applied to the tip.


2. Remove the high-voltage wire tip from the spark plug.
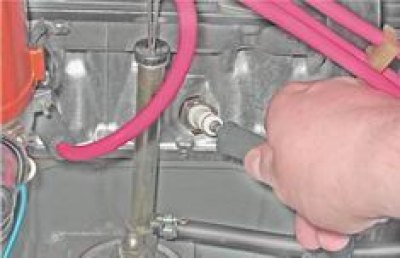
2. Remove the high-voltage wire tip from the spark plug.


3. Clean the cylinder head around the spark plug from dirt and blow it with compressed air.

4. With a spark plug wrench on 21 mm or using a deep-head socket wrench, unscrew the spark plug from the threaded hole in the cylinder head.
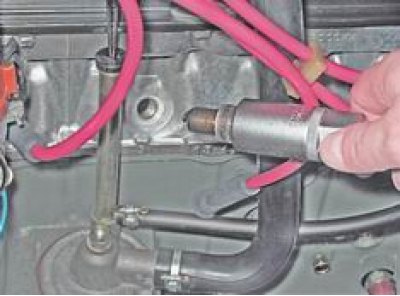
4. With a spark plug wrench on 21 mm or using a deep-head socket wrench, unscrew the spark plug…


5. Visually assess the condition of the spark plug.
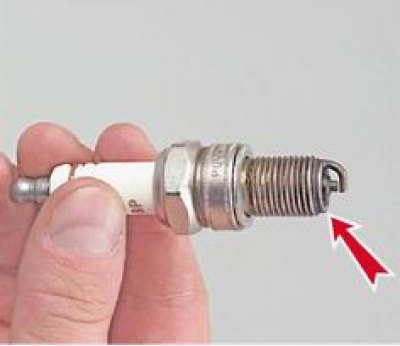
5. Visually assess the condition of the spark plug.


A properly functioning spark plug with an adjusted engine should have a carbon deposit on the insulator that is gray-yellow to gray-brown in color. If the carbon deposit is black, the spark plug may be faulty or the engine adjustments may be incorrect. If the spark plug insulator is cracked or damaged, it must be replaced.


6. Using a round feeler gauge, check the gap between the electrodes. If the gap is not within the norm, set it according to the table by bending or unbending the side electrode.
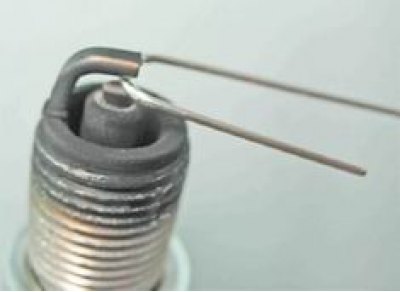
6. Using a round feeler gauge, check the gap between the electrodes. If the gap is not within the…


7. Install the spark plug by screwing it in by hand, and then tighten it with a wrench to a torque of 3-4 kgf·m.

Caution! Tightening the spark plug too tightly may damage the threads in the cylinder head bore.


8. Similarly, replace the spark plugs of other cylinders.

Table 13.15. Gaps between spark plug electrodes


Ignition systemGap, mmType of candle
contact0,5-0,6A17DVR
contactless0,7-0,8A17DV-10
injection engine1,0-1,1A17DVRM


This article is available at russian, bulgarian, belarusian, ukrainian, serbian, croatian, romanian, polish, slovak, hungarian
The text was reviewed by the specialist: Grigory Vologodtsev

Share with friends:

Previous articles
VAZ-2104: Engine electrics
Next articles

Starter — check and repair
Starter — removal and installation
Description of the starter design
Generator — Checking and Repairing
Generator — removal and installation
Ignition switch (lock) — removal, inspection and replacement of the contact group
Ignition coil
Ignition coil — checking, removal and installation
Ignition distributor
Distributor Cap and Rotor — Check and Replace

More articles from other manuals on VAZ cars:
➠ Spark plugs — checking condition and replacement VAZ-2106 (1976-2006)
➠ Spark plugs — checking condition and replacement VAZ-2107 (1982-2012)
➠ Checking and replacing spark plugs VAZ-1111 (1988-1996)
➠ Spark plugs — checking VAZ-21011 (1974-1983)
➠ Checking and replacing spark plugs VAZ-21099 (1990-2004)
Link in different formats to this page


Visitor comments

No comments yet


How much will 10 + 46 ?


VAZ-2104 (1984-2012) 
  • General information
  • Operation and maintenance
  • Power unit
  • Engine repair
  • Fuel system (carburetor)
  • Fuel system (injector)
  • Control system
  • Cooling system
  • Exhaust system
  • Transmission
  • Clutch
  • Car gearbox
  • Cardan gear
  • Rear axle
  • Chassis
  • Front suspension
  • Rear suspension
  • Wheels and tires
  • Steering
  • Brake system
  • Body
  • Exterior
  • Interior
  • Doors and glass
  • Ventilation and heating
  • Electrical equipment
  • Equipment and devices
  • Headlights and lighting
  • Engine electrics
  • Electrical circuits


VAZ-2105 (1979-2010) 
  • General information
  • Vehicle description
  • Vehicle device
  • Vehicle operation
  • Maintenance
  • Power unit
  • Engine repair
  • Cooling and lubrication system
  • Supply system
  • Transmission
  • Clutch
  • Car gearbox
  • Cardan gear
  • Rear axle
  • Chassis
  • Suspension and shock absorbers
  • Steering
  • Brake system
  • Body
  • Body elements
  • Electrical equipment
  • Engine electrics
  • Equipment and devices


VAZ-21051 (1979-2010) 
  • General information
  • Introduction to guide
  • User manual
  • Troubleshooting
  • Power unit
  • Engine repair
  • Engine repair VAZ-2103
  • Cooling system
  • Lubrication system
  • Power and exhaust system
  • Fuel injection
  • Transmission
  • Clutch
  • Car gearbox
  • Cardan gear
  • Rear axle
  • Chassis
  • Suspension and shock absorbers
  • Steering
  • Brake system
  • Body
  • Exterior
  • Interior
  • Doors and windows
  • Electrical equipment
  • Equipment and devices
  • Engine electrics
  • Ignition system
  • Electrical circuits


VAZbook.ru © 2017 · Mobile version · Contact with administration · Sitemap: EN BG BY UA RS HR RO PL SK HU · Site search · News and articles VAZ-1111 · VAZ-11113 · VAZ-2101 · VAZ-21011 · VAZ-2104 · VAZ-2105 · VAZ-21051 · VAZ-2106 · VAZ-21061 · VAZ-2107 · VAZ-21099 · VAZ-2109 · VAZ-2108 · VAZ-2110 · VAZ-2112 · VAZ-2114 · VAZ-2115 · VAZ-2121 · VAZ-21213 · VAZ-21214 ·
The site stores technical data using cookies to improve the service.