
Tool 67.7824.9521 for checking wear (hoods) chains
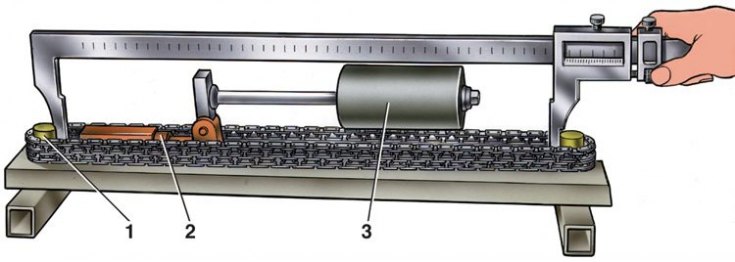
1 - roller; 2 - adjusting nut; 3 - counterweight
Wear Check Diagram (hoods) chains
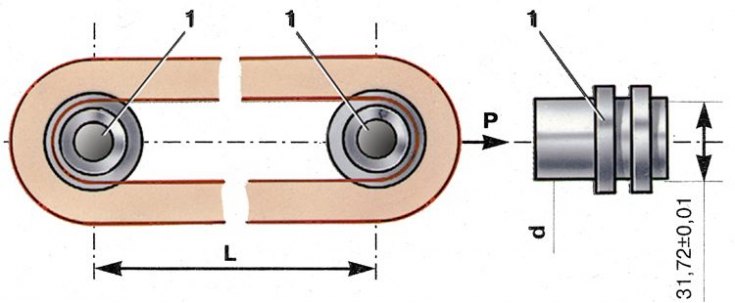
1 - rollers
Check and replacement
1. Rinse the chain in kerosene, and then check the condition of its links.
2. On rollers and cheeks, chips, cracks and other damage are not allowed.
3. When the engine is running, the chain stretches. It is considered operational if the tensioner provides its tension, i.e. if the chain is extended by no more than 4 mm.
4. Check the chain extractor on tool 67.7824.9521 (see fig. Tool 67.7824.9521 for checking wear (hoods) chains), having two stepped rollers 1, on which the chain is put on. With the help of counterweight 3, the chain is stretched with a force of 294 N (30 kgf) or 147 N (15 kgf). The adjusting nut 2 ensures that the axis of the counterweight is parallel to the base of the device.
5. Stretch the chain with a force of 294 N (30 kgf), placing the counterweight in the extreme right position, then reduce the force by 147 N (15 kgf), by moving the counterweight to the extreme left position. Repeat both operations again and determine the chain extension by the distance L (see fig. Wear Check Diagram (hoods) chains) between roller axes. By measuring the distance between the diameters d of the rollers with a caliper and adding the diameter d to it, you get the distance L between the axes of the rollers.
6. For a new chain, the distance L between the axes of the rollers is 485.755+0,5-0,1 mm. If the chain has stretched to 490 mm, it should be replaced.
7. Lubricate the chain with engine oil before installing on the engine.