
English Русский
Български
Беларускі
Український
Српски
Hrvatski
Română
Polski
Slovenský
Magyar
| Articles | Contacts | Sitemap |   
Repair and maintenance Lada Repair and maintenance Mazda Repair and maintenance Mitsubishi Repair and maintenance Toyota Repair and maintenance Land Rover Repair and maintenance Hyundai Repair and maintenance Nissan
VAZbook.ru


Main     1111   2101   2105   2106   2107   2109   2110   2115   2121  
VAZ-2114 (2004-2013) VAZ-2115 (1997-2012)
  • Main
  • «Samara-2»
  • VAZ-2115
  • Power unit
  • Engine repair
  • Replacing the camshaft drive belt

Replacing the camshaft drive belt (VAZ-2115)

            0

Replace the camshaft drive belt if you find the following upon inspection:
  • traces of oil on any surface of the belt;
  • traces of wear on the toothed surface, cracks, cuts, folds and separation of the fabric from the rubber;
  • cracks, folds, depressions or bulges on the outer surface of the belt;
  • delamination on the end surfaces of the belt.

You will need: a 17 mm open-end wrench, a 10 mm socket wrench, a special key for turning the tension roller or two drills and a screwdriver, and a mounting blade.

1. Disconnect the wire from the "-" terminal of the battery.

2. Remove the alternator belt (see "Replacing and adjusting the tension of the generator drive belt".

3. Set the piston of the 1st cylinder to the TDC position (see "Setting the piston of the first cylinder to the TDC position of the compression stroke").
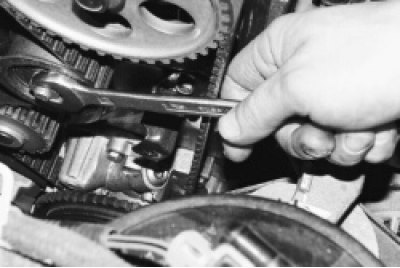
4. Loosen the tension roller mounting nut…

4. Loosen the tension roller mounting nut…

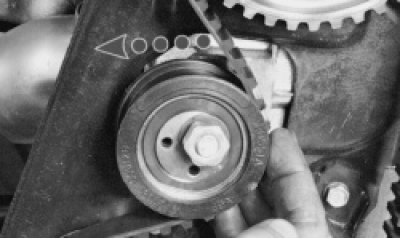
5. …and turn the tension roller to release the belt tension.

5. …and turn the tension roller to release the belt tension.


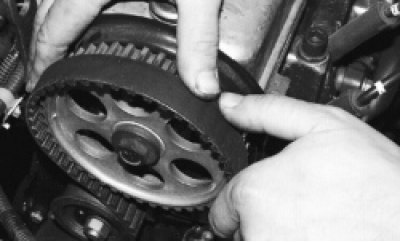
6. Remove the belt from the camshaft pulley, tension roller and water pump toothed pulley.

6. Remove the belt from the camshaft pulley, tension roller and water pump toothed pulley.

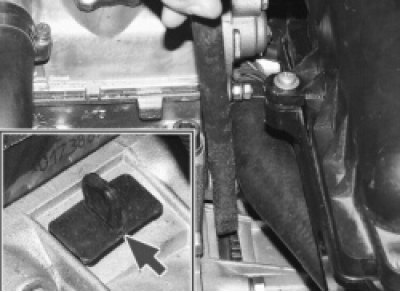
7. To unscrew the generator drive pulley mounting bolt, it is necessary to secure the crankshaft…


7. To unscrew the generator drive pulley mounting bolt, it is necessary to secure the crankshaft from turning. To do this, having removed the plug in the clutch housing, an assistant should use a mounting blade or a large screwdriver to hold the crankshaft from turning by the teeth of the flywheel ring gear.

8. Unscrew the crankshaft pulley mounting bolt, remove it with the washer and remove the generator drive pulley from the crankshaft.
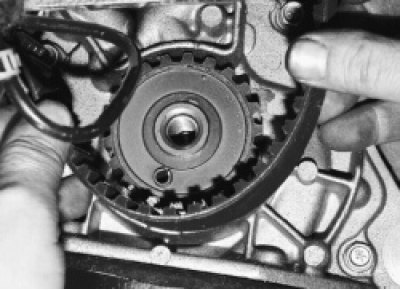
9. Remove the camshaft drive belt from the crankshaft toothed pulley.


9. Remove the camshaft drive belt from the crankshaft toothed pulley.


10. Before installing a new belt, clean the pulleys and tension roller from dirt and grease, degrease them with white spirit.
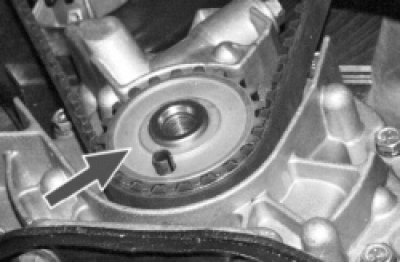
11. Install the new belt onto the crankshaft timing pulley…
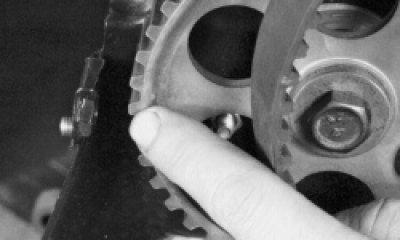

11. Install the new belt onto the crankshaft timing pulley…

12. …then onto the camshaft pulley, pulling the drive belt so that it does not sag. Make sure that…


(The article is taken from an online resource VazBook.ru)

12. …then onto the camshaft pulley, pulling the drive belt so that it does not sag. Make sure that the marks on the pulley and the rear cover match.
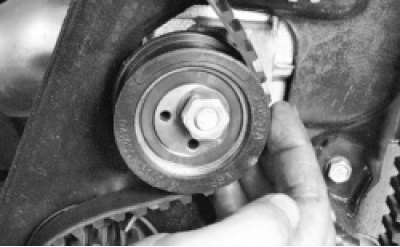
13. Place the belt on the water pump toothed pulley and tension roller.

13. Place the belt on the water pump toothed pulley and tension roller.

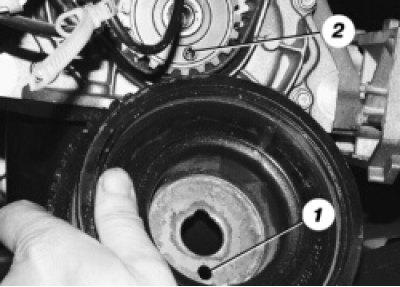
14. Install the alternator drive pulley in the reverse order of removal, aligning hole 1 of the…


14. Install the alternator drive pulley in the reverse order of removal, aligning hole 1 of the pulley with mounting sleeve 2. Tighten the pulley mounting bolt to a torque of 99-110 N·m (9.9-11.0 kgf·m).
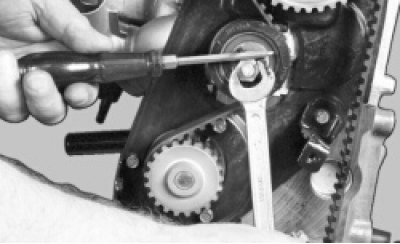
15. Turn the camshaft drive belt tension roller counterclockwise, tension the belt and tighten its…


15. Turn the camshaft drive belt tension roller counterclockwise, tension the belt and tighten its fastening nut.

Note: A special key is required to tension the belt. If you do not have a key, insert two metal rods of the appropriate diameter into the holes in the roller. Fix a screwdriver between the rods and turn the roller, thereby tensioning the belt.


After this, tighten the nut.
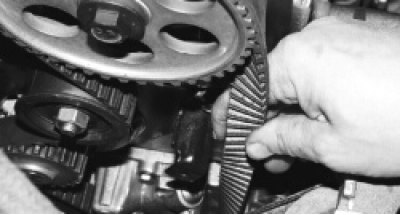
16. Check the belt tension. A correctly tensioned belt should turn 90° with finger force (1.5-2…


16. Check the belt tension. A correctly tensioned belt should turn 90° with finger force (1.5-2 kgf) in the middle between the crankshaft and camshaft pulleys. Repeat the adjustment if necessary.

Warnings! Too much belt tension will cause increased wear of the water pump bearings and tension roller. If the belt tension is too low, the valve timing may be out of alignment due to the belt jumping over the teeth on the camshaft pulley. In addition, any misalignment in either direction will cause increased belt wear.


17. Turn the crankshaft. Check that the timing marks on the camshaft and crankshaft pulleys match (see "Setting the piston of the first cylinder to the TDC position of the compression stroke").

18. Install the front camshaft drive belt cover. Then install the alternator drive belt and adjust its tension (see "Replacing and adjusting the tension of the generator drive belt").


This article is available at russian, bulgarian, belarusian, ukrainian, serbian, croatian, romanian, polish, slovak, hungarian
The text was reviewed by the specialist: Grigory Vologodtsev

Share with friends:

Previous articles
VAZ-2115: Engine repair
Next articles

Setting the piston of the first cylinder to the TDC position of the compression stroke
Changing engine oil and oil filter
Useful tips for engine repair
Possible engine malfunctions
Engine design features
Replacing the tension roller
Removal and installation the flywheel
Replacing the cylinder head cover gasket
Replacing the cylinder head gasket
Replacing the intake manifold and exhaust manifold gaskets

More articles from other manuals on VAZ cars:
➠ Replacing the camshaft drive belt VAZ-1111 (1988-1996)
➠ Replacing the camshaft drive belt VAZ-21051 (1979-2010)
➠ Replacing the camshaft drive belt VAZ-2109 (1984-1997)
➠ Replacing the camshaft drive chain damper VAZ-21061 (1976-2006)
➠ Adjusting the tension and replacing the coolant pump drive belt VAZ-21214 (1994-2006)
Link in different formats to this page


Visitor comments

No comments yet


How much will 31 + 35 ?


VAZ-2114 (2004-2013) 
  • General information
  • Operation and maintenance
  • Power unit
  • Engine repair
  • Cooling system
  • Supply system
  • Control system
  • Exhaust system
  • Transmission
  • Clutch
  • Car gearbox
  • Front wheel drives
  • Chassis
  • Wheels and tires
  • Front suspension
  • Rear suspension
  • Steering
  • Brake system
  • Body
  • Exterior
  • Interior
  • Doors and glass
  • Tailgate
  • Ventilation and heating
  • Electrical equipment
  • Equipment and devices
  • Headlights and lighting
  • Engine electrics
  • Electrical circuits


VAZ-2115 (1997-2012) 
  • General information
  • Vehicle device
  • Operation manual
  • Vehicle malfunctions
  • Car care
  • Power unit
  • Engine repair
  • Cooling system
  • Supply system
  • Control system
  • Exhaust system
  • Transmission
  • Clutch
  • Car gearbox
  • Front wheel drives
  • Chassis
  • Front suspension
  • Rear suspension
  • Steering
  • Brake system
  • Body
  • Exterior
  • Interior
  • Doors, covers and windows
  • Electrical equipment
  • Equipment and devices
  • Headlights and lighting
  • Engine electrics
  • Anti-theft system


VAZbook.ru © 2017 · Mobile version · Contact with administration · Sitemap: EN BG BY UA RS HR RO PL SK HU · Site search · News and articles VAZ-1111 · VAZ-11113 · VAZ-2101 · VAZ-21011 · VAZ-2104 · VAZ-2105 · VAZ-21051 · VAZ-2106 · VAZ-21061 · VAZ-2107 · VAZ-21099 · VAZ-2109 · VAZ-2108 · VAZ-2110 · VAZ-2112 · VAZ-2114 · VAZ-2115 · VAZ-2121 · VAZ-21213 · VAZ-21214 ·
The site stores technical data using cookies to improve the service.