
English Русский
Български
Беларускі
Український
Српски
Hrvatski
Română
Polski
Slovenský
Magyar
| Articles | Contacts | Sitemap |   
Repair and maintenance Lada Repair and maintenance Mazda Repair and maintenance Mitsubishi Repair and maintenance Toyota Repair and maintenance Land Rover Repair and maintenance Hyundai Repair and maintenance Nissan
VAZbook.ru


Main     1111   2101   2105   2106   2107   2109   2110   2115   2121  
VAZ-2106 (1976-2006) VAZ-21061 (1976-2006)
  • Main
  • «Zhiguli»
  • VAZ-21061
  • Chassis
  • Steering
  • Steering gear repair

Steering gear repair (VAZ-21061)

            0

Section of the steering gear housing
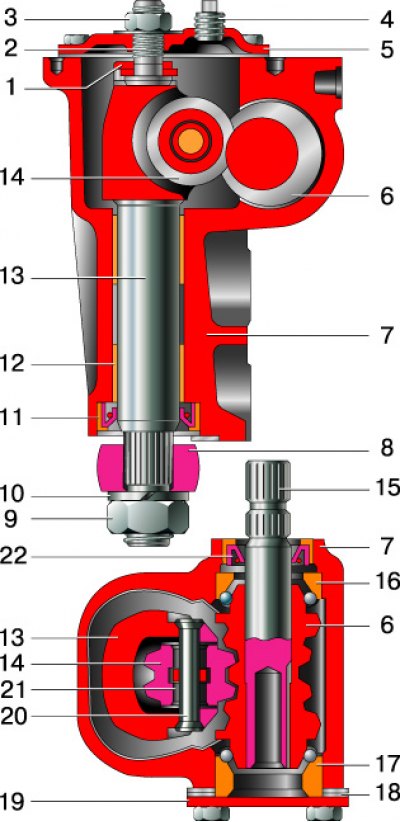


1 – Bipod shaft adjusting screw plate; 2 – adjusting screw of the bipod shaft; 3 – adjusting screw…

1 – Bipod shaft adjusting screw plate; 2 – adjusting screw of the bipod shaft; 3 – adjusting screw nut; 4 – oil filler plug; 5 – steering gear housing cover; 6 - worm; 7 – steering gear housing; 8 – bipod; 9 – nut for fastening the bipod to the shaft; 10 – spring washer for bipod mounting nut; 11 – knuckle shaft cuff; 12 – bronze sleeve of the bipod shaft; 13 – bipod shaft; 14 – roller of the bipod shaft; 15 – worm shaft; 16 – upper ball bearing; 17 – lower ball bearing; 18 – adjusting shims; 19 – lower worm bearing cover; 20 – roller axis; 21 – needle bearing; 22 – worm shaft seal.


We drain the oil from the gearbox housing, unscrew the adjusting nut and remove the lock washer.
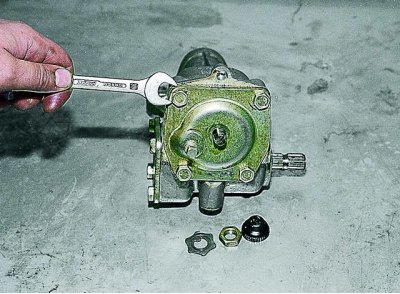
We drain the oil from the gearbox housing, unscrew the adjusting nut and remove the lock washer.


Using a 10 mm spanner, unscrew the four bolts securing the top cover of the gearbox.
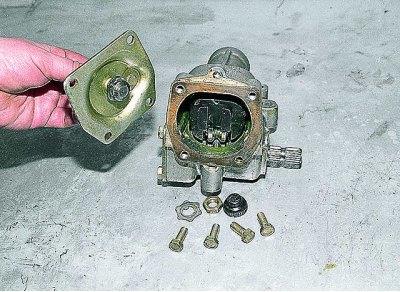


Using a 10 mm spanner, unscrew the four bolts securing the top cover of the gearbox.


We remove the head of the adjusting screw from the groove on the bipod shaft and remove the cover.
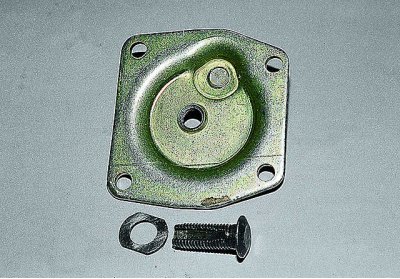
We remove the head of the adjusting screw from the groove on the bipod shaft and remove the cover.


When replacing the bipod shaft, the axial clearance between the screw head and the shaft groove is eliminated by selecting the thickness of the adjusting plate. The clearance value is allowed to be no more than 0.05 mm. The plates have a thickness from 1.95 to 2.20 mm with a step of 0.025 mm.
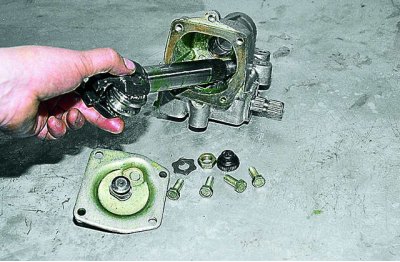
When replacing the bipod shaft, the axial clearance between the screw head and the shaft groove is…


We remove the knuckle shaft with the roller from the crankcase.
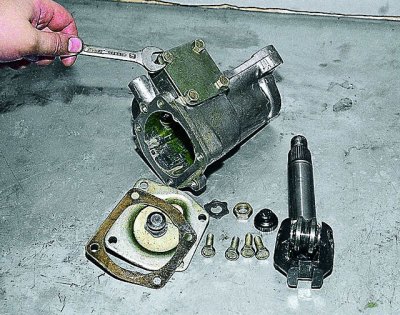

We remove the knuckle shaft with the roller from the crankcase.


Using a 10 mm spanner, unscrew the four bolts securing the worm shaft cover and...
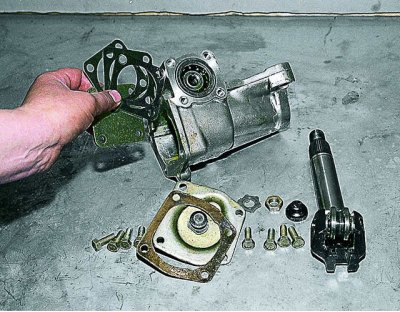
Using a 10 mm spanner, unscrew the four bolts securing the worm shaft cover and...


...we remove it together with the ball bearing adjustment linings.

The gaskets are available in thicknesses of 0.1 and 0.15 mm.
The gaskets are available in thicknesses of 0.1 and 0.15 mm.


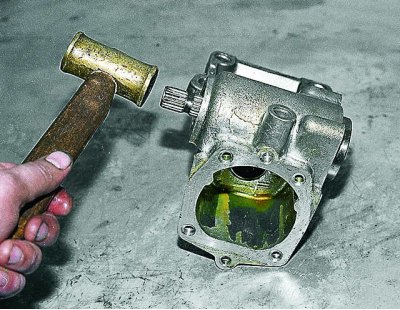
Using light blows from a soft metal hammer, knock the worm shaft out of the gearbox housing together with the bearing.
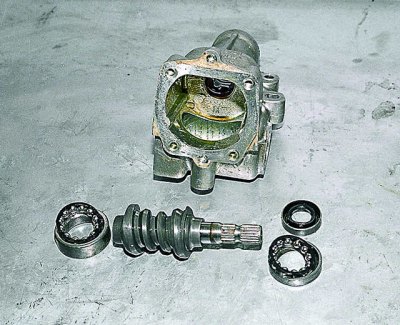
Using light blows from a soft metal hammer, knock the worm shaft out of the gearbox housing…


The end surfaces of the worm are provided with raceways for bearing balls.
The end surfaces of the worm are provided with raceways for bearing balls.


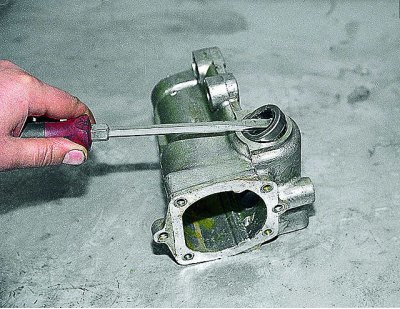
Using a screwdriver, we remove the worm shaft cuff.

We remove the knuckle shaft cuff in the same way.
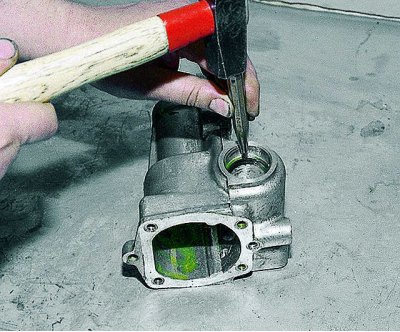
We remove the knuckle shaft cuff in the same way.


We knock out the outer ring of the second bearing with a punch.

Wash all parts in kerosene or diesel fuel. Carefully check the working surfaces of the roller and worm for signs of wear, scoring or damage. The gap between the pitman shaft and bronze bushings should not exceed 0.1 mm. Ball bearings should rotate freely, without jamming, there should be no damage or signs of wear on the surfaces of rings, separators and balls. Cracks of any length are not allowed on the crankcase itself. Replace worn and damaged parts with serviceable ones. Replace cuffs with new ones in any case. Before assembly, lubricate all internal parts with transmission oil.
Wash all parts in kerosene or diesel fuel. Carefully check the working surfaces of the roller and…


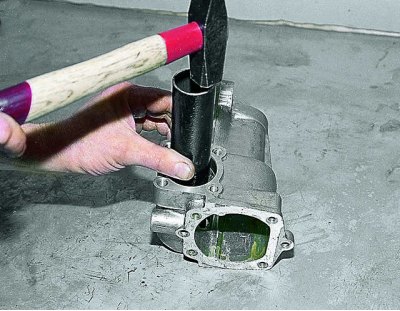
Using light hammer blows on a piece of pipe of a suitable diameter, press the inner bearing ring into the crankcase.
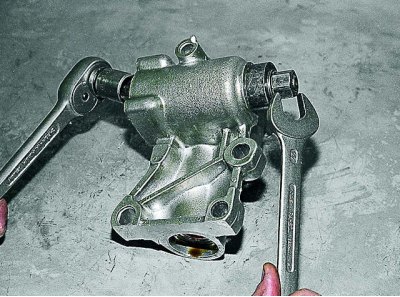
Using light hammer blows on a piece of pipe of a suitable diameter, press the inner bearing ring…


The bearing ring can be pressed in using the front suspension rubber-to-metal joint replacement tool (see Applications).

We install a separator with balls in the bearing ring and insert the worm shaft. We put the separator of the outer bearing on it and press the outer ring with light hammer blows. We put the cover with gaskets and...
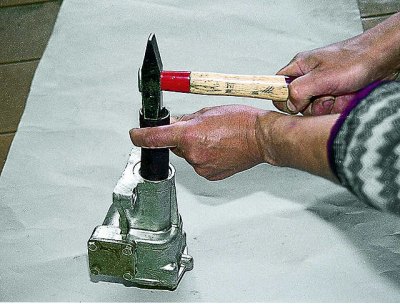
We install a separator with balls in the bearing ring and insert the worm shaft. We put the…


...we press in the worm shaft and pitman arm seals, lubricating the working edges with Litol-24 grease.

We install the worm in the crankcase. Using a set of adjusting linings, we set the moment of its rotation from 2 to 5 kgf cm. We install the pitman shaft and adjust the clearance in the engagement according to the moment of shaft rotation. It should be 7–9 kgf cm when turning the worm shaft by 30° to the left and right and smoothly decrease to 5 kgf cm with further rotation to the stop.

Fill the crankcase with transmission oil to the level of the lower edge of the filler hole (0.215 l).

(The article is taken from an online resource: VazBook)

Dimensions of the main mating parts and limits of permissible wear


Mating parts

Dimensions of mating parts, mm

Permissible clearance in the mating, mm

Hole

Shaft

Steering Arm Shaft Bushing – Steering Arm Shaft

28,698 +0,022

28,690 -0,021

0,1

Steering gear housing - upper worm bearing

47 +0,008
-0,033

47 -0,011

Free play is not allowed

Steering gear housing - lower worm bearing

50 0,025

50 -0,011

0,06

Pendulum Arm Bracket - Pendulum Arm Axle Bushing

24 +0,072
-0,020
24 +0,1
-0,1

0,175

Pendulum Arm Axis Bushing – Pendulum Arm Axis

20 +0,1
-0,1

20 -0,050

0,3–0,5


This article is available at russian, bulgarian, belarusian, ukrainian, serbian, croatian, romanian, polish, slovak, hungarian
The text was reviewed by the specialist: Grigory Vologodtsev

Share with friends:

Previous articles
VAZ-21061: Steering
Next articles

Removal the bipod
Removal and installation the steering gear
Removal and installation the steering shaft
Removal and installation the steering wheel
Replacement and repair of the pendulum lever

More articles from other manuals on VAZ cars:
➠ Steering gear repair VAZ-2105 (1979-2010)
➠ Steering gear repair VAZ-2115 (1997-2012)
➠ Steering gear assembly VAZ-1111 (1988-1996)
➠ Removal and installation the steering gear VAZ-2101 (1970-1983)
➠ Steering gear engagement — adjustment VAZ-2107 (1982-2012)
Link in different formats to this page


Visitor comments

No comments yet


How much will 38 + 43 ?


VAZ-2106 (1976-2006) 
  • General information
  • Vehicle device
  • Operation and maintenance
  • Power unit
  • Engine repair
  • Supply system
  • Cooling system
  • Exhaust system
  • Transmission
  • Clutch
  • Car gearbox
  • Cardan gear
  • Rear axle
  • Chassis
  • Front suspension
  • Rear suspension
  • Wheels and tires
  • Steering
  • Brake system
  • Body
  • Exterior
  • Interior
  • Doors and glass
  • Electrical equipment
  • Equipment and devices
  • Headlights and lighting
  • Engine electrics
  • Electrical circuits


VAZ-21061 (1976-2006) 
  • General information
  • Specifications
  • Troubleshooting
  • Power unit
  • Engine repair
  • Cooling and lubrication system
  • Power and exhaust system
  • Transmission
  • Clutch
  • Car gearbox
  • Cardan gear
  • Rear axle
  • Chassis
  • Front suspension
  • Rear suspension
  • Steering
  • Brake system
  • Body
  • Exterior
  • Interior
  • Doors and windows
  • Heating and ventilation
  • Electrical equipment
  • Equipment and devices
  • Engine electrics
  • Ignition system
  • Lighting and signaling


VAZbook.ru © 2017 · Mobile version · Contact with administration · Sitemap: EN BG BY UA RS HR RO PL SK HU · Site search · News and articles VAZ-1111 · VAZ-11113 · VAZ-2101 · VAZ-21011 · VAZ-2104 · VAZ-2105 · VAZ-21051 · VAZ-2106 · VAZ-21061 · VAZ-2107 · VAZ-21099 · VAZ-2109 · VAZ-2108 · VAZ-2110 · VAZ-2112 · VAZ-2114 · VAZ-2115 · VAZ-2121 · VAZ-21213 · VAZ-21214 ·
The site stores technical data using cookies to improve the service.