
English Русский
Български
Беларускі
Український
Српски
Hrvatski
Română
Polski
Slovenský
Magyar
| Articles | Contacts | Sitemap |   
Repair and maintenance Lada Repair and maintenance Mazda Repair and maintenance Mitsubishi Repair and maintenance Toyota Repair and maintenance Land Rover Repair and maintenance Hyundai Repair and maintenance Nissan
VAZbook.ru


Main     1111   2101   2105   2106   2107   2109   2110   2115   2121  
VAZ-2108 (1984-2003) VAZ-2109 (1984-1997) VAZ-21099 (1990-2004)
  • Main
  • «Sputnik»
  • VAZ-21099
  • Transmission
  • Car gearbox
  • Selecting the differential bearing adjusting ring

Selecting the differential bearing adjusting ring (VAZ-21099)

            0

Note 1: The adjustment ring is selected only when replacing one of the following parts: clutch or gearbox housing, differential housing or differential bearings.


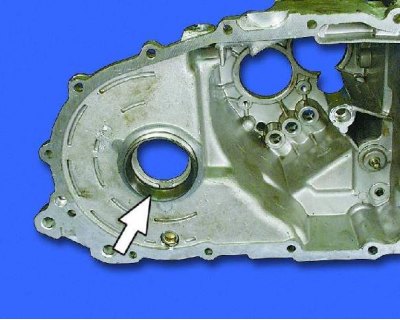
Note 2. The differential bearing preload should be 0.15-0.35 mm. Preload is achieved by selecting the thickness of the adjusting ring from those supplied as spare parts. The adjusting ring is installed in the gearbox housing socket under the outer ring of the differential bearing.
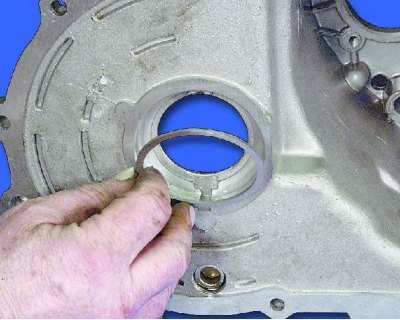

Note 2. The differential bearing preload should be 0.15-0.35 mm. Preload is achieved by selecting…


1. Insert a 1.25 mm thick installation ring into the gearbox housing socket under the differential bearing.
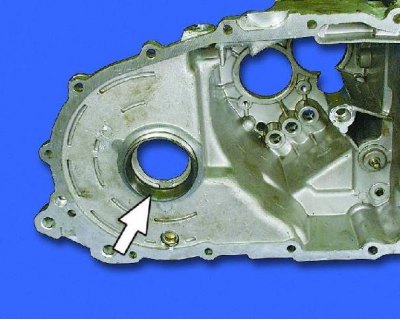
1. Insert a 1.25 mm thick installation ring into the gearbox housing socket under the differential…


2. Press the outer race of the differential bearing into the socket of the gearbox housing.
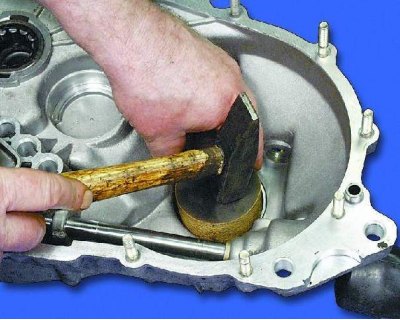
2. Press the outer race of the differential bearing into the socket of the gearbox housing.


3. Press the outer race of the differential bearing into the socket of the clutch housing.


3. Press the outer race of the differential bearing into the socket of the clutch housing.


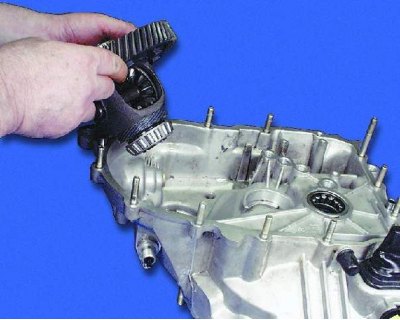
4. Install the differential into the gearbox housing.
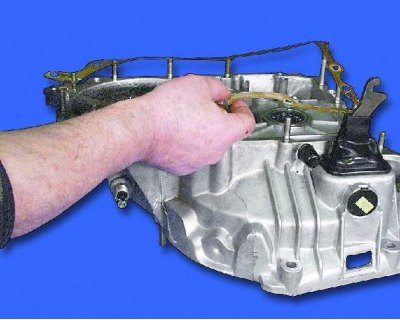
4. Install the differential into the gearbox housing.


5. Install the sealing gasket.
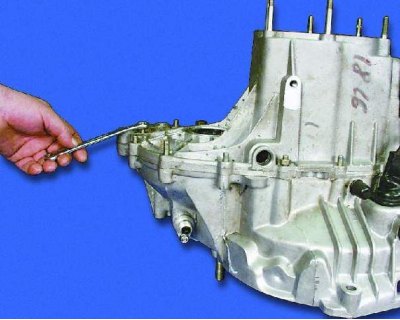
5. Install the sealing gasket.


6. Install the clutch housing onto the gearbox housing.
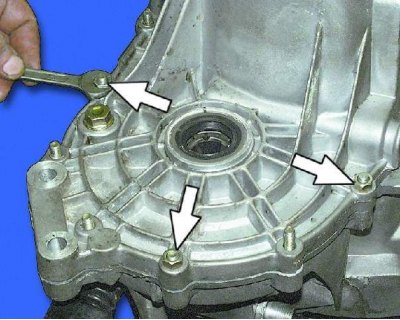
6. Install the clutch housing onto the gearbox housing.


7. Tighten three equally spaced crankcase mounting nuts to a torque of 25.0 N·m (2.5 kgf·m).
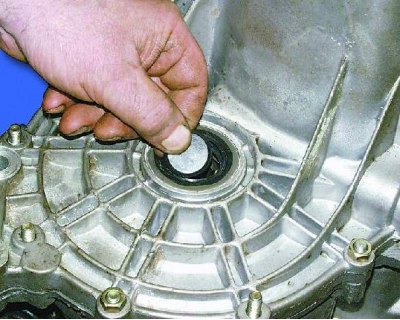

7. Tighten three equally spaced crankcase mounting nuts to a torque of 25.0 N·m (2.5 kgf·m).


8. Rotate the differential a few turns to allow the bearings to self-align.

9. Install a support plate of the appropriate diameter on the end of the differential flange on the clutch housing side.
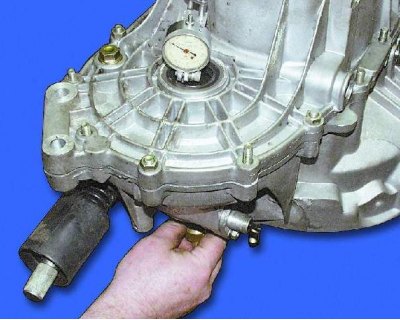
9. Install a support plate of the appropriate diameter on the end of the differential flange on the…


10. Place the indicator on the stand. Install the indicator leg on the support plate with a pre-tension of 1 mm.
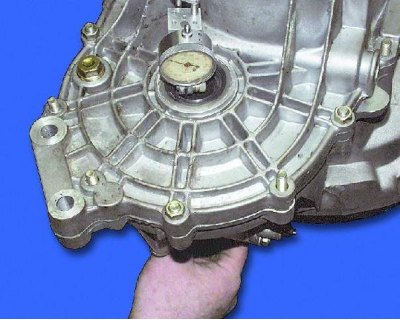
10. Place the indicator on the stand. Install the indicator leg on the support plate with a…


11. Applying force from below, move the differential up to the stop without turning the differential around the axis.

12. Measure the differential axial travel using the indicator. Calculate the required differential bearing adjusting ring thickness using the formula:

T = S + C + Y, where:

T – required thickness of the adjusting ring, mm;
S – measured value of differential axial displacement, mm;
C – differential bearing preload value, equal to 0.25 mm;
Y – thickness of the mounting ring, equal to 1.25 mm.

Select from the spare parts supplied an adjustment ring of the calculated thickness T±0.1 mm.

Calculation example: The value of the axial clearance S as indicated by the indicator is 0.95 mm. We substitute this value into the formula, as well as the value of the bearing preload C=0.25 mm and the thickness of the mounting ring Y=1.25 mm:

(The original is available on the website: «VAZBOOK.RU»)

T = 0.95 + 0.25 + 1.25 = 2.45 mm.

Thus, the thickness of the adjustment ring should be 2.45±0.1 mm.
Thus, the thickness of the adjustment ring should be 2.45±0.1 mm.


13. Install the selected adjusting ring into the gearbox housing socket and press in the outer ring of the differential bearing. Then assemble the gearbox in the order specified in subsection 12.12.

14. After bolting the clutch housing and gearbox, check that the differential rotates freely and has no axial play.


This article is available at russian, bulgarian, belarusian, ukrainian, serbian, croatian, romanian, polish, slovak, hungarian
The text was reviewed by the specialist: Grigory Vologodtsev

Share with friends:

Previous articles
VAZ-21099: Car gearbox
Next articles

Differential assembly
Inspection and defect detection of differential parts
Disassembling the differential
Differential — design description
Primary shaft of the gearbox
Synchronizer — disassembly and assembly
Gear shift mechanism
Gearbox assembly
Gear shift lever
Gearbox oil change

More articles from other manuals on VAZ cars:
➠ Selecting the differential bearing adjusting ring VAZ-1111 (1988-1996)
➠ Selecting the differential bearing adjusting ring VAZ-2115 (1997-2012)
➠ Differential adjusting ring — selection of rings VAZ-2110 (1995-2007)
➠ Installing and adjusting the differential pinion VAZ-21011 (1974-1983)
➠ Main gear, differential, axle shafts of VAZ-2104 and VAZ-2105… VAZ-2105 (1979-2010)
Link in different formats to this page


Visitor comments

No comments yet


How much will 49 + 48 ?


VAZ-21099 (1990-2004) 
  • General information
  • Specifications
  • User manual
  • Maintenance
  • Car care
  • Troubleshooting
  • Power unit
  • Engine repair
  • Cooling and lubrication system
  • Power and exhaust system
  • Transmission
  • Car gearbox
  • Clutch and drive shafts
  • Chassis
  • Car suspension
  • Steering
  • Brake system
  • Body
  • Exterior
  • Interior
  • Doors and locks
  • Electrical equipment
  • Equipment and devices
  • Lighting and signaling
  • Engine electrics
  • Ignition system


VAZ-2109 (1984-1997) 
  • General information
  • Vehicle operation
  • Vehicle device
  • Power unit
  • Engine repair
  • Cooling and lubrication system
  • Supply system
  • Transmission
  • Clutch
  • Gearbox and drive
  • Chassis
  • Car suspension
  • Steering
  • Brake system
  • Body
  • Body elements
  • Electrical equipment
  • Engine electrics
  • Equipment and devices


VAZ-2108 (1984-2003) 
  • General information
  • Introduction to guide
  • Power unit
  • Engine repair
  • Cooling and lubrication system
  • Power and exhaust system
  • Transmission
  • Clutch and drive shafts
  • Car gearbox
  • Chassis
  • Front suspension
  • Rear suspension
  • Steering
  • Brake system
  • Body
  • Exterior
  • Interior
  • Doors and glass
  • Electrical equipment
  • Equipment and devices
  • Engine electrics
  • Ignition system


VAZbook.ru © 2017 · Mobile version · Contact with administration · Sitemap: EN BG BY UA RS HR RO PL SK HU · Site search · News and articles VAZ-1111 · VAZ-11113 · VAZ-2101 · VAZ-21011 · VAZ-2104 · VAZ-2105 · VAZ-21051 · VAZ-2106 · VAZ-21061 · VAZ-2107 · VAZ-21099 · VAZ-2109 · VAZ-2108 · VAZ-2110 · VAZ-2112 · VAZ-2114 · VAZ-2115 · VAZ-2121 · VAZ-21213 · VAZ-21214 ·
The site stores technical data using cookies to improve the service.