




Contents: Removal ↓ Installation ↓
An assistant will be required to complete the work.
Removal
1. Remove the front timing belt cover (see "Timing Belt - Checking Condition and Adjusting Tension").
2. Remove the front right wheel (see "Wheel - replacement") and engine splash guard (see "Engine Mudguard - Removal and Installation").
3. Remove the generator drive belt (see "Generator Drive Belt - Replacement").
4. Turning the crankshaft to the TDC position of the compression stroke of the first cylinder (see "Timing Belt - Checking Condition and Adjusting Tension").
5. With a socket wrench by 17 mm (on some cars by 19 mm) with an extension, unscrew the pulley mounting bolt, while the assistant through the window in the clutch housing (see "Timing Belt - Checking Condition and Adjusting Tension"), a slotted screwdriver inserted between the teeth of the flywheel ring gear holds the shaft from turning.
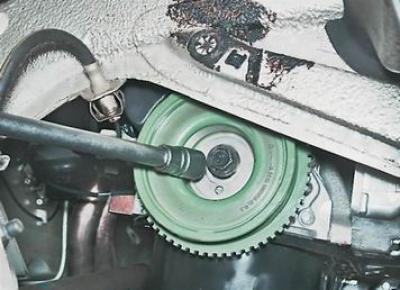
6. Remove the pulley.
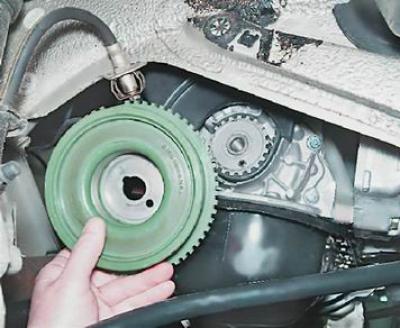
7. Unscrew the tension roller mounting nut and loosen the toothed belt tension as much as possible (see "Timing Belt - Checking Condition and Adjusting Tension").
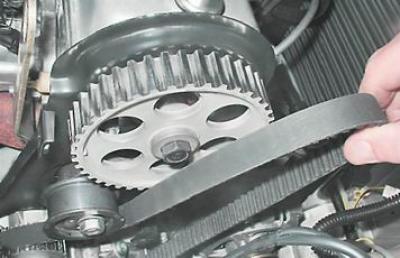
8. Remove the toothed belt from the pulleys.
9. Rotate the tension roller to check its condition. Replace the roller that has play and makes a lot of noise when rotating (see "Timing Belt Tensioner Roller - Replacement").
Installation
1. Check the alignment of the marks on the toothed pulley of the crankshaft and the lug on the oil pump housing.
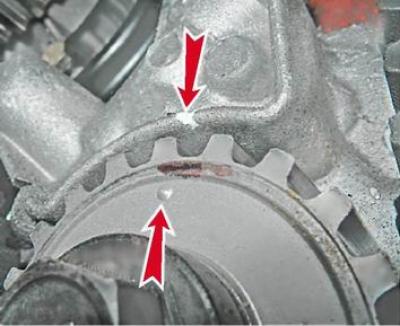
2. We also make sure that the mark on the camshaft pulley and the protrusion on the rear cover of the drive belt match.
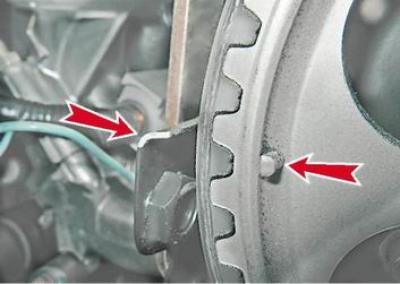
3. Place the belt on the pulleys and tension roller as shown in the figure below, without allowing the timing marks to shift.
Note: The belt must be put on so that the belt branch between the camshaft and crankshaft pulleys is taut. It is permissible to turn the camshaft slightly within the thickness of the belt tooth (so that the mark D does not move away from the protrusion C).
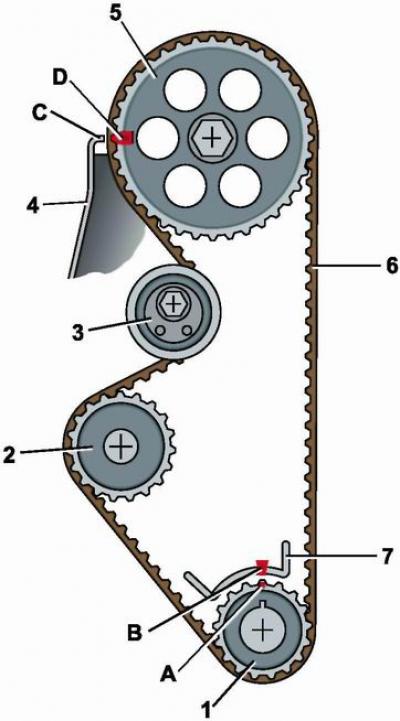
Camshaft drive diagram: 1 - toothed pulley of the engine crankshaft; 2 - toothed pulley of the coolant pump; 3 - tension roller; 4 - rear timing belt cover; 5 - toothed pulley of the camshaft; 6 - timing belt; 7 - lug on the oil pump cover; A - mark on the toothed pulley of the crankshaft; B - mark on the tide of the oil pump cover; C - protrusion on the rear cover of the timing belt; D - mark on the toothed pulley of the camshaft
4. Adjust the belt tension (see "Timing Belt - Checking Condition and Adjusting Tension").
5. Tighten the crankshaft pulley mounting bolt and, having turned the engine crankshaft two revolutions, make sure that the marks on the pulleys and the engine match. If necessary, reinstall the belt.
6. Install the crankshaft pulley in place and tighten its mounting bolt to a torque of 97.9-108.8 N·m (9.9-11.1 kgf·m).
7. Install the front timing belt cover and the alternator drive belt in place in the reverse order of removal.
8. Adjust the tension of the generator drive belt (see "Generator Drive Belt - Checking Condition and Adjusting Tension").