
English Русский
Български
Беларускі
Український
Српски
Hrvatski
Română
Polski
Slovenský
Magyar
| Articles | Contacts | Sitemap |   
Repair and maintenance Lada Repair and maintenance Mazda Repair and maintenance Mitsubishi Repair and maintenance Toyota Repair and maintenance Land Rover Repair and maintenance Hyundai Repair and maintenance Nissan
VAZbook.ru


Main     1111   2101   2105   2106   2107   2109   2110   2115   2121  
VAZ-1111 (1988-1996) VAZ-11113 (1996-2003)
  • Main
  • «Oka»
  • VAZ-11113
  • Power unit
  • Fuel system
  • Replacing the traction and adjusting the air damper drive

Replacing the traction and adjusting the air damper drive (VAZ-11113)

            0

You will need:
  • key "8"
  • awl
  • pliers

Remove the air filter (see subsection 10.10.1.).

If the wire rod in the casing is difficult to move, you can try to lubricate it. To do this, remove the rod from the car. Hold the rod vertically and periodically move the wire rod in the casing, pour in oil (engine or transmission) into the shell until it starts to flow out of the opposite end of the shell. If this does not produce positive results, the rod assembly must be replaced.
If the wire rod in the casing is difficult to move, you can try to lubricate it. To do this, remove…


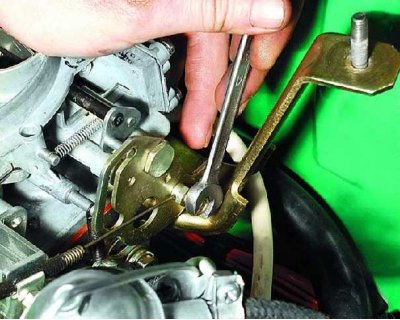
1. Loosen the bolt securing the rod to the air damper drive lever.
1. Loosen the bolt securing the rod to the air damper drive lever.


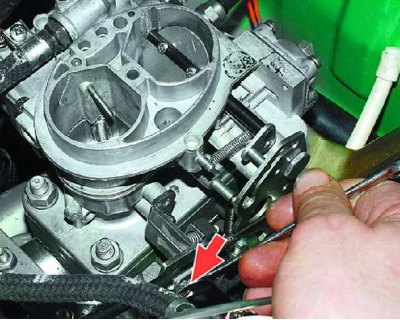
2. Loosen the tightening bolt that secures the tie rod housing to the bracket.
2. Loosen the tightening bolt that secures the tie rod housing to the bracket.


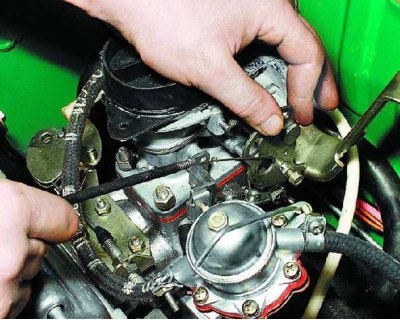
3. Remove the rod housing from the bracket and disconnect the rod from the air damper drive lever.


3. Remove the rod housing from the bracket and disconnect the rod from the air damper drive lever.


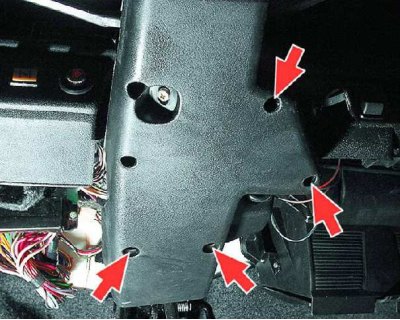
4. In the passenger compartment, unscrew the four screws securing the steering column covers.
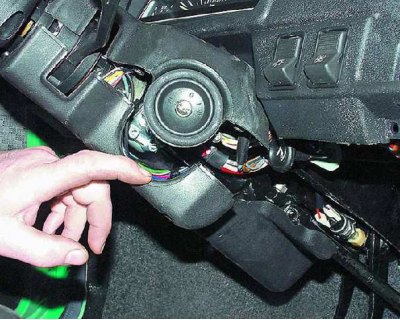
4. In the passenger compartment, unscrew the four screws securing the steering column covers.


5. Press the lower steering column cover down slightly to gain access to the air damper drive linkage mounting bracket.
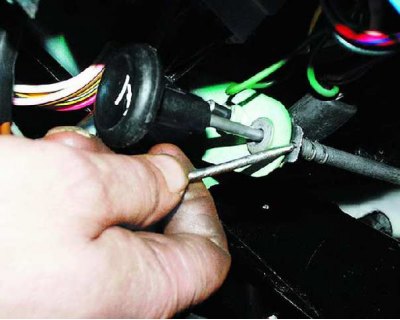
5. Press the lower steering column cover down slightly to gain access to the air damper drive…


6. Insert an awl into the hole in the retainer and, using the awl as a lever, slide the retainer out of the slot in the end of the rod housing.
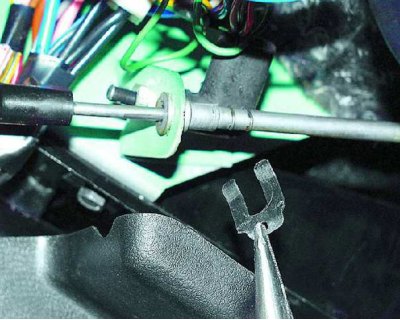

6. Insert an awl into the hole in the retainer and, using the awl as a lever, slide the retainer…


7. Use pliers to completely remove the retainer.
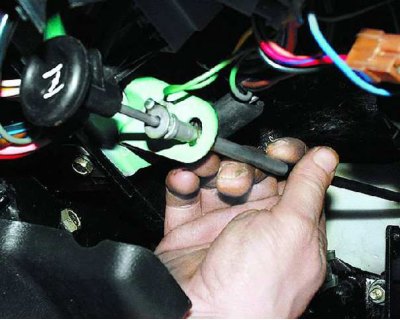
7. Use pliers to completely remove the retainer.


8. Pull the rod towards you from the holes in the bracket and the front shield.

(Original source is on the resource: vazbook.ru)
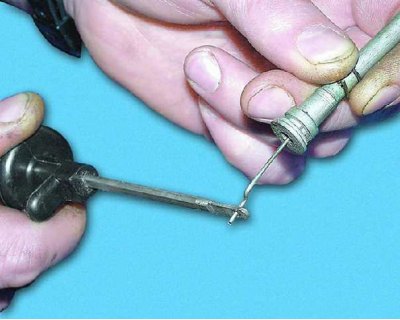
8. Pull the rod towards you from the holes in the bracket and the front shield.


9. Pull the handle with the rod out of the casing and, turning the handle, remove it from the rod. Install the rod in the reverse order of removal.
9. Pull the handle with the rod out of the casing and, turning the handle, remove it from the rod.…


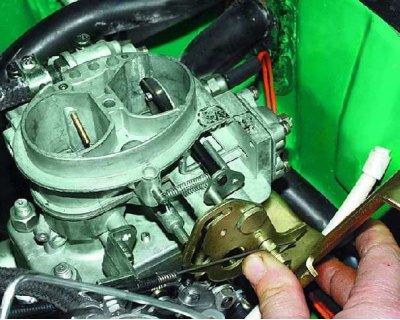
10. Before tightening the bolt that secures the tie rod to the choke lever, adjust its drive. To do this, turn the choke lever so that it is fully open.
10. Before tightening the bolt that secures the tie rod to the choke lever, adjust its drive. To do…


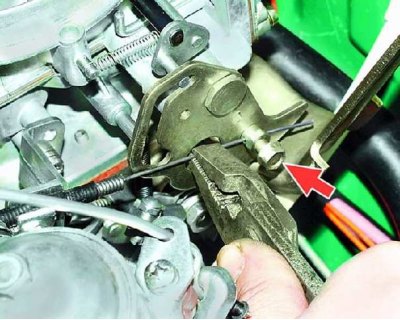
11. Pull the rod completely out of the shell and...
11. Pull the rod completely out of the shell and...


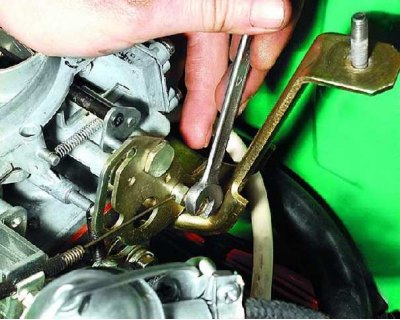
12....tighten the bolt securing the rod to the air damper lever (make sure the rod is not bent).

12....tighten the bolt securing the rod to the air damper lever (make sure the rod is not bent).
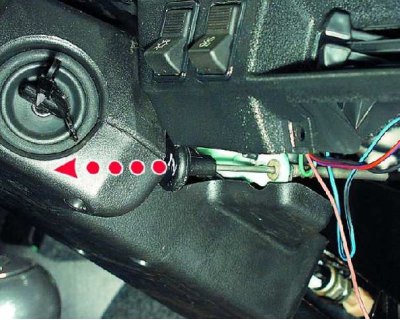

13. Check the correct adjustment of the drive. To do this, pull the air damper drive handle on the instrument panel all the way out. In this case...
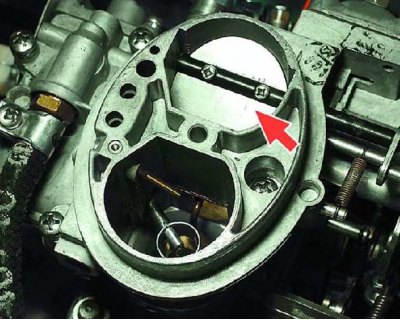
13. Check the correct adjustment of the drive. To do this, pull the air damper drive handle on the…


14....the air damper should be completely closed.
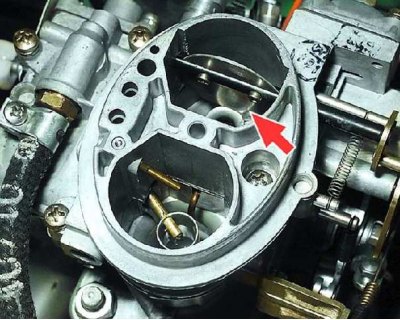
14....the air damper should be completely closed.


15. Press the air damper drive handle all the way down – the air damper should open completely. This can be checked...
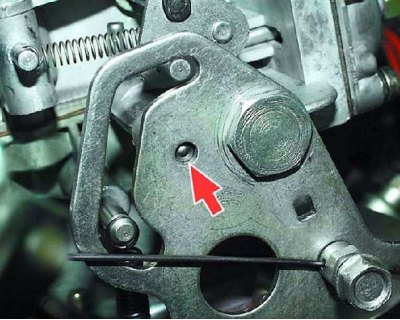
15. Press the air damper drive handle all the way down – the air damper should open completely.…


16....on the ball of the lever lock, which should fit into the hole on the lever.
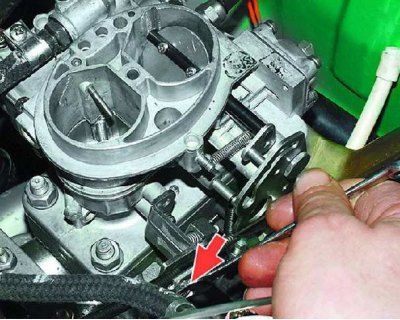
16....on the ball of the lever lock, which should fit into the hole on the lever.


17. If the rod cannot be used to adjust the complete closure of the air damper, loosen the rod housing mounting bolt.
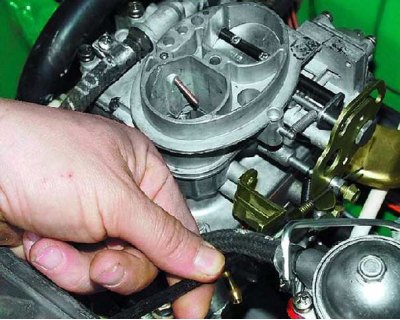
17. If the rod cannot be used to adjust the complete closure of the air damper, loosen the rod…


18. Move the casing until the damper is completely closed. Tighten the casing mounting bolt. Then check again and, if necessary, adjust the full opening of the air damper using the rod.


This article is available at russian, bulgarian, belarusian, ukrainian, serbian, croatian, romanian, polish, slovak, hungarian
The text was reviewed by the specialist: Grigory Vologodtsev

Share with friends:

Previous articles
VAZ-11113: Fuel system
Next articles

Replacing the traction and adjusting the throttle drive
Fuel pump repair
Removal and installation the fuel pump
Checking the fuel pump
Removal and installation the air filter
Removal and installation the carburetor
Carburetor repair
Adjusting the carburetor trigger
Adjusting the fuel level in the carburetor float chamber
Adjusting engine idle speed

More articles from other manuals on VAZ cars:
➠ Replacing the camshaft drive chain damper VAZ-21061 (1976-2006)
➠ Replacing and adjusting the tension of the generator drive belt VAZ-21099 (1990-2004)
➠ Replacing and adjusting the tension of the generator drive belt VAZ-2115 (1997-2012)
➠ Adjusting the tension and replacing the coolant pump drive belt VAZ-21214 (1994-2006)
➠ Adjusting the tension of the pump drive belt VAZ-21011 (1974-1983)
Link in different formats to this page


Visitor comments

No comments yet


How much will 12 + 27 ?


VAZ-1111 (1988-1996) 
  • General information
  • Vehicle description
  • Vehicle device
  • Vehicle operation
  • Maintenance
  • Applications
  • Power unit
  • Engine repair
  • Cooling system
  • Lubrication system
  • Supply system
  • Transmission
  • Clutch
  • Transmission
  • Chassis
  • Front suspension and wheels
  • Rear suspension
  • Steering
  • Brake system
  • Body
  • Exterior
  • Interior
  • Electrical equipment
  • Engine electrics
  • Equipment and devices


VAZ-11113 (1996-2003) 
  • General information
  • Introduction to the guide
  • User manual
  • Maintenance
  • Power unit
  • Engine repair
  • Cooling and lubrication system
  • Fuel system
  • Exhaust system
  • Transmission
  • Car gearbox
  • Clutch and drive shafts
  • Chassis
  • Front suspension
  • Rear suspension
  • Steering
  • Brake system
  • Body
  • Exterior
  • Interior
  • Doors and locks
  • Electrical equipment
  • Equipment and devices
  • Lighting and signaling
  • Engine electrics
  • Ignition system


VAZbook.ru © 2017 · Mobile version · Contact with administration · Sitemap: EN BG BY UA RS HR RO PL SK HU · Site search · News and articles VAZ-1111 · VAZ-11113 · VAZ-2101 · VAZ-21011 · VAZ-2104 · VAZ-2105 · VAZ-21051 · VAZ-2106 · VAZ-21061 · VAZ-2107 · VAZ-21099 · VAZ-2109 · VAZ-2108 · VAZ-2110 · VAZ-2112 · VAZ-2114 · VAZ-2115 · VAZ-2121 · VAZ-21213 · VAZ-21214 ·
The site stores technical data using cookies to improve the service.