
English Русский
Български
Беларускі
Український
Српски
Hrvatski
Română
Polski
Slovenský
Magyar
| Articles | Contacts | Sitemap |   
Repair and maintenance Lada Repair and maintenance Mazda Repair and maintenance Mitsubishi Repair and maintenance Toyota Repair and maintenance Land Rover Repair and maintenance Hyundai Repair and maintenance Nissan
VAZbook.ru


Main     1111   2101   2105   2106   2107   2109   2110   2115   2121  
VAZ-2110 (1995-2007) VAZ-2112 (1999-2007)
  • Main
  • «Lada»
  • VAZ-2110
  • Chassis
  • Steering
  • Steering column bearings — replacement

Steering column bearings — replacement (VAZ-2110)

            0

Contents: Removal ↓ Installation ↓

Removal


1. Remove the steering column assembly (see "Steering column assembly - removal, installation, replacement").

2. Install the steering column in a vice.

3. Using a 13 mm open-end wrench, hold the head of the crosspiece flange tie bolt and use a 13 mm socket wrench to unscrew its nut.
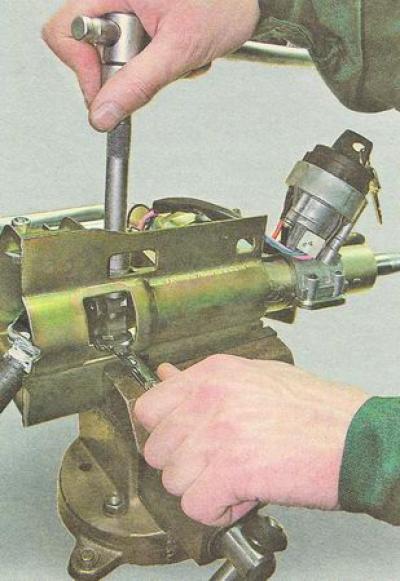
3. Using a 13 mm open-end wrench, hold the head of the crosspiece flange tie bolt and use a 13 mm…


4. Remove the tie bolt and remove the intermediate steering shaft crosspiece flange from the splines of the upper shaft.

5. Remove the thrust sleeve.
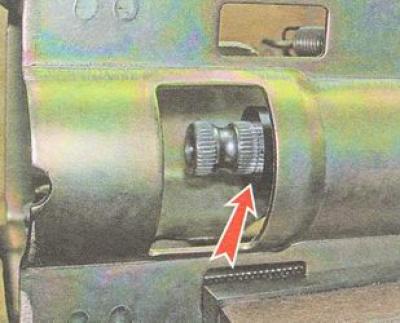
5. Remove the thrust sleeve.


6. To install the steering shaft in its original position during pressing, use a marker to mark the position of the lower end of the steering shaft on the bracket.

7. Insert the key into the ignition switch and turn it to position "I". In this position, the anti-theft device lock is retracted into the ignition switch housing and stops holding the steering shaft from turning.


Warning: Attempting to press out the steering shaft while the anti-theft device is on will result in damage to the steering shaft.


8. Using a hammer, a soft metal punch or a wooden block, press the steering shaft out of the bracket pipe towards the steering wheel mount.
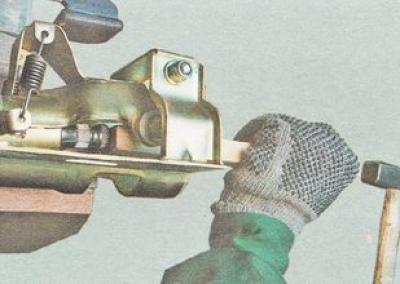
8. Using a hammer, a soft metal punch or a wooden block, press the steering shaft out of the…


9. Remove the steering shaft from the steering column tube together with the upper bearing.
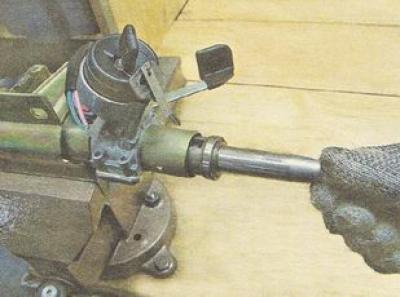
9. Remove the steering shaft from the steering column tube together with the upper bearing.


10. We rest the upper end of the steering shaft on a wooden pad. Using light blows of a hammer on the jaws of the pliers, we press the bearing off the steering shaft.

Caution: To avoid damaging the steering shaft surface when removing the bearing, do not squeeze the pliers.
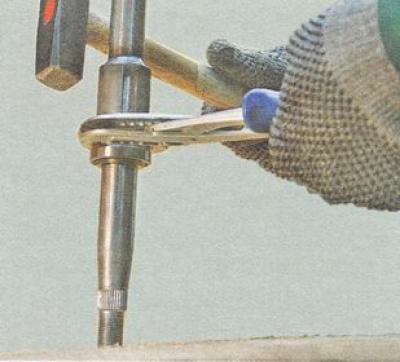

Caution: To avoid damaging the steering shaft surface when removing the bearing, do not squeeze the…


11. Both steering shaft bearings are mounted on plastic bushings, with the wide side oriented towards the thickening in the center of the steering shaft.
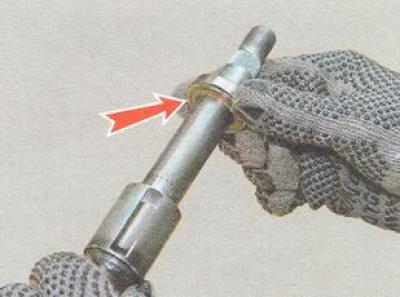

11. Both steering shaft bearings are mounted on plastic bushings, with the wide side oriented…


12. With a hammer through a punch, (you can use a head of the appropriate size with an extension) we press out the lower steering shaft bearing from the bracket pipe.
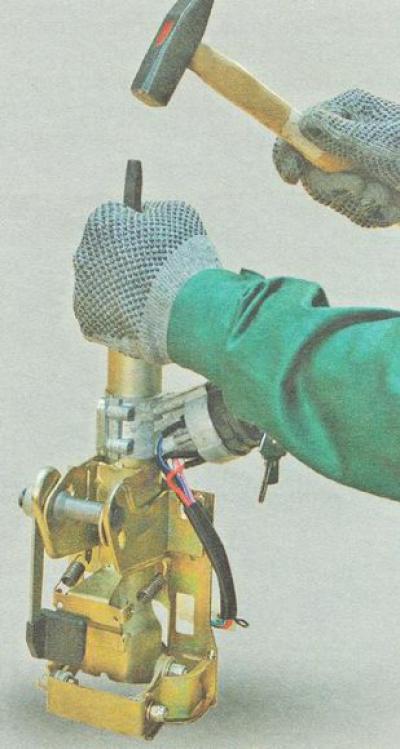
12. With a hammer through a punch, (you can use a head of the appropriate size with an extension)…


Installation


1. Using a mandrel or a head of a suitable diameter with an extension, press the lower bearing of the steering shaft into the pipe until it stops, with the wide side of the plastic sleeve facing up.

Warning: When pressing in, select a mandrel or head of such a diameter that it rests on the outer ring of the bearing.


2. Insert the upper steering shaft into the bracket tube and press the steering shaft into the lower bearing until it stops.
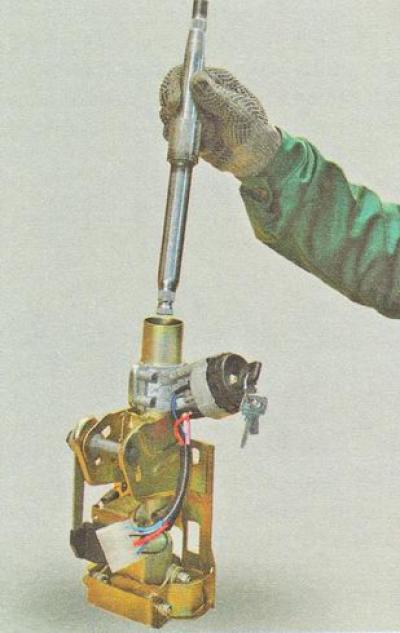
2. Insert the upper steering shaft into the bracket tube and press the steering shaft into the…


3. Place the upper bearing onto the upper end of the steering shaft with the wide side of the plastic sleeve facing down.

4. Resting the punch against the outer ring of the bearing, press it into the pipe until it stops.
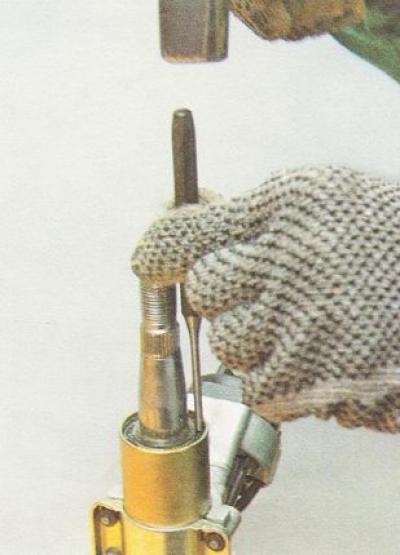
4. Resting the punch against the outer ring of the bearing, press it into the pipe until it stops.


5. Make sure that the lower end of the steering shaft is opposite the previously applied mark on the bracket

6. Check the operation of the ignition switch anti-theft device.

7. If necessary, lightly tap the ends of the steering shaft with a hammer through a wooden spacer (at this time the lock must be open) we move it in the steering column tube, achieving its easy blocking and release by the anti-theft device.

8. Further assembly and installation of the steering column on the vehicle is carried out in the reverse order of removal.


This article is available at russian, bulgarian, belarusian, ukrainian, serbian, croatian, romanian, polish, slovak, hungarian
The text was reviewed by the specialist: Grigory Vologodtsev

Share with friends:

Previous articles
VAZ-2110: Steering
Next articles

Steering column assembly — removal, installation, replacement
Steering column tilt mechanism — adjustment
Decorative steering column trims — removal, installation, replacement
Steering wheel — removal, installation, replacement
Steering — device and description
Tie Rod End — Removal, Installation, Replacement
Steering rods — removal, installation, replacement
Steering gear assembly with steering rods — removal and installation
Steering rack boot — removal, installation, replacement

More articles from other manuals on VAZ cars:
➠ Replacing steering shaft bearings VAZ-11113 (1996-2003)
➠ Checking and adjusting the clearance in the steering worm… VAZ-21011 (1974-1983)
➠ Steering column switches VAZ-2105 (1979-2010)
➠ Steering column switches VAZ-2106 (1976-2006)
➠ Steering column switches VAZ-2107 (1982-2012)
Link in different formats to this page


Visitor comments

No comments yet


How much will 36 + 21 ?


VAZ-2110 (1995-2007) 
  • General information
  • Vehicle description
  • Specifications
  • User manual
  • Maintenance
  • Operation and maintenance
  • Tips for car owner
  • Power unit
  • Engine repair
  • Supply system
  • Control system
  • Cooling system
  • Exhaust system
  • Transmission
  • Clutch
  • Car gearbox
  • Front wheel drives
  • Chassis
  • Suspension and wheels
  • Steering
  • Brake system
  • Body
  • Exterior
  • Interior
  • Doors and glass
  • Tailgate
  • Ventilation and heating
  • Electrical equipment
  • Equipment and devices
  • Headlights and lighting
  • Engine electrics
  • Electrical circuits


VAZ-2112 (1999-2007) 
  • General information
  • Operation and maintenance
  • Power unit
  • Engine repair
  • Supply system
  • Control system
  • Cooling system
  • Exhaust system
  • Transmission
  • Clutch
  • Car gearbox
  • Front wheel drives
  • Chassis
  • Wheels and tires
  • Car suspension
  • Steering
  • Brake system
  • Body
  • Exterior
  • Interior
  • Doors and glass
  • Tailgate
  • Ventilation and heating
  • Electrical equipment
  • Equipment and devices
  • Headlights and lighting
  • Engine electrics
  • Electrical circuits


VAZbook.ru © 2017 · Mobile version · Contact with administration · Sitemap: EN BG BY UA RS HR RO PL SK HU · Site search · News and articles VAZ-1111 · VAZ-11113 · VAZ-2101 · VAZ-21011 · VAZ-2104 · VAZ-2105 · VAZ-21051 · VAZ-2106 · VAZ-21061 · VAZ-2107 · VAZ-21099 · VAZ-2109 · VAZ-2108 · VAZ-2110 · VAZ-2112 · VAZ-2114 · VAZ-2115 · VAZ-2121 · VAZ-21213 · VAZ-21214 ·
The site stores technical data using cookies to improve the service.