
Removing
To carry out repair work on the removal, installation, replacement of the tie rod end, you will need a ball joint puller.
1. We prepare the car for work (see paragraphs 2b and 4 "Preparing the car for maintenance and repair").
2. Remove the front wheel (see "Wheel - replacement").
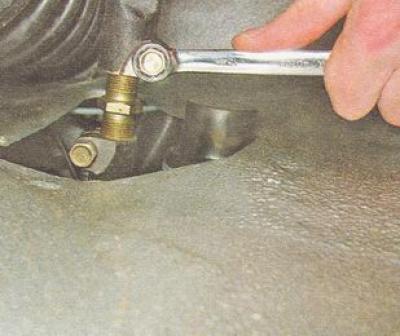
3. Using a 13 mm spanner, loosen the tightening bolt of the outer tie rod end.
4. Straighten with pliers and remove the cotter pin from the ball pin hole.
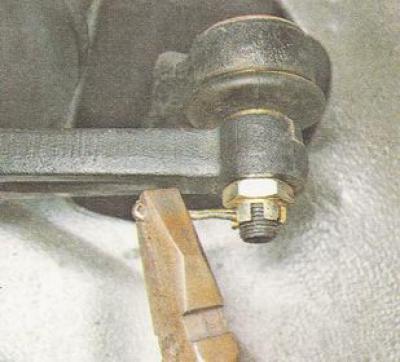
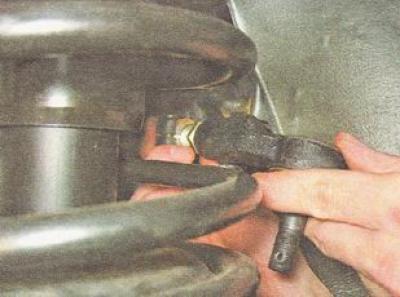
5. Using a 19 mm spanner, unscrew the castellated nut of the ball pin.
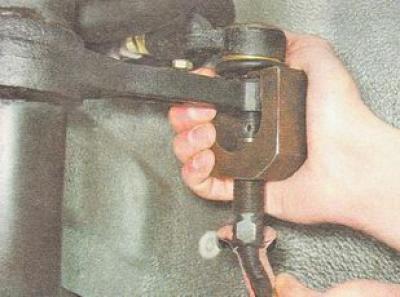
6. With a puller, we press the ball pin out of the hole in the steering knuckle of the front suspension strut.
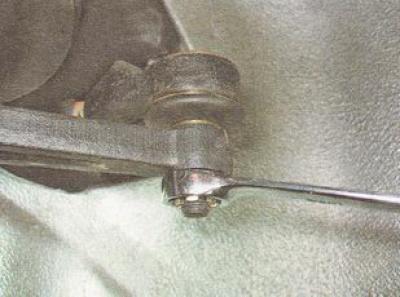
7. Rotating the outer tie rod end, unscrew it from the adjusting insert.
Helpful advice. If it is necessary to keep the wheel alignment adjustment, we count the number of revolutions made.
Installation
1. We cover the threaded part of the adjusting insert with Litol-24 grease or similar.
2. We screw a new tie rod end onto the adjusting insert.
Helpful advice. To maintain the angle of convergence of the wheels, we screw the new tie rod end onto the adjusting insert by the same number of revolutions that was made when unscrewing the old tie rod end.
3. Insert the ball pin into the hole in the swing arm of the rack and wrap the castellated nut.
4. Tightening the nut to a torque of 27.1-33.4 Nm (2.8-3.4 kgf·m) align the hole in the ball stud with the nearest slot in the nut.
5. We split the nut and spread the ends of the cotter pin in different directions.
6. We tighten the coupling bolt of the tie rod end with a torque of 19.1-30.9 N·m (2.0-3.1 kgf·m).