To replace the lamp 1 (pic. 51) dipped or main beam in the headlamp, turn cover 3 counterclockwise, disconnect the block from the lamp, remove the antennae of the spring retainer 4 from the grooves and remove the lamp.
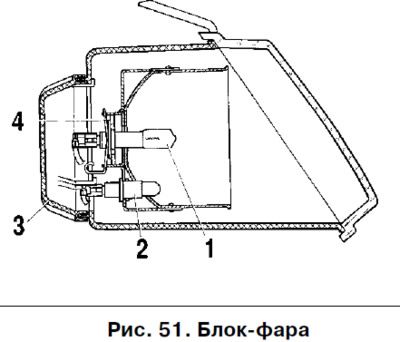
In the variant, to remove cover 3, press the latch located in its lower part.
To replace the parking light bulb, remove the socket 2 complete with the bulb from the socket and pull the bulb towards you.
To replace the bulb in the turn signal, disconnect the block and turn the cartridge counterclockwise. The lamp is removed from the socket by turning it counterclockwise. In a variant, the dismantling of the cartridge with the lamp is carried out by turning it clockwise.
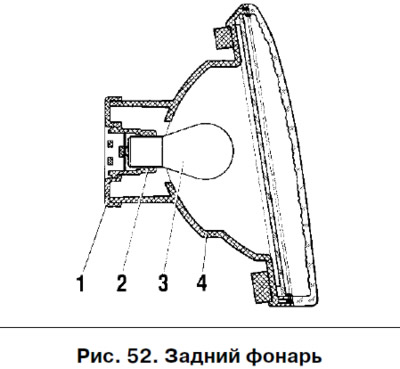
To replace the lamp in the rear light, remove the plugs in the upholstery, contact part 1 (pic. 52), which, assembled with lamps, is held in the housing by 4 lanterns with latches. To remove bulb 3 from socket 2, press the bulb and turn it counterclockwise.
To replace indicator lamp 1 (pic. 53) or instrument lighting lamp 2, remove the shield from the instrument cluster, for which unscrew 4 screws, pull it towards you and lift it up. Then bend the upper retaining plates, unscrew the two screws securing the instrument cluster to the lugs 4, pull it towards you and, if necessary, disconnect the wire bundles from the pads 3. Turn the lamp to be replaced counterclockwise and remove it from the socket.
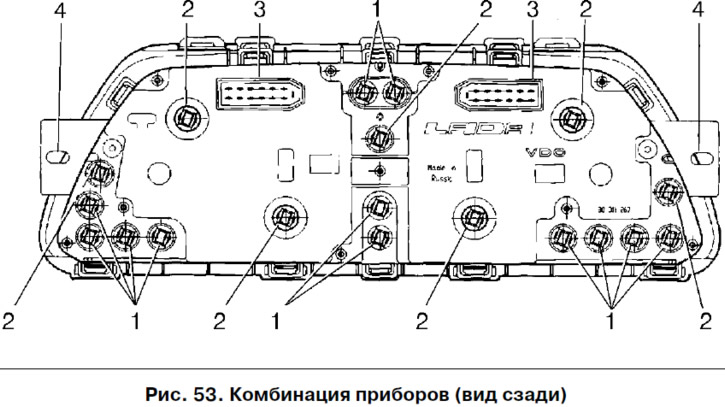
In the variant version of the indicator lamps, LEDs are used that do not require replacement during the entire life of the vehicle.
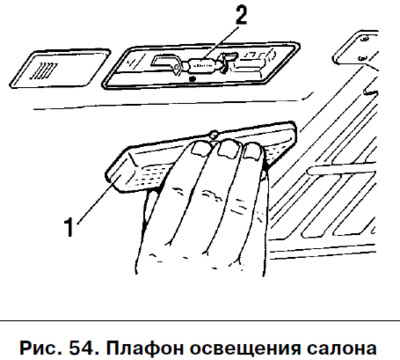
In the dome light (pic. 54) change a burnt-out lamp 2 after first removing the diffuser 1, for which press the sides in the central part of the diffuser with your fingers and pull it down. The lamp is held in the plafond by spring contacts.
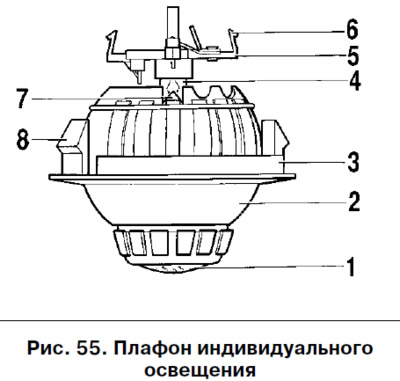
To replace a burnt out lamp 4 (pic. 55) in the ceiling lamp for individual lighting, carefully pry off the body 2 with a screwdriver in the socket and, holding the lampshade by the tube 1, pull it down. The plafond is held in the socket with the help of latches 8 of the adjusting ring 3. Also, carefully using a screwdriver, disengage the latches 6 of the cartridge 5 in the grooves and pull the cartridge towards you. After replacing the lamp, install the socket 5 so that the guide slot 7 of the body 2 includes the socket element with the appropriate configuration.
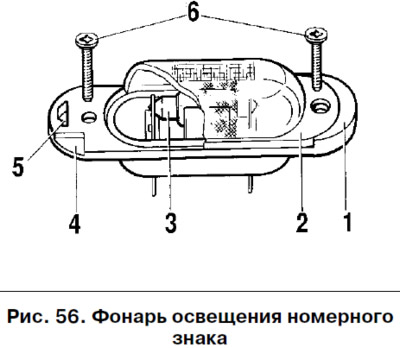
Burnt out lamp 3 (pic. 56) change in the license plate light only after removing it from the vehicle, to do this, unscrew screws 6, insert a screwdriver into groove 4, press latch 5 with your finger to the center and carefully remove diffuser 2 with a screwdriver. Lamp 3 in housing 1 is held by spring contacts.
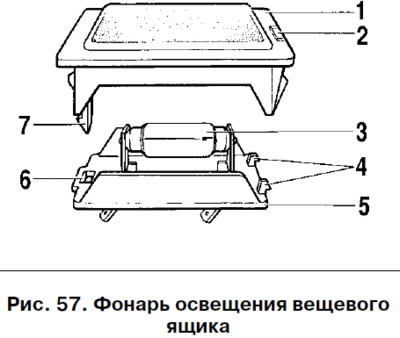
To replace a burnt out bulb 3 (pic. 57) in the glove box light, remove the light from its socket by inserting a screwdriver into slot 2 and carefully turning it towards you. Then press the latch 7, pull it out of the hole 6 and remove the diffuser 1. After replacing the lamp, install the diffuser 1 so that the mounting antennae 4 of the lamp housing 5 fit into its grooves.
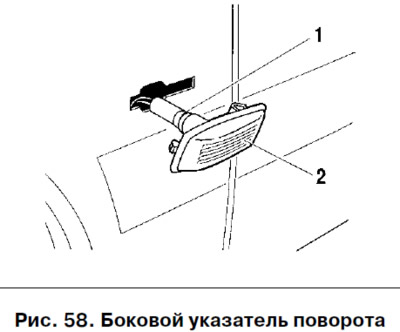
To replace the bulb in the side turn signal (pic. 58) remove it from the car. In the nest, the pointer is held by spring clips. Then remove the protective rubber cap 1, remove the cartridge assembly with the lamp from the housing 2 and pull the lamp towards you.