

Doors, windows, hood and trunk of cars VAZ-2121

Removal and installation of a forward door
Open the door all the way and disconnect the door stop by knocking out the pin of the attachment to the A-pillar. Hold the door open with an impact screwdriver 2 (pic. 8-12)...
Open the door all the way and disconnect the door stop by knocking out the pin of the attachment to the A-pillar. Hold the door open with an impact screwdriver 2 (pic. 8-12)...

Disassembly and assembly of the front door
When repairing and replacing components and mechanisms of the door, its disassembly is required. Unscrew the screws securing the armrest, after removing the decorative plastic...
When repairing and replacing components and mechanisms of the door, its disassembly is required. Unscrew the screws securing the armrest, after removing the decorative plastic...

Front door adjustment
Before adjusting, outline the hinges on the body pillar with an impact screwdriver 2 ( see fig. 8-12 ) loosen the screws 1 fastening the hinges. Set the necessary external...
Before adjusting, outline the hinges on the body pillar with an impact screwdriver 2 ( see fig. 8-12 ) loosen the screws 1 fastening the hinges. Set the necessary external...
Door lock adjustment
For normal operation of the door lock, adjust the position of the body 14 ( see fig 8-15 ) latch of the lock, having previously loosened the mounting bolts. Before adjusting the...
For normal operation of the door lock, adjust the position of the body 14 ( see fig 8-15 ) latch of the lock, having previously loosened the mounting bolts. Before adjusting the...

Removal, installation and adjustment of the tailgate
The tailgate is hung on the body on two hinges 2 (pic. 8-18) and locked with a padlock. In the open position, the door is held by two non-separable gas-filled stops 11. Pic. 8-18....
The tailgate is hung on the body on two hinges 2 (pic. 8-18) and locked with a padlock. In the open position, the door is held by two non-separable gas-filled stops 11. Pic. 8-18....

Removal, installation and adjustment of position of a cowl
Open the hood 3 (pic. 8-20), unpin the axle 1 of stop 2 and disconnect the stop from the hood. While holding the hood, unscrew the bolts 4 of the upper links of the hinges 5 and...
Open the hood 3 (pic. 8-20), unpin the axle 1 of stop 2 and disconnect the stop from the hood. While holding the hood, unscrew the bolts 4 of the upper links of the hinges 5 and...

Hood lock adjustment
If the lock does not securely lock the hood or unlocks with great effort, adjust the position of the lock (pic. 8-21). Pic. 8-21. Hood lock: 1 - lock case; 2 - spring; 3 -...
If the lock does not securely lock the hood or unlocks with great effort, adjust the position of the lock (pic. 8-21). Pic. 8-21. Hood lock: 1 - lock case; 2 - spring; 3 -...

Windshield replacement
To replace damaged glass, remove the wiper arms, seal bezel, etc. by pressing on the upper corners of the glass, squeeze it out. At the same time, the assistant should support the...
To replace damaged glass, remove the wiper arms, seal bezel, etc. by pressing on the upper corners of the glass, squeeze it out. At the same time, the assistant should support the...
Side glass and tailgate glass replacement
To remove the glass, remove the seal edging and, by pressing on the lower corners of the glass, squeeze it out. An assistant should support the glass from the outside. The glass...
To remove the glass, remove the seal edging and, by pressing on the lower corners of the glass, squeeze it out. An assistant should support the glass from the outside. The glass...

Windshield and headlight washers
The layout of the windshield and headlight washers is shown in Figure 8-25. In the headlight washer, a check valve 8 is installed between the pump and jets, which prevents leakage...
The layout of the windshield and headlight washers is shown in Figure 8-25. In the headlight washer, a check valve 8 is installed between the pump and jets, which prevents leakage...
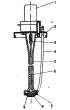
Removal and installation of the pressure washer pump
Disconnect electrical wires from motor 1 (pic. 8-26) and remove the tube from the pressure pump fitting. Turn cover 2 with the electric motor counterclockwise and remove them...
Disconnect electrical wires from motor 1 (pic. 8-26) and remove the tube from the pressure pump fitting. Turn cover 2 with the electric motor counterclockwise and remove them...
Dismantling and assembly of the pressure washer pump
Discharge pump and electric motor ( see fig. 8-26 ) fastened with screws and nuts to the cover 2. To disassemble the pump, unscrew the screws, remove the motor and cover,...
Discharge pump and electric motor ( see fig. 8-26 ) fastened with screws and nuts to the cover 2. To disassemble the pump, unscrew the screws, remove the motor and cover,...

Removal and installation of windshield washer jets
In cases of clogging of the jets, remove and disassemble them. On the side of the air intake box of the body, slightly squeeze the plastic sleeve 3 (pic. 8-27) and, picking it up...
In cases of clogging of the jets, remove and disassemble them. On the side of the air intake box of the body, slightly squeeze the plastic sleeve 3 (pic. 8-27) and, picking it up...
This section is available on russian, bulgarian, belarusian, ukrainian, serbian, croatian, romanian, polish, slovak, hungarian
More articles from other manuals on VAZ cars:
➠ Body: Doors and locks VAZ-11113 (1996-2003)
➠ Body: Doors and locks VAZ-21011 (1974-1983)
➠ Body: Doors and windows VAZ-21051 (1979-2010)
➠ Body: Doors and windows VAZ-21061 (1976-2006)
➠ Body: Doors and glass VAZ-2107 (1982-2012)
➠ Body: Doors and locks VAZ-21099 (1990-2004)
➠ Body: Doors and glass VAZ-2112 (1999-2007)
➠ Body: Doors, covers and windows VAZ-2115 (1997-2012)
➠ Body: Doors and locks VAZ-11113 (1996-2003)
➠ Body: Doors and locks VAZ-21011 (1974-1983)
➠ Body: Doors and windows VAZ-21051 (1979-2010)
➠ Body: Doors and windows VAZ-21061 (1976-2006)
➠ Body: Doors and glass VAZ-2107 (1982-2012)
➠ Body: Doors and locks VAZ-21099 (1990-2004)
➠ Body: Doors and glass VAZ-2112 (1999-2007)
➠ Body: Doors, covers and windows VAZ-2115 (1997-2012)
Share with friends:
- General information
- Vehicle device
- Car VAZ-21219
- Power unit
- Engine repair
- Cooling system
- Lubrication system
- Supply system
- Transmission
- Clutch
- Car gearbox
- Transfer case
- Cardan gear
- Rear axle and gearbox
- Front axle
- Chassis
- Front suspension
- Rear suspension
- Steering
- Brake system
- Body
- Exterior
- Interior
- Doors and windows
- Electrical equipment
- Equipment and devices
- Headlights and lighting
- Engine electrics
- General information
- Vehicle device
- User manual
- Power unit
- Engine repair
- Cooling and lubrication system
- Supply system
- Transmission
- Clutch
- Car gearbox
- Transfer case
- Cardan gear
- Rear axle and shafts
- Front axle and wheel drive
- Chassis
- Wheel suspension
- Steering
- Brake system
- Body
- Exterior
- Interior
- Electrical equipment
- Engine electrics
- Equipment and devices
- General information
- Vehicle information
- Troubleshooting
- Power unit
- Engine repair
- Cooling system
- Fuel system (carburetor)
- Fuel system (injector)
- Ignition system
- Control system
- Exhaust system
- Transmission
- Clutch
- Car gearbox
- Transfer case
- Cardan gear
- Front axle
- Rear axle
- Chassis
- Front suspension
- Rear suspension
- Steering
- Brake system
- Body
- Exterior
- Interior
- Doors, covers and windows
- Ventilation and heating
- Electrical equipment
- Equipment and devices
- Headlights and lighting
- Engine electrics
- Electrical circuits
VAZbook.ru © 2017 · Mobile version · Contact with administration · Sitemap: EN BG BY UA RS HR RO PL SK HU · Site search · News and articles
VAZ-1111 · VAZ-11113 · VAZ-2101 · VAZ-21011 · VAZ-2104 · VAZ-2105 · VAZ-21051 · VAZ-2106 · VAZ-21061 · VAZ-2107 · VAZ-21099 · VAZ-2109 · VAZ-2108 · VAZ-2110 · VAZ-2112 · VAZ-2114 · VAZ-2115 · VAZ-2121 · VAZ-21213 · VAZ-21214 ·