

Car engine repair VAZ-21213

Cross and longitudinal sections of the engine
Transverse and longitudinal sections of the VAZ-21213 engine are shown in fig. 2-1 and 2-2. Pic. 2-1. Longitudinal section of the VAZ-21213 engine. Pic. 2-2. Cross section of the...
Transverse and longitudinal sections of the VAZ-21213 engine are shown in fig. 2-1 and 2-2. Pic. 2-1. Longitudinal section of the VAZ-21213 engine. Pic. 2-2. Cross section of the...

Possible engine malfunctions, their causes and methods of elimination
Engine won't start Cause of malfunction Elimination Method 1. No fuel in carburetor: 1. Do the following: - clogged fuel lines or fuel filter; - blow out the fuel lines, flush the...
Engine won't start Cause of malfunction Elimination Method 1. No fuel in carburetor: 1. Do the following: - clogged fuel lines or fuel filter; - blow out the fuel lines, flush the...

Removal and installation of the engine
Put the car on a lift or over an inspection ditch and brake it with the parking brake lever. Stow the spare wheel and remove the spare wheel support tube. Disconnect the wires...
Put the car on a lift or over an inspection ditch and brake it with the parking brake lever. Stow the spare wheel and remove the spare wheel support tube. Disconnect the wires...

Engine disassembly
Wash the engine in a car wash, place it on a dismantling stand and drain the oil from the crankcase. Remove the carburetor by disconnecting the hoses and throttle linkage from it....
Wash the engine in a car wash, place it on a dismantling stand and drain the oil from the crankcase. Remove the carburetor by disconnecting the hoses and throttle linkage from it....

Engine Assembly
Assemble the engine as follows. Install a clean block on the stand and wrap the missing studs in it. Lubricate the bearing shells and thrust washers of the crankshaft, as well as...
Assemble the engine as follows. Install a clean block on the stand and wrap the missing studs in it. Lubricate the bearing shells and thrust washers of the crankshaft, as well as...
Engine break-in after repair
The overhauled engine is bench tested (running-in) without load for the following cycle: 750-800 min -1 - 2 minutes 1000 min -1 - 3 min 1500 min -1 — 4 min 2000 min -1 - 5 minutes...
The overhauled engine is bench tested (running-in) without load for the following cycle: 750-800 min -1 - 2 minutes 1000 min -1 - 3 min 1500 min -1 — 4 min 2000 min -1 - 5 minutes...
Checking the engine on a car after repair
After installing the engine on the car, carefully check the correct installation. Let the engine run for a while and then check: no leakage of coolant and fuel in the pipe...
After installing the engine on the car, carefully check the correct installation. Let the engine run for a while and then check: no leakage of coolant and fuel in the pipe...

Features of the cylinder block device
The main dimensions of the cylinder block are given in fig. 2-25. The cylinder block is cast from special low-alloy cast iron. Cylinder diameters are divided into five classes...
The main dimensions of the cylinder block are given in fig. 2-25. The cylinder block is cast from special low-alloy cast iron. Cylinder diameters are divided into five classes...

Check of a technical condition and repair of the block of cylinders
Examination Wash the cylinder block thoroughly and clean the oil passages. After blowing and drying with compressed air, inspect the cylinder block. Cracks in bearings or other...
Examination Wash the cylinder block thoroughly and clean the oil passages. After blowing and drying with compressed air, inspect the cylinder block. Cracks in bearings or other...

Features of the device of the connecting rod and piston group
The main dimensions of the connecting rod and piston group are given in fig. 2-29. Piston - aluminum cast. In the manufacture of the mass of pistons is strictly maintained....
The main dimensions of the connecting rod and piston group are given in fig. 2-29. Piston - aluminum cast. In the manufacture of the mass of pistons is strictly maintained....
Piston to cylinder selection
Estimated clearance between piston and cylinder (for new parts) equal to 0.025-0.045 mm. It is determined by measuring parts and is provided by installing pistons of the same...
Estimated clearance between piston and cylinder (for new parts) equal to 0.025-0.045 mm. It is determined by measuring parts and is provided by installing pistons of the same...

Disassembly and assembly of the connecting rod and piston group
Disassembly Remove the piston pin circlips from the piston, remove the pin and disconnect the connecting rod from the piston. Remove piston rings. Connecting rod bolts are pressed...
Disassembly Remove the piston pin circlips from the piston, remove the pin and disconnect the connecting rod from the piston. Remove piston rings. Connecting rod bolts are pressed...

Checking the technical condition of the connecting rod and piston group
Clean the piston from carbon deposits and remove all deposits from the lubrication channels of the piston and connecting rod. Check the details carefully. Cracks of any nature on...
Clean the piston from carbon deposits and remove all deposits from the lubrication channels of the piston and connecting rod. Check the details carefully. Cracks of any nature on...

Features of the device of the crankshaft and flywheel
The main dimensions of the crankshaft are given in fig. 2-36. Crankshaft - cast, cast iron, five-bearing. It is possible to regrind the crankshaft journals during repairs with a...
There is 1 comment
The main dimensions of the crankshaft are given in fig. 2-36. Crankshaft - cast, cast iron, five-bearing. It is possible to regrind the crankshaft journals during repairs with a...
There is 1 comment

Checking the technical condition and repair of the crankshaft and flywheel
Crankshaft Inspect the crankshaft. Cracks anywhere on the crankshaft are not allowed. Scratches, nicks and risks are not allowed on surfaces mating with the working edges of the...
Crankshaft Inspect the crankshaft. Cracks anywhere on the crankshaft are not allowed. Scratches, nicks and risks are not allowed on surfaces mating with the working edges of the...

Cylinder head and valve train
The main dimensions of valves, valve guides and valve seats are given in fig. 2-40. The cylinder head is cast aluminum alloy with pressed cast iron seats and valve guides. The...
The main dimensions of valves, valve guides and valve seats are given in fig. 2-40. The cylinder head is cast aluminum alloy with pressed cast iron seats and valve guides. The...

Valve clearance adjustment
Adjust the gaps on a cold engine, after adjusting the chain tension. After adjustment, the clearance should be 0.15±0.02 mm for intake valves and 0.2±0.02 for exhaust valves....
Adjust the gaps on a cold engine, after adjusting the chain tension. After adjustment, the clearance should be 0.15±0.02 mm for intake valves and 0.2±0.02 for exhaust valves....
Dismantling and assembly of a head of the block of cylinders
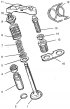
Disassembly If only one part needs to be replaced, the cylinder head may not be completely disassembled and only what is needed for replacement can be removed. Place the cylinder...
Disassembly If only one part needs to be replaced, the cylinder head may not be completely disassembled and only what is needed for replacement can be removed. Place the cylinder...

Check of a technical condition and repair of a head of the block of cylinders
Cylinder head Wash the cylinder head thoroughly and clean the oil passages. Remove carbon deposits from the combustion chambers and from the surface of the exhaust channels with a...
Cylinder head Wash the cylinder head thoroughly and clean the oil passages. Remove carbon deposits from the combustion chambers and from the surface of the exhaust channels with a...

Features of the camshaft device and its drive
Camshaft - cast iron, rests on five necks and rotates in an aluminum bearing housing mounted on the cylinder head. The main dimensions of the camshaft and bearing housing are...
Camshaft - cast iron, rests on five necks and rotates in an aluminum bearing housing mounted on the cylinder head. The main dimensions of the camshaft and bearing housing are...

Camshaft chain tension adjustment
Loosen nut 1 (pic. 2-56) tensioner. In this case, the rod 3 is released and the chain is tensioned by the shoe 7 ( rice. 2-55 ), which is acted upon by the spring 7 (pic. 2-56)....
Loosen nut 1 (pic. 2-56) tensioner. In this case, the rod 3 is released and the chain is tensioned by the shoe 7 ( rice. 2-55 ), which is acted upon by the spring 7 (pic. 2-56)....
Camshaft chain replacement
To remove the chain, brake the vehicle with the parking brake, open the hood, remove the spare wheel with support tube and the battery. Remove the air filter and close the...
To remove the chain, brake the vehicle with the parking brake, open the hood, remove the spare wheel with support tube and the battery. Remove the air filter and close the...

Checking the technical condition of the camshaft
Camshaft On the bearing journals of the camshaft, scuffing, nicks, scratches, aluminum enveloping from bearing housings are not allowed. On the working surfaces of the cams, wear...
Camshaft On the bearing journals of the camshaft, scuffing, nicks, scratches, aluminum enveloping from bearing housings are not allowed. On the working surfaces of the cams, wear...
Removal and installation of a head of cylinders
The cylinder head is removed from the engine on the car if the engine itself does not need to be removed to fix the problem, or if it is only necessary to remove carbon deposits...
The cylinder head is removed from the engine on the car if the engine itself does not need to be removed to fix the problem, or if it is only necessary to remove carbon deposits...
Features of car engine repair VAZ-21214
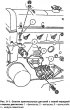
On VAZ-21214 cars, a 1.7 liter engine with a central fuel injection system is installed. In this system, fuel is injected by a single nozzle into a central injection unit...
On VAZ-21214 cars, a 1.7 liter engine with a central fuel injection system is installed. In this system, fuel is injected by a single nozzle into a central injection unit...

Features of car engine repair VAZ-21214-10
Engine 21214-10 - four-stroke, four-cylinder, with in-line vertical arrangement of cylinders and an overhead camshaft, with a distributed fuel injection system. The 21214-10...
Engine 21214-10 - four-stroke, four-cylinder, with in-line vertical arrangement of cylinders and an overhead camshaft, with a distributed fuel injection system. The 21214-10...

Features of car engine repair VAZ-21215-10
A DHW diesel engine is installed on a VAZ-21215-10 car (XUD-9SD). This chapter provides a brief description of the diagnostics of fuel and electrical equipment, the procedure for...
A DHW diesel engine is installed on a VAZ-21215-10 car (XUD-9SD). This chapter provides a brief description of the diagnostics of fuel and electrical equipment, the procedure for...

Removal and installation of the timing belt VAZ-21215-10
To remove the timing belt, you must: remove covers 3, 5 and 6 (pic. 9-29) timing drive; securely fix the flywheel with tool OUT0000049; loosen the crankshaft pulley bolts; remove...
To remove the timing belt, you must: remove covers 3, 5 and 6 (pic. 9-29) timing drive; securely fix the flywheel with tool OUT0000049; loosen the crankshaft pulley bolts; remove...

Removal and installation of the VAZ-21215-10 generator drive belt
Removing Loosen the roller fixing bolt 2 and bolt 9 (pic. 9-31). Tighten bolt 8 until it rests against the limiter. Remove the belt. Pic. 9-31. Removing and installing the...
Removing Loosen the roller fixing bolt 2 and bolt 9 (pic. 9-31). Tighten bolt 8 until it rests against the limiter. Remove the belt. Pic. 9-31. Removing and installing the...
This section is available on russian, bulgarian, belarusian, ukrainian, serbian, croatian, romanian, polish, slovak, hungarian
More articles from other manuals on VAZ cars:
➠ Electrical equipment: Engine electrics VAZ-11113 (1996-2003)
➠ Electrical equipment: Engine electrics VAZ-2101 (1970-1983)
➠ Electrical equipment: Engine electrics VAZ-2104 (1984-2012)
➠ Power unit: Engine repair VAZ-21061 (1976-2006)
➠ Power unit: Engine repair VAZ-2107 (1982-2012)
➠ Electrical equipment: Engine electrics VAZ-2108 (1984-2003)
➠ Power unit: Engine repair VAZ-2112 (1999-2007)
➠ Electrical equipment: Engine electrics VAZ-2114 (2004-2013)
➠ Electrical equipment: Engine electrics VAZ-11113 (1996-2003)
➠ Electrical equipment: Engine electrics VAZ-2101 (1970-1983)
➠ Electrical equipment: Engine electrics VAZ-2104 (1984-2012)
➠ Power unit: Engine repair VAZ-21061 (1976-2006)
➠ Power unit: Engine repair VAZ-2107 (1982-2012)
➠ Electrical equipment: Engine electrics VAZ-2108 (1984-2003)
➠ Power unit: Engine repair VAZ-2112 (1999-2007)
➠ Electrical equipment: Engine electrics VAZ-2114 (2004-2013)
Share with friends:
- General information
- Vehicle device
- Car VAZ-21219
- Power unit
- Engine repair
- Cooling system
- Lubrication system
- Supply system
- Transmission
- Clutch
- Car gearbox
- Transfer case
- Cardan gear
- Rear axle and gearbox
- Front axle
- Chassis
- Front suspension
- Rear suspension
- Steering
- Brake system
- Body
- Exterior
- Interior
- Doors and windows
- Electrical equipment
- Equipment and devices
- Headlights and lighting
- Engine electrics
- General information
- Vehicle device
- User manual
- Power unit
- Engine repair
- Cooling and lubrication system
- Supply system
- Transmission
- Clutch
- Car gearbox
- Transfer case
- Cardan gear
- Rear axle and shafts
- Front axle and wheel drive
- Chassis
- Wheel suspension
- Steering
- Brake system
- Body
- Exterior
- Interior
- Electrical equipment
- Engine electrics
- Equipment and devices
- General information
- Vehicle information
- Troubleshooting
- Power unit
- Engine repair
- Cooling system
- Fuel system (carburetor)
- Fuel system (injector)
- Ignition system
- Control system
- Exhaust system
- Transmission
- Clutch
- Car gearbox
- Transfer case
- Cardan gear
- Front axle
- Rear axle
- Chassis
- Front suspension
- Rear suspension
- Steering
- Brake system
- Body
- Exterior
- Interior
- Doors, covers and windows
- Ventilation and heating
- Electrical equipment
- Equipment and devices
- Headlights and lighting
- Engine electrics
- Electrical circuits
VAZbook.ru © 2017 · Mobile version · Contact with administration · Sitemap: EN BG BY UA RS HR RO PL SK HU · Site search · News and articles
VAZ-1111 · VAZ-11113 · VAZ-2101 · VAZ-21011 · VAZ-2104 · VAZ-2105 · VAZ-21051 · VAZ-2106 · VAZ-21061 · VAZ-2107 · VAZ-21099 · VAZ-2109 · VAZ-2108 · VAZ-2110 · VAZ-2112 · VAZ-2114 · VAZ-2115 · VAZ-2121 · VAZ-21213 · VAZ-21214 ·