English Русский
Български
Беларускі
Український
Српски
Hrvatski
Română
Polski
Slovenský
Magyar
| Articles | Contacts | Sitemap |   
Repair and maintenance Lada Repair and maintenance Mazda Repair and maintenance Mitsubishi Repair and maintenance Toyota Repair and maintenance Land Rover Repair and maintenance Hyundai Repair and maintenance Nissan
VAZbook.ru


Main     1111   2101   2105   2106   2107   2109   2110   2115   2121  
VAZ-1111 (1988-1996) VAZ-11113 (1996-2003)
  • Main
  • «Oka»
  • VAZ-11113
  • Chassis
  • Brake system
  • Repair of the main brake cylinder

Repair of the main brake cylinder (VAZ-11113)

            0

You will need:
  • key "12"
  • socket head "22"
  • crank
  • screwdriver

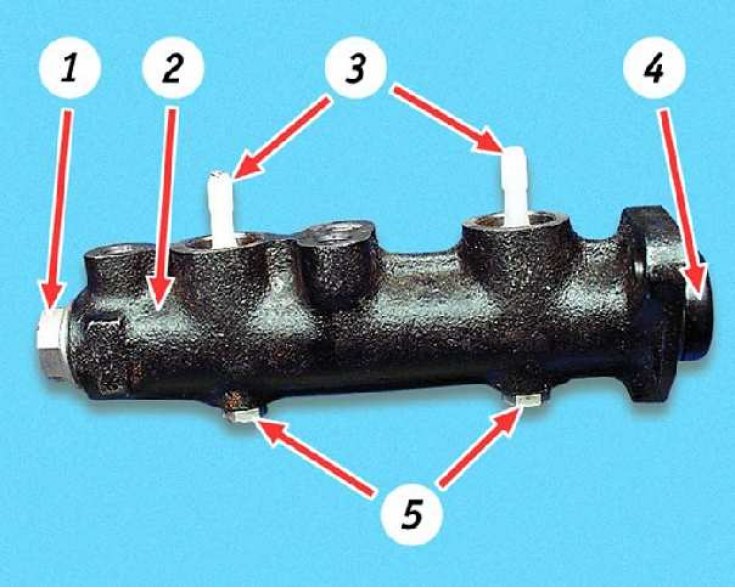
Master Brake Cylinder: 1 - cork; 2 – cylinder body; 3 – nipples; 4 – protective cap; 5 – piston…

Master Brake Cylinder: 1 - cork; 2 – cylinder body; 3 – nipples; 4 – protective cap; 5 – piston locking screws

Master Brake Cylinder: 1 - cork; 2 – cylinder body; 3 – nipples; 4 – protective cap; 5 – piston…


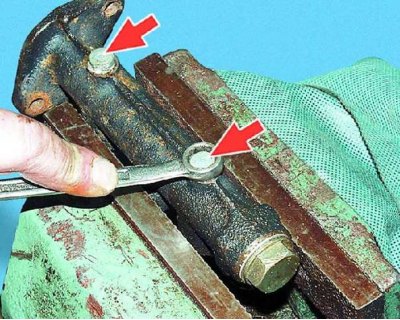
1. Loosen the two brake cylinder piston locking screws and remove them with the sealing washers.
1. Loosen the two brake cylinder piston locking screws and remove them with the sealing washers.


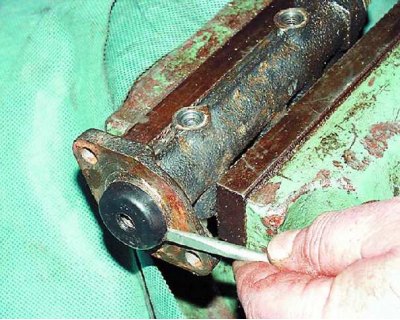
2. Remove the protective cap from the cylinder body.


2. Remove the protective cap from the cylinder body.


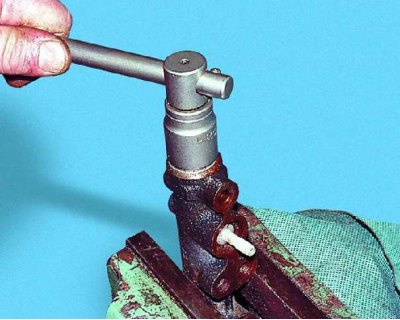
3. Unscrew the plug from the cylinder body and...
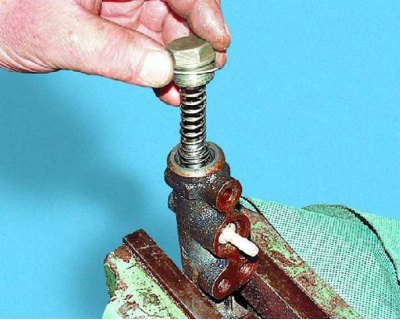
3. Unscrew the plug from the cylinder body and...


4....remove it together with the sealing washer, holding the spring.
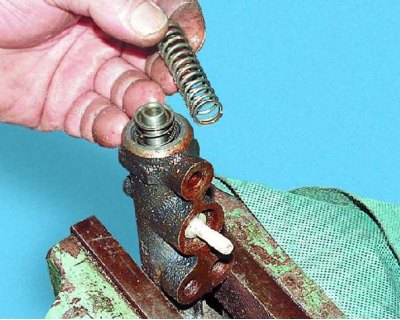
4....remove it together with the sealing washer, holding the spring.


5. Remove the rear brake actuator piston return spring from the cylinder body.
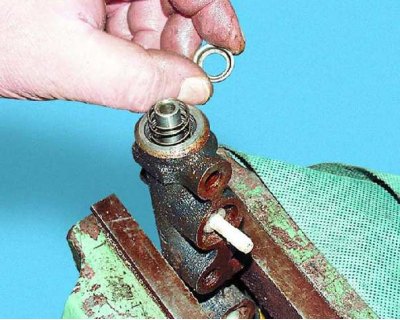
5. Remove the rear brake actuator piston return spring from the cylinder body.


6. Remove the cup from the rear brake actuator piston and...
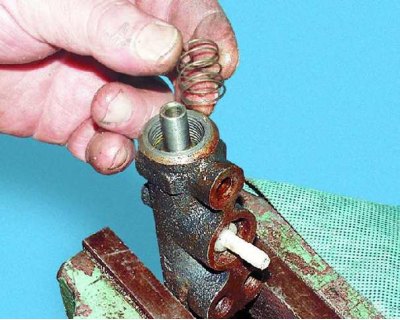

6. Remove the cup from the rear brake actuator piston and...


7....the piston sealing ring pressure spring.
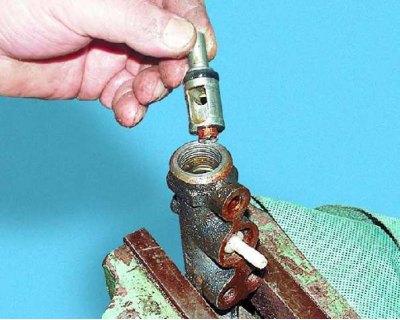
7....the piston sealing ring pressure spring.


8. Remove the rear brake actuator piston assembly with the sealing and spacer rings.
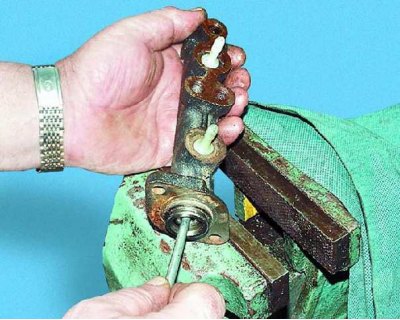
8. Remove the rear brake actuator piston assembly with the sealing and spacer rings.


9. Use a screwdriver to move the front brake actuator piston for further disassembly.
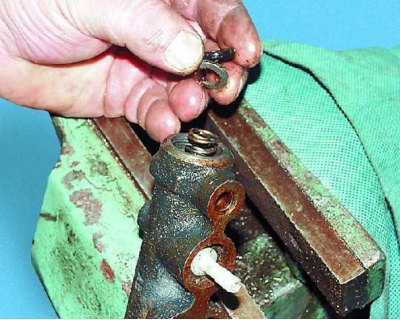
9. Use a screwdriver to move the front brake actuator piston for further disassembly.


10. Remove the O-ring and washer from the cylinder body.
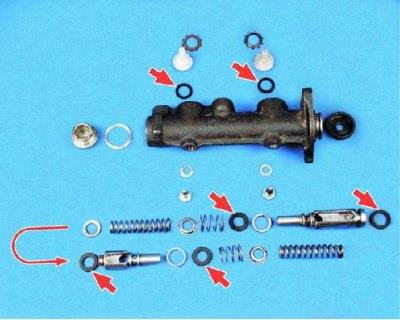
10. Remove the O-ring and washer from the cylinder body.


Replace the O-rings each time the master cylinder is disassembled (shown by arrows) new, even if they are in satisfactory condition.
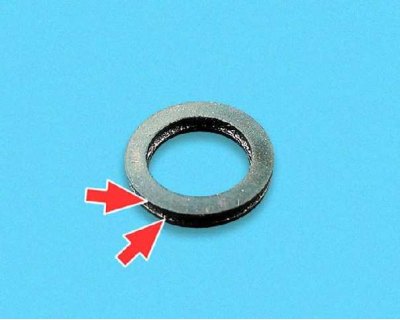
Replace the O-rings each time the master cylinder is disassembled (shown by arrows) new, even if…


Second sealing ring of the front brake actuator piston (from the main cylinder rod side) has two working edges. When assembling, pay special attention to their condition.
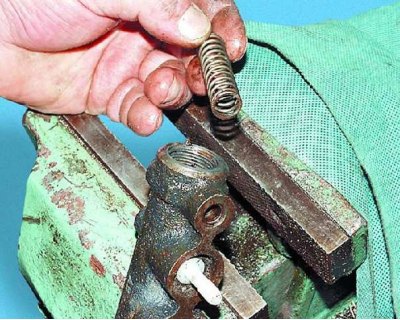
Second sealing ring of the front brake actuator piston (from the main cylinder rod side) has two…


11. Remove the front brake actuator piston return spring.
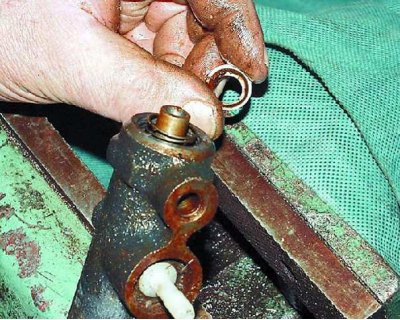
11. Remove the front brake actuator piston return spring.


12. Remove the cup and...
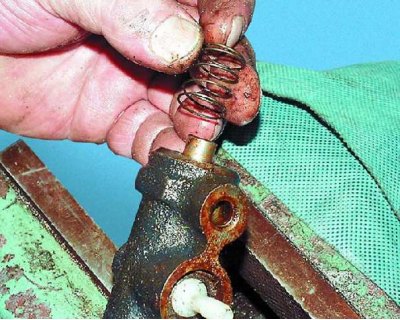
12. Remove the cup and...


13....the sealing ring pressure spring.
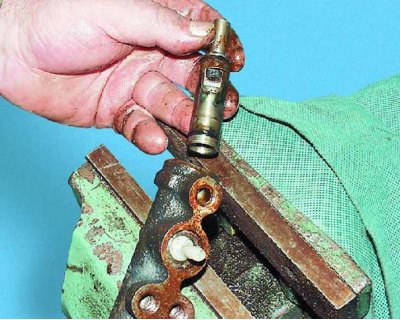
13....the sealing ring pressure spring.


14. Remove the front brake actuator piston assembly with the sealing and spacer rings.
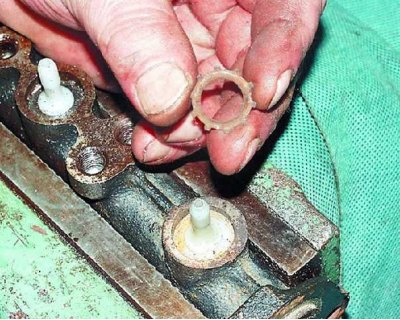
14. Remove the front brake actuator piston assembly with the sealing and spacer rings.


15. Use a thin screwdriver to pry up the lock washer and remove it.
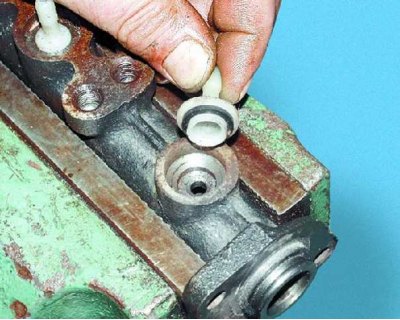
15. Use a thin screwdriver to pry up the lock washer and remove it.


16. Remove the fitting with the sealing gasket from the cylinder body.
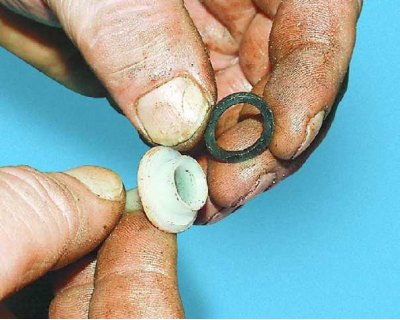
16. Remove the fitting with the sealing gasket from the cylinder body.


17. Remove the sealing gasket from the fitting.
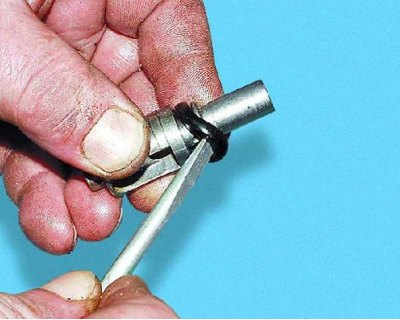
17. Remove the sealing gasket from the fitting.


18. Remove the seal and... from the rear brake actuator piston.
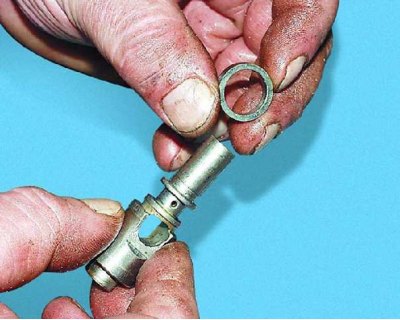
18. Remove the seal and... from the rear brake actuator piston.


19....spacer rings.
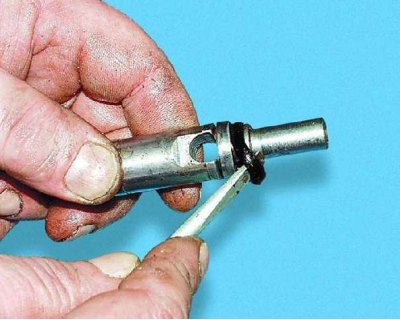
19....spacer rings.


20. Remove the seal from the front brake actuator piston...
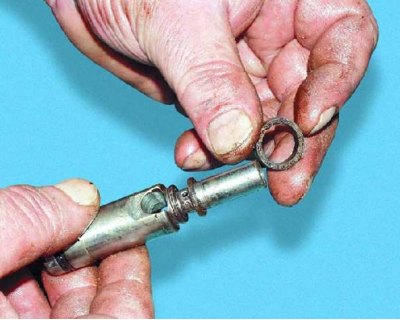
20. Remove the seal from the front brake actuator piston...


21....spacer and...
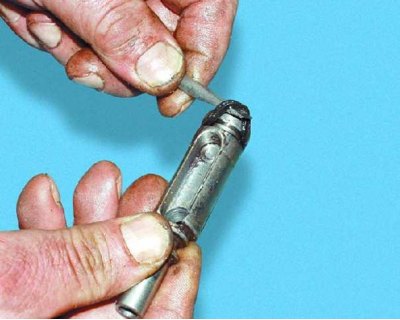
21....spacer and...


22....the second sealing ring.

23. Check the condition of the pistons and the master cylinder body. Cracks, burrs, scratches, etc. on the working surfaces are not allowed. The protective cap should not have cracks or ruptures in the rubber.

24. Flush all parts with clean brake fluid of the same brand used in your vehicle's brake system.

25. Assemble the master brake cylinder in the reverse order of disassembly. Before installation, moisten all parts of the master brake cylinder with brake fluid.

Caution! Avoid contact of parts with mineral and synthetic oils, kerosene, gasoline and diesel fuel: they may damage the sealing rings.


This article is available at russian, bulgarian, belarusian, ukrainian, serbian, croatian, romanian, polish, slovak, hungarian
The text was reviewed by the specialist: Grigory Vologodtsev

Share with friends:

Previous articles
VAZ-11113: Brake system
Next articles

Removal and installation the master brake cylinder
Replacing the vacuum booster
Wheel cylinder repair
Replacing the rear wheel cylinder
Repair of rear brake drum
Removal and installation the pressure regulator
Pressure regulator repair
Replacing brake hoses
Replacing brake pipes
Replacing the parking brake cable

More articles from other manuals on VAZ cars:
➠ Repair of the main brake cylinder VAZ-2115 (1997-2012)
➠ The device of the main cylinder of the brake drive VAZ-2121 (1977-1994)
➠ Checking the technical condition of cylinder head parts and… VAZ-2101 (1970-1983)
➠ Parking brake inspection and repair VAZ-21051 (1979-2010)
➠ Master Brake Cylinder — Removal and Installation VAZ-2106 (1976-2006)
Link in different formats to this page


Visitor comments

No comments yet


How much will 29 + 12 ?


VAZ-1111 (1988-1996) 
  • General information
  • Vehicle description
  • Vehicle device
  • Vehicle operation
  • Maintenance
  • Applications
  • Power unit
  • Engine repair
  • Cooling system
  • Lubrication system
  • Supply system
  • Transmission
  • Clutch
  • Transmission
  • Chassis
  • Front suspension and wheels
  • Rear suspension
  • Steering
  • Brake system
  • Body
  • Exterior
  • Interior
  • Electrical equipment
  • Engine electrics
  • Equipment and devices


VAZ-11113 (1996-2003) 
  • General information
  • Introduction to the guide
  • User manual
  • Maintenance
  • Power unit
  • Engine repair
  • Cooling and lubrication system
  • Fuel system
  • Exhaust system
  • Transmission
  • Car gearbox
  • Clutch and drive shafts
  • Chassis
  • Front suspension
  • Rear suspension
  • Steering
  • Brake system
  • Body
  • Exterior
  • Interior
  • Doors and locks
  • Electrical equipment
  • Equipment and devices
  • Lighting and signaling
  • Engine electrics
  • Ignition system


VAZbook.ru © 2017 · Mobile version · Contact with administration · Sitemap: EN BG BY UA RS HR RO PL SK HU · Site search · News and articles VAZ-1111 · VAZ-11113 · VAZ-2101 · VAZ-21011 · VAZ-2104 · VAZ-2105 · VAZ-21051 · VAZ-2106 · VAZ-21061 · VAZ-2107 · VAZ-21099 · VAZ-2109 · VAZ-2108 · VAZ-2110 · VAZ-2112 · VAZ-2114 · VAZ-2115 · VAZ-2121 · VAZ-21213 · VAZ-21214 ·
The site stores technical data using cookies to improve the service.