English Русский
Български
Беларускі
Український
Српски
Hrvatski
Română
Polski
Slovenský
Magyar
| Articles | Contacts | Sitemap |   
Repair and maintenance Lada Repair and maintenance Mazda Repair and maintenance Mitsubishi Repair and maintenance Toyota Repair and maintenance Land Rover Repair and maintenance Hyundai Repair and maintenance Nissan
VAZbook.ru


Main     1111   2101   2105   2106   2107   2109   2110   2115   2121  
VAZ-1111 (1988-1996) VAZ-11113 (1996-2003)
  • Main
  • «Oka»
  • VAZ-11113
  • Chassis
  • Brake system
  • Repair of rear brake drum

Repair of rear brake drum (VAZ-11113)

            0

You will need:
  • cylinder key, key "on 27"
  • pliers
  • screwdriver
  • hammer
  • jack
  • stand
  • wheel chocks

Lower the parking brake lever all the way down (the car is released).

Remove the rear wheel.

Inner diameter of brake drum, mm:
  • nominal 180
  • maximum permissible 181.5

Be sure to replace the drum if its internal diameter has reached the maximum permissible size.

(The text is published on the portal VazBook)

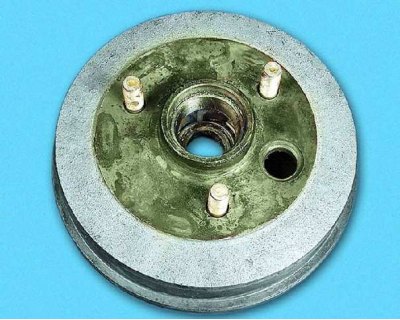
Attention! A defective brake drum reduces the durability of the brake shoes, leads to ineffective and uneven braking.

Attention! A defective brake drum reduces the durability of the brake shoes, leads to ineffective…


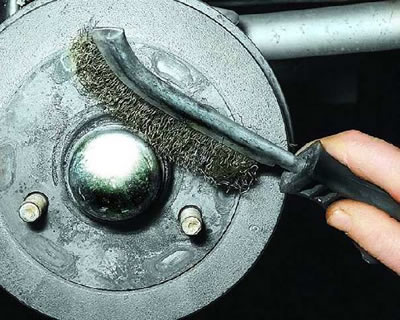
1. Clean any dirt from the brake drum and wheel hub cap.
1. Clean any dirt from the brake drum and wheel hub cap.


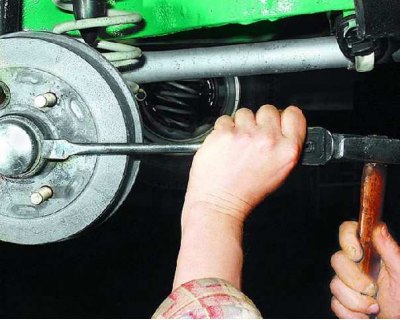
2. While turning the drum, carefully knock off the protective cap of the hub and...
2. While turning the drum, carefully knock off the protective cap of the hub and...


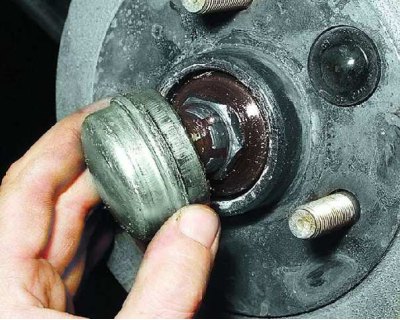
3....remove it from the drum.


3....remove it from the drum.


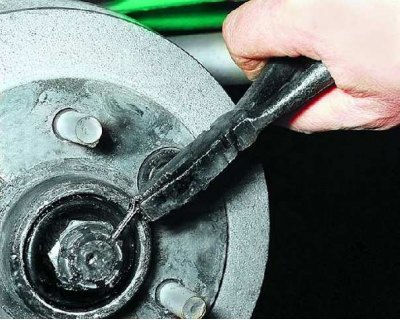
4. Bend the cotter pin and remove it from the hole in the hub axle.
4. Bend the cotter pin and remove it from the hole in the hub axle.


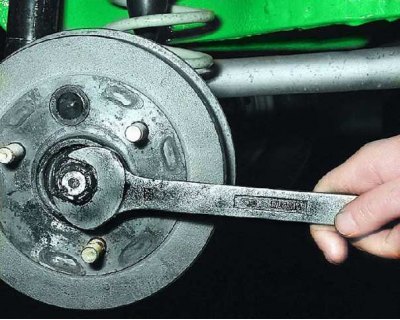
5. Loosen the hub nut.
5. Loosen the hub nut.


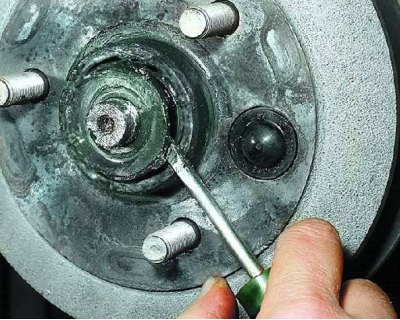
6. Remove the thrust washer.
6. Remove the thrust washer.


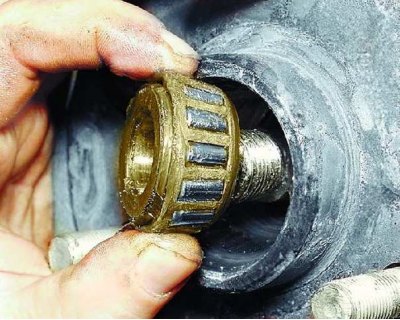
7. Remove the front (outer) hub bearing by gently pushing the drum toward you and then sliding it into place.
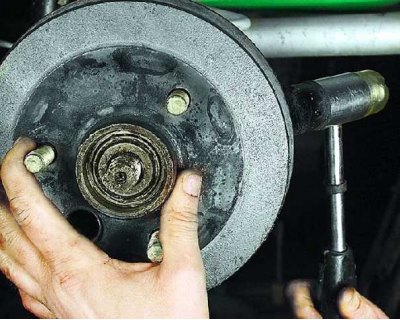

7. Remove the front (outer) hub bearing by gently pushing the drum toward you and then sliding it…


8. If the drum is difficult to remove, bring the shoes together by turning the adjusting nut of the expansion bar and knock the drum down with a rubber hammer.
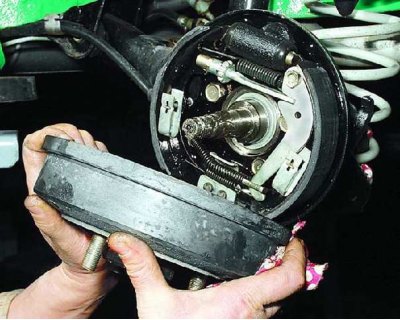
8. If the drum is difficult to remove, bring the shoes together by turning the adjusting nut of the…


9. Remove the brake drum.

9. Remove the brake drum.


10. Carefully inspect the drum. Be sure to replace the drum if you find chips or cracks on it.
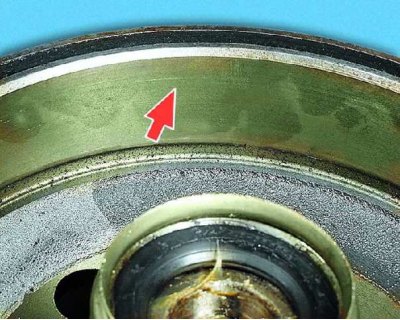
10. Carefully inspect the drum. Be sure to replace the drum if you find chips or cracks on it.


11. Inspect the working surface of the drum. If there are deep scratches, chips or ovality is visible, the drum must be replaced.
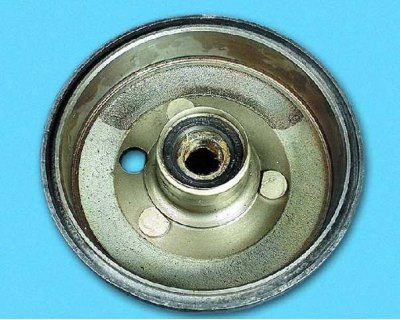
11. Inspect the working surface of the drum. If there are deep scratches, chips or ovality is…


12. The drum can be bored and ground, but its internal diameter must not exceed 181 mm.
12. The drum can be bored and ground, but its internal diameter must not exceed 181 mm.


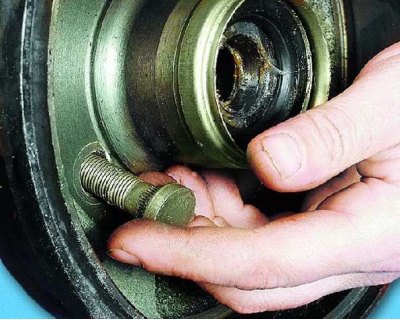
13. Replace wheel rim mounting studs that have a loose fit in the drum or have damaged threads.
13. Replace wheel rim mounting studs that have a loose fit in the drum or have damaged threads.


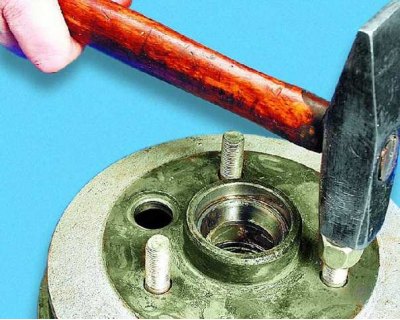
14. When replacing the drum, press out the studs from it, screwing the nuts onto them flush so as not to damage the threads. Also remove the oil seal, rear bearing and inner bearing rings (see subsection 5.2.3.).
14. When replacing the drum, press out the studs from it, screwing the nuts onto them flush so as…


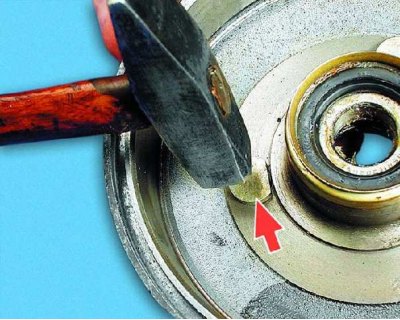
15. Press the studs into the new drum with the cut off part of the head towards the center. Press in the outer bearing races and install the rear bearing with the seal (see subsection 5.2.3.).
15. Press the studs into the new drum with the cut off part of the head towards the center. Press…


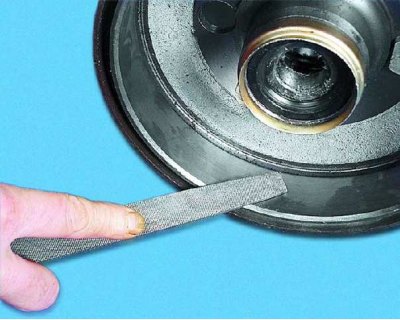
16. If a ridge has formed on the working surface of the drum as a result of wear, remove it with a file.
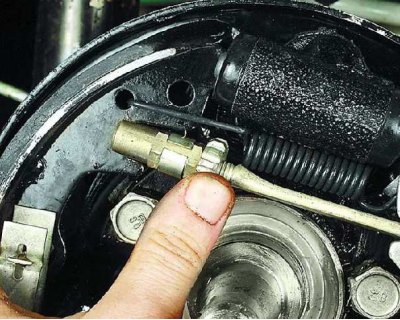
16. If a ridge has formed on the working surface of the drum as a result of wear, remove it with a…


17. Bring the pads together by screwing the adjusting nut onto half of the threaded part of the expansion bar.
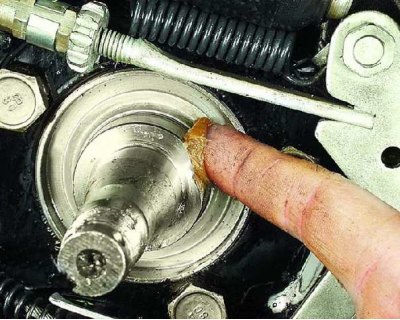
17. Bring the pads together by screwing the adjusting nut onto half of the threaded part of the…


18. Lubricate the journal with Litol-24 grease, install the brake drum and adjust the clearance in the wheel hub bearings (see subsection 5.2.4.).
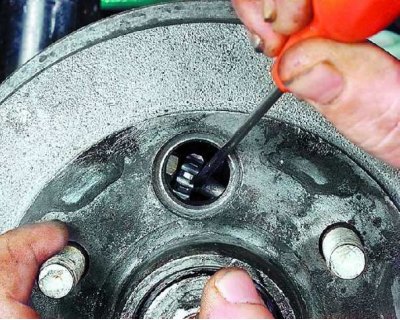
18. Lubricate the journal with Litol-24 grease, install the brake drum and adjust the clearance in…


19. Adjust the clearances between the brake shoes and the brake drum (see subsection 7.4.4.). Install the wheel, check the operation of the parking brake and adjust it if necessary (see subsection 7.4.3.).


This article is available at russian, bulgarian, belarusian, ukrainian, serbian, croatian, romanian, polish, slovak, hungarian
The text was reviewed by the specialist: Grigory Vologodtsev

Share with friends:

Previous articles
VAZ-11113: Brake system
Next articles

Replacing the front guide pin protective covers
Replacing the front brake disc
Front Caliper Repair
Removal and installation the front caliper
Replacing the rear wheel cylinder
Wheel cylinder repair
Replacing the vacuum booster
Removal and installation the master brake cylinder
Repair of the main brake cylinder

More articles from other manuals on VAZ cars:
➠ Adjusting the clearance between the pads and the rear brake drum VAZ-2101 (1970-1983)
➠ Repair of the rear brake pressure regulator VAZ-2105 (1979-2010)
➠ Rear brake drum — removal and installation VAZ-2110 (1995-2007)
➠ Replacing the rear brake hose VAZ-21061 (1976-2006)
➠ Rear Brake Pads — Replacement VAZ-2107 (1982-2012)
Link in different formats to this page


Visitor comments

No comments yet


How much will 15 + 48 ?


VAZ-1111 (1988-1996) 
  • General information
  • Vehicle description
  • Vehicle device
  • Vehicle operation
  • Maintenance
  • Applications
  • Power unit
  • Engine repair
  • Cooling system
  • Lubrication system
  • Supply system
  • Transmission
  • Clutch
  • Transmission
  • Chassis
  • Front suspension and wheels
  • Rear suspension
  • Steering
  • Brake system
  • Body
  • Exterior
  • Interior
  • Electrical equipment
  • Engine electrics
  • Equipment and devices


VAZ-11113 (1996-2003) 
  • General information
  • Introduction to the guide
  • User manual
  • Maintenance
  • Power unit
  • Engine repair
  • Cooling and lubrication system
  • Fuel system
  • Exhaust system
  • Transmission
  • Car gearbox
  • Clutch and drive shafts
  • Chassis
  • Front suspension
  • Rear suspension
  • Steering
  • Brake system
  • Body
  • Exterior
  • Interior
  • Doors and locks
  • Electrical equipment
  • Equipment and devices
  • Lighting and signaling
  • Engine electrics
  • Ignition system


VAZbook.ru © 2017 · Mobile version · Contact with administration · Sitemap: EN BG BY UA RS HR RO PL SK HU · Site search · News and articles VAZ-1111 · VAZ-11113 · VAZ-2101 · VAZ-21011 · VAZ-2104 · VAZ-2105 · VAZ-21051 · VAZ-2106 · VAZ-21061 · VAZ-2107 · VAZ-21099 · VAZ-2109 · VAZ-2108 · VAZ-2110 · VAZ-2112 · VAZ-2114 · VAZ-2115 · VAZ-2121 · VAZ-21213 · VAZ-21214 ·
The site stores technical data using cookies to improve the service.