
1. Check if the alternator drive belt is broken. If the belt is intact, check its tension. Press your thumb on the top of the strap and see how much it sags.
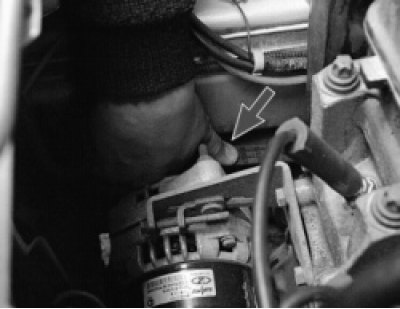
Normal tension is provided when the belt deflection is 10-15 mm. If the belt is loose, loosen the nuts of the lower and upper fastenings of the generator and, turning the adjusting bolt clockwise (shown by arrow), move the generator away from the engine. Tighten the generator mounting nuts.
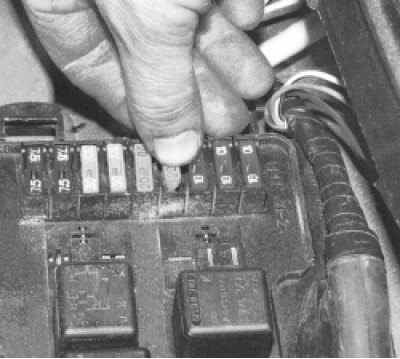
2. If the belt tension is normal, check if the appropriate fuse has blown. See fuse locations and ratings. «Electrical faults», in the car repair manual, in a separate electrical diagram, on the body of the mounting block and the fuses themselves.
If the fuse is blown, replace it, start the engine and check if the battery charge lamp goes out. If the lamp goes out, you can continue driving.
Warning! Do not install fuses with a higher current rating, as this may cause damage to electrical equipment and even cause a fire.
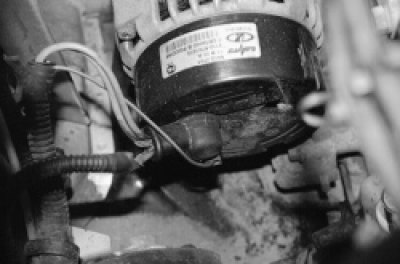
3. If the battery charging lamp does not go out, check the wire from the generator to «positive» battery terminal. Two wires are connected to it: a thicker one connects the battery to the starter, a thin one to the generator. The wire may be broken, broken inside the insulation, or have oxidized or unreliable contacts. Repair the problem and start the engine. If the charging current appears, you can continue driving.
If, after the measures taken, the charging lamp continues to burn when the engine is running, then the possible cause of the malfunction lies in the generator itself. There may be several reasons, it is better to eliminate them in a car service or garage, and you can only hope that there is enough energy in the battery to get to them.
To reduce current consumption when driving a vehicle with a faulty alternator, if possible, turn off the radio, unnecessary lights, heater fan, defroster, etc.
Experienced motorists can be recommended to check the generator voltage regulator. The operation of the voltage regulator is to continuously automatically change the generator excitation current in such a way that the generator voltage is maintained within the specified limits when the generator speed and load change.
Vehicle check
To check, you need a DC voltmeter with a scale of up to 15-30 V with an accuracy class of at least 1.0. After 15 minutes of engine operation at medium speed with the headlights on, measure the voltage between the output «30» and «weight» generator. The voltage should be within 13.6-14.6 V. In the event that a systematic undercharging or overcharging of the battery is observed and the regulated voltage does not fit within the specified limits, the voltage regulator must be replaced.
Checks of the regulator removed from the generator
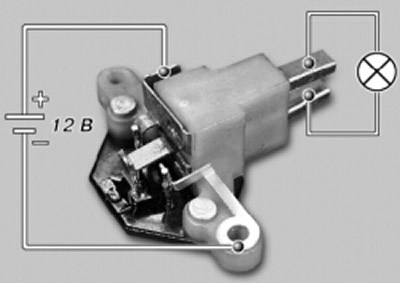
Connect a 12 V test lamp to the brushes. Apply 12V «+» on the clamp, and «-» on «mass» brush holder - the control lamp should be on.
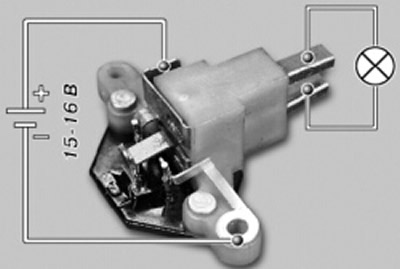
Then apply a voltage of 15-16 V - the lamp should go out. If the lamp is on in both cases, then there is a breakdown in the regulator; if it does not light up in both cases, then either there is an open in the regulator, or there is no contact between the brushes and the outputs of the voltage regulator.