

Remove the upholstery of the pillars of the wind window, the facing casing of the steering column, the instrument panel (see section «electrical equipment») and disconnect the pads and plugs of the vehicle electrical wiring harness.
After pulling out the handle of the instrument lighting switch, unscrew the mounting bracket and remove the switch.
Remove storage shelf 6 (pic. 8-28) and the radio receiver panel, having previously unscrewed the fastening screws; disconnect the wires from the radio, cigarette lighter, wiper and headlight washer switch, alarm switch.
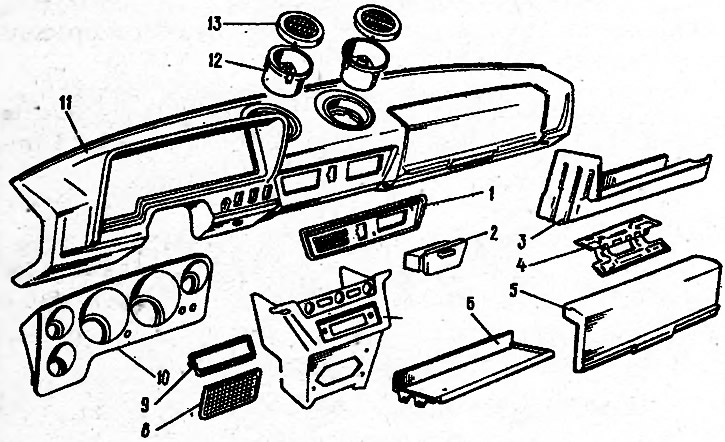
Pic. 8-28. Dashboard and its accessories: 1 - lining of the ashtray and heater control levers; 2 - ashtray; 3 - glove box body; 4 - a loop of a cover of a ware box; 5 - glove box cover; 6 - shelf; 7 - radio receiver panel; 8 - lining of the loudspeaker; 9 - lining of the radio receiver panel, 10 - instrument panel; 11 - instrument panel; 12 - deflector pipe; 13 - deflector
Turn out screws of fastening and remove the case 3 of a ware box.
Remove the handles from the heater control levers, for which, at the junction of the handle with the lever, bend the lower part at the upper handle with a sharp tool, and the upper part at the lower handle.
Remove the four bottom fixing screws (pic. 8-29) instrument panel to the cross member of the front end, and through the openings of the glove box and instrument panel, unscrew the four nuts of the upper fastening of the panel to the front end, then remove the instrument panel.
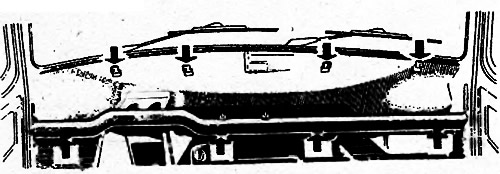
Pic. 8-29. Dashboard mounting points. Attachment points are indicated by arrows
Install the instrument panel in reverse order.