English Русский
Български
Беларускі
Український
Српски
Hrvatski
Română
Polski
Slovenský
Magyar
| Articles | Contacts | Sitemap |   
Repair and maintenance Lada Repair and maintenance Mazda Repair and maintenance Mitsubishi Repair and maintenance Toyota Repair and maintenance Land Rover Repair and maintenance Hyundai Repair and maintenance Nissan
VAZbook.ru


Main     1111   2101   2105   2106   2107   2109   2110   2115   2121  
VAZ-1111 (1988-1996) VAZ-11113 (1996-2003)
  • Main
  • «Oka»
  • VAZ-11113
  • Power unit
  • Engine repair
  • Removal and installation of the power unit

Removal and installation of the power unit (VAZ-11113)

            0

You will need:
  • keys "8", "10", "13", "17", "19"
  • pliers
  • screwdriver

Disconnect the wire from the "–" terminal of the battery.

Drain the oil from the engine and gearbox crankcases (if it is supposed to be disassembled), as well as coolant from the engine cooling system.

Remove the air filter (see subsection 10.10.1.).

Loosen the hub nuts and front wheel mounting nuts.

The manufacturer recommends removing the power unit downwards together with the subframe. The power unit can also be removed upwards. To do this, remove the hood and air filter, disconnect the wires and hoses from the engine, and the clutch and speedometer cables from the gearbox. Secure the slings to the power unit eyelets (on the cylinder head and on the gearbox housing) and, having disconnected its supports from the subframe, remove the power unit using a lifting mechanism.
The manufacturer recommends removing the power unit downwards together with the subframe. The power…


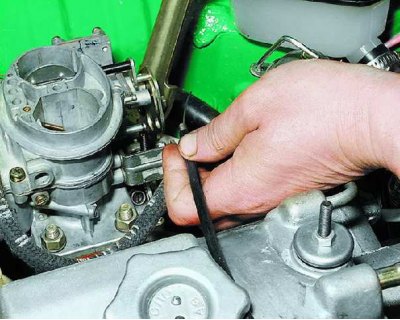
1. Disconnect the carburetor air damper drive rod (see subsection 10.10.6.) And...
1. Disconnect the carburetor air damper drive rod (see subsection 10.10.6.) And...


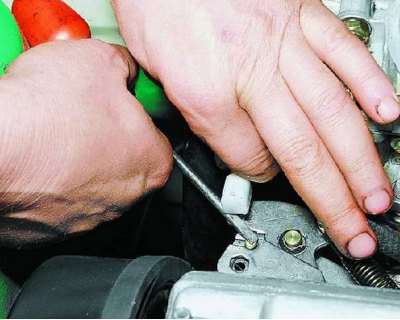
2.... throttle actuator rod (see subsection 10.10.5.).


2.... throttle actuator rod (see subsection 10.10.5.).


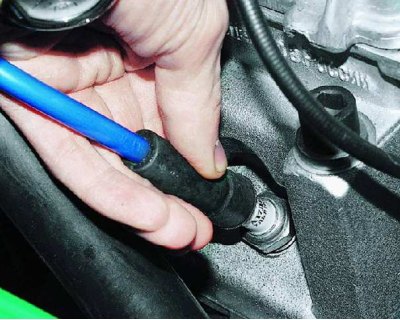
3. Remove the high tension wire caps from the spark plugs.
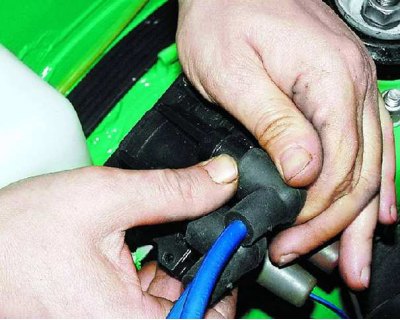
3. Remove the high tension wire caps from the spark plugs.


4. Disconnect the high tension wires from the ignition coil terminals.
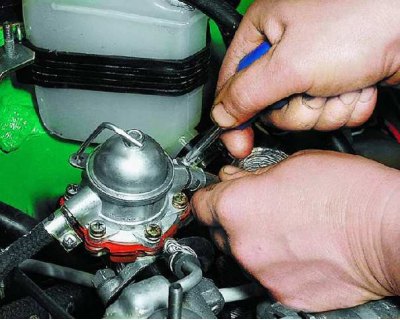
4. Disconnect the high tension wires from the ignition coil terminals.


5. Loosen the fuel supply hose clamp on the fuel pump inlet fitting and...
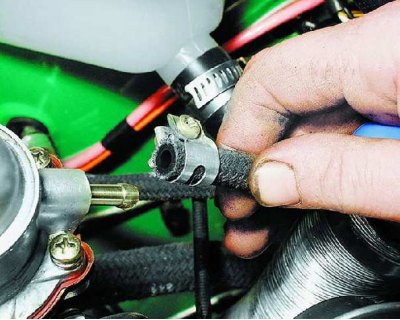
5. Loosen the fuel supply hose clamp on the fuel pump inlet fitting and...


6....disconnect the hose from the fuel pump.
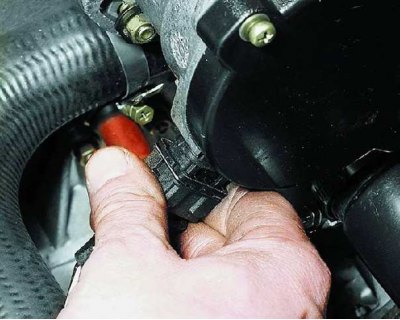

6....disconnect the hose from the fuel pump.


7. Disconnect the ignition wire connector from the spark timing sensor by releasing the spring clip.
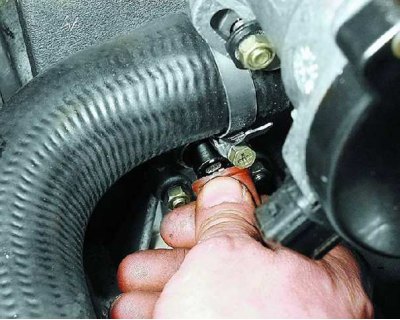
7. Disconnect the ignition wire connector from the spark timing sensor by releasing the spring clip.


8. Remove the protective cap and disconnect the wire tip from the coolant temperature sensor.
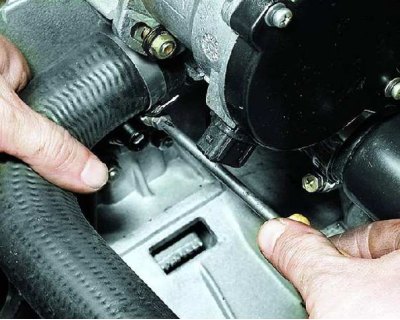
8. Remove the protective cap and disconnect the wire tip from the coolant temperature sensor.


9. Loosen the hose clamps and...
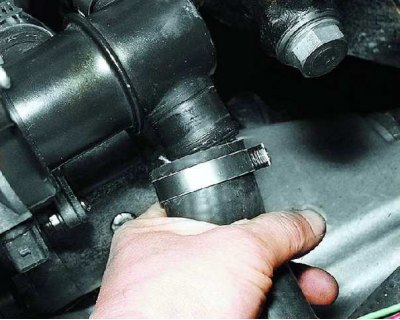
9. Loosen the hose clamps and...


10....disconnect the cooling system hoses from the coolant outlet pipes and thermostat.
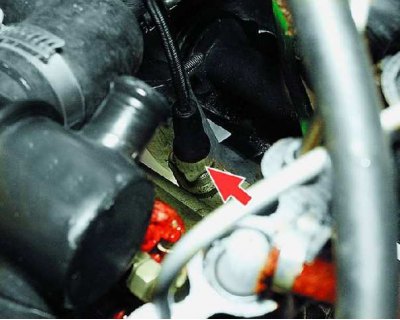
10....disconnect the cooling system hoses from the coolant outlet pipes and thermostat.


11. Disconnect the speedometer drive cable from the drive on the transmission.
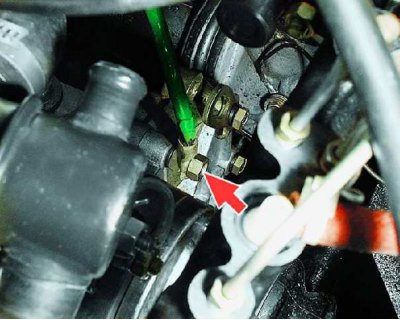
11. Disconnect the speedometer drive cable from the drive on the transmission.


12. Unscrew the fastening nut and remove the ground wire from the gearbox housing stud.
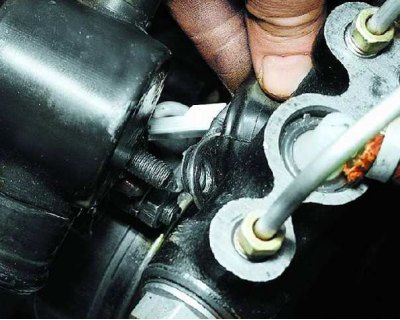
12. Unscrew the fastening nut and remove the ground wire from the gearbox housing stud.


13. Disconnect the wires from the starter solenoid relay.
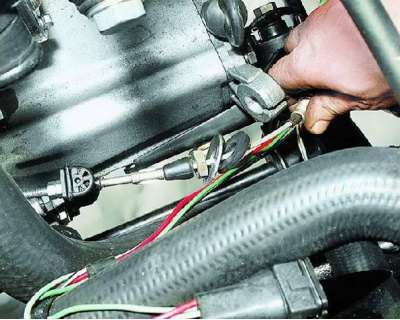
13. Disconnect the wires from the starter solenoid relay.


14. Disconnect the drive cable from the clutch release lever and remove it from the bracket on the gearbox housing (see subsection 11.2.6.).
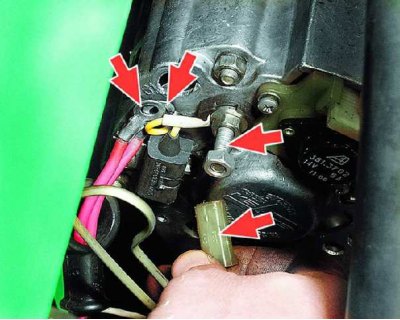
14. Disconnect the drive cable from the clutch release lever and remove it from the bracket on the…


15. Remove the protective cap, unscrew the nut of the terminal "30" of the generator and disconnect the wires from the generator.
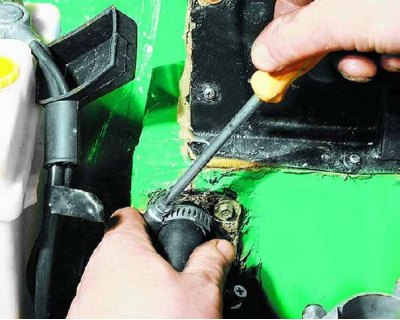
15. Remove the protective cap, unscrew the nut of the terminal «30» of the generator and disconnect…


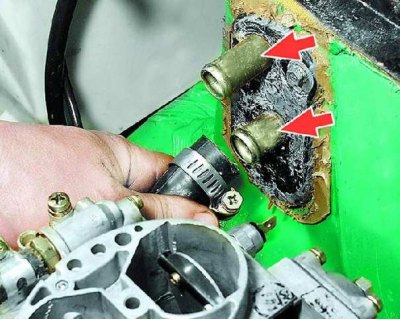
16. Loosen the clamps and...

16. Loosen the clamps and...


17....remove the hoses from the heater pipes.
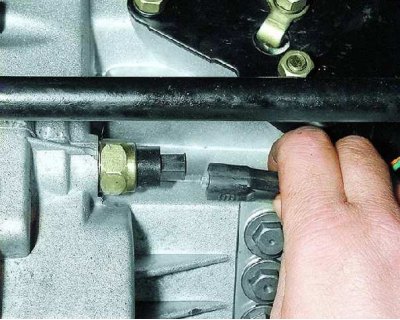
17....remove the hoses from the heater pipes.


18. Remove the connector block from the reverse light switch on the transmission.
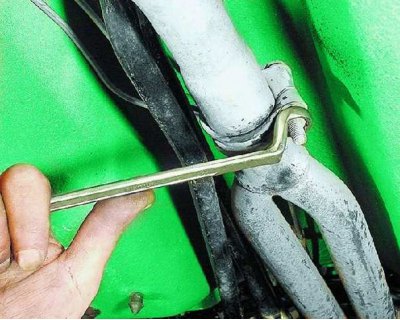
18. Remove the connector block from the reverse light switch on the transmission.


The information is posted on the portal: vazbook.ru

19. Loosen the nut of the clamp bolt connecting the inlet pipe and the additional muffler (resonator).
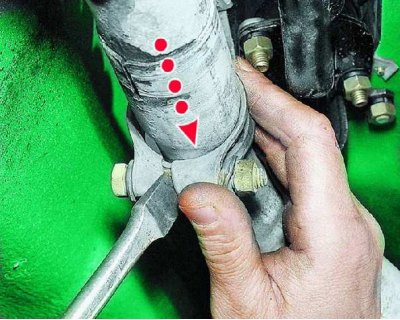
19. Loosen the nut of the clamp bolt connecting the inlet pipe and the additional muffler…


20. Use a large screwdriver to loosen the clamp and slide it along the pipe towards the resonator.
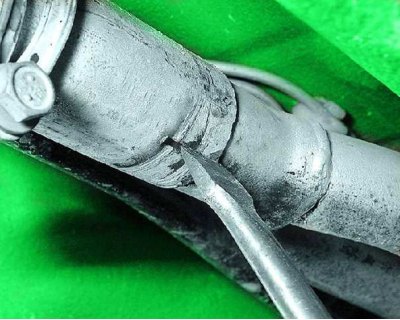
20. Use a large screwdriver to loosen the clamp and slide it along the pipe towards the resonator.


21. Use a screwdriver to loosen the connection between the pipe and the resonator, and disconnect the resonator pipe from the muffler inlet pipe.
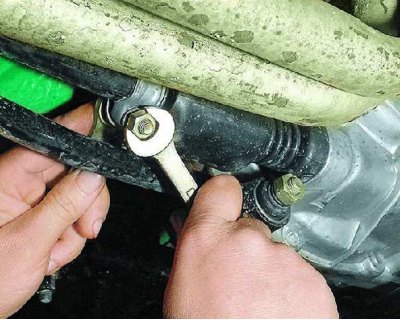
21. Use a screwdriver to loosen the connection between the pipe and the resonator, and disconnect…


22. Disconnect the shift linkage and torque rod from the transmission (see subsection 11.1.1., operations 10–16).
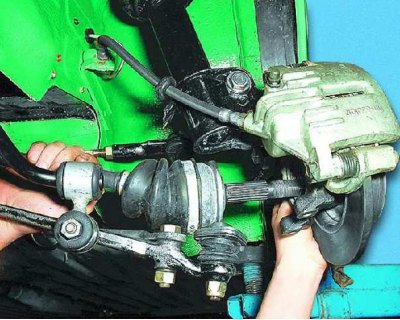
22. Disconnect the shift linkage and torque rod from the transmission (see subsection 11.1.1.,…


23. Remove the front wheels and disconnect their drives from the steering knuckles (remove the outer joint tails from the wheel hubs; see subsection 11.3.1.).
23. Remove the front wheels and disconnect their drives from the steering knuckles (remove the…


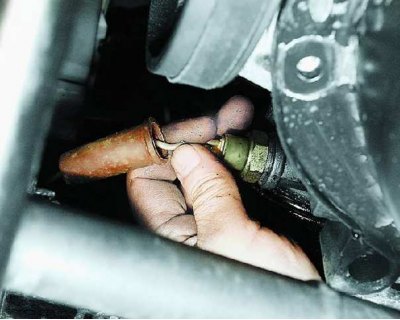
24. Remove the protective cap and disconnect the tip from the engine oil pressure warning lamp sensor terminal (the sensor is located under the oil filter).
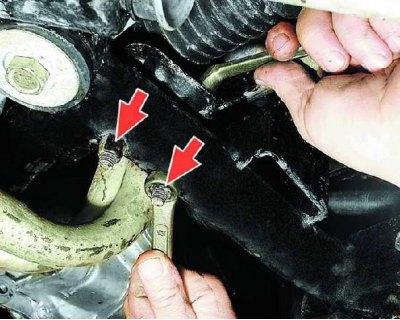
24. Remove the protective cap and disconnect the tip from the engine oil pressure warning lamp…


25. Remove the four nuts securing the steering gear bracket to the subframe (two are shown, the rest are located symmetrically).
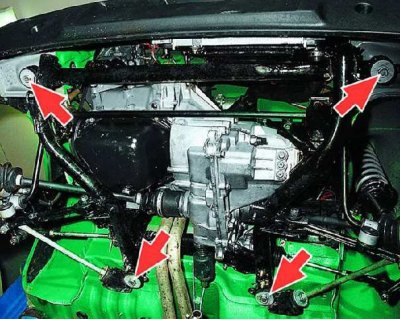
25. Remove the four nuts securing the steering gear bracket to the subframe (two are shown, the…


26. Place wooden support blocks under the subframe and carefully lower the car so that the subframe rests on the blocks. Remove the four bolts securing the subframe to the body and...
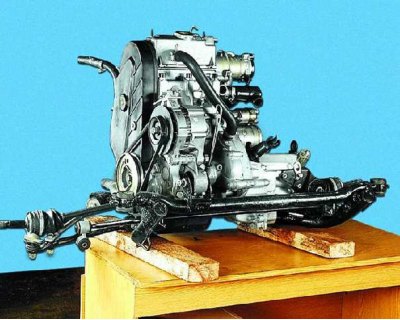
26. Place wooden support blocks under the subframe and carefully lower the car so that the subframe…


27....after raising the car, remove the power unit from it (engine assembly with gearbox) complete with subframe.
27....after raising the car, remove the power unit from it (engine assembly with gearbox) complete…


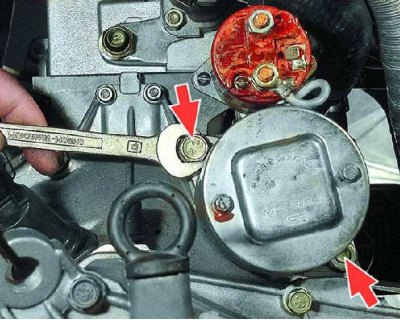
28. If it is necessary to remove the gearbox, unscrew the bolt and nut securing the starter and...
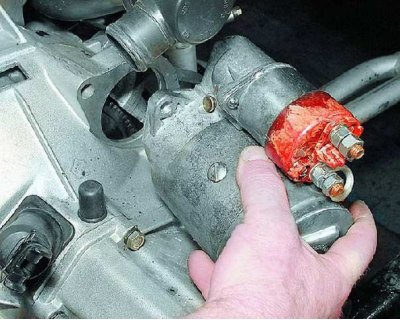
28. If it is necessary to remove the gearbox, unscrew the bolt and nut securing the starter and...


29....take it off.
29....take it off.


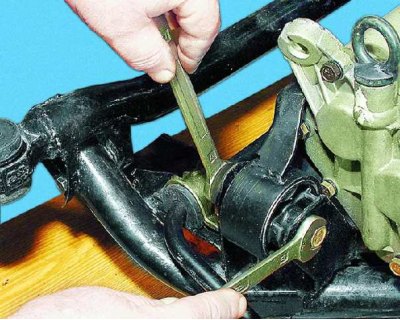
30. Loosen the nut of the left powertrain support bolt, remove the spring and flat washers and take out the bolt with the flat washer.
30. Loosen the nut of the left powertrain support bolt, remove the spring and flat washers and take…


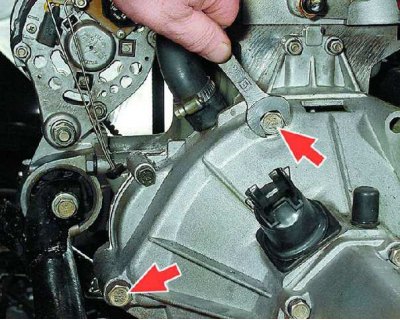
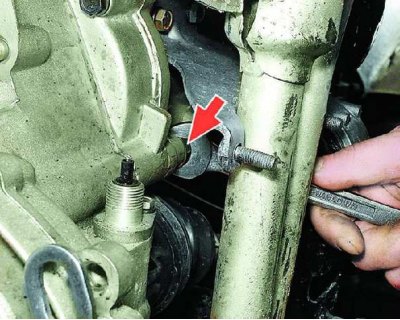
31. Unscrew the two bolts securing the clutch housing to the engine cylinder block and...
31. Unscrew the two bolts securing the clutch housing to the engine cylinder block and...


32....the nut located next to the muffler inlet pipe bracket.
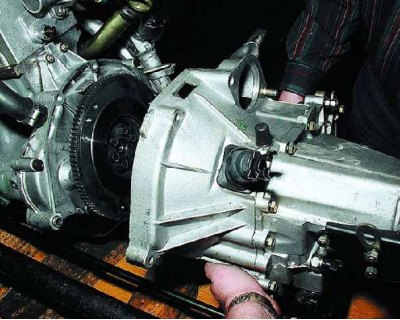
32....the nut located next to the muffler inlet pipe bracket.


33. With the help of an assistant, separate the gearbox from the engine and remove it.

34. Install the power unit in the reverse order of removal. Fill the engine and gearbox crankcases with oil (if the oil was drained during their removal or disassembly), fill with coolant. Check and, if necessary, set the ignition timing, adjust the air and throttle valve drives of the carburetor (see subsections 10.10.5. and 10.10.6.), clutches (see subsection 11.2.7.) and gear shifting (see subsection 11.1.12.).


This article is available at russian, bulgarian, belarusian, ukrainian, serbian, croatian, romanian, polish, slovak, hungarian
The text was reviewed by the specialist: Grigory Vologodtsev

Share with friends:

Previous articles
VAZ-11113: Engine repair
Next articles

Lapping valves
Cylinder head repair
Replacing the rear crankshaft oil seal
Replacing the front crankshaft oil seal
Replacing the oil pan gasket
Disassembling the engine
Engine parts defect detection
Engine assembly

More articles from other manuals on VAZ cars:
➠ Removal and installation of the power unit VAZ-2108 (1984-2003)
➠ Engine power supply system. Fuel supply, air supply and exhaust… VAZ-2101 (1970-1983)
➠ Power supply system of the VAZ-2104 and VAZ-2105 engine VAZ-2105 (1979-2010)
➠ The device of the engine power supply system of VAZ-2106 and… VAZ-2106 (1976-2006)
➠ Power supply system VAZ-2107 (1982-2012)
Link in different formats to this page


Visitor comments

No comments yet


How much will 23 + 48 ?


VAZ-1111 (1988-1996) 
  • General information
  • Vehicle description
  • Vehicle device
  • Vehicle operation
  • Maintenance
  • Applications
  • Power unit
  • Engine repair
  • Cooling system
  • Lubrication system
  • Supply system
  • Transmission
  • Clutch
  • Transmission
  • Chassis
  • Front suspension and wheels
  • Rear suspension
  • Steering
  • Brake system
  • Body
  • Exterior
  • Interior
  • Electrical equipment
  • Engine electrics
  • Equipment and devices


VAZ-11113 (1996-2003) 
  • General information
  • Introduction to the guide
  • User manual
  • Maintenance
  • Power unit
  • Engine repair
  • Cooling and lubrication system
  • Fuel system
  • Exhaust system
  • Transmission
  • Car gearbox
  • Clutch and drive shafts
  • Chassis
  • Front suspension
  • Rear suspension
  • Steering
  • Brake system
  • Body
  • Exterior
  • Interior
  • Doors and locks
  • Electrical equipment
  • Equipment and devices
  • Lighting and signaling
  • Engine electrics
  • Ignition system


VAZbook.ru © 2017 · Mobile version · Contact with administration · Sitemap: EN BG BY UA RS HR RO PL SK HU · Site search · News and articles VAZ-1111 · VAZ-11113 · VAZ-2101 · VAZ-21011 · VAZ-2104 · VAZ-2105 · VAZ-21051 · VAZ-2106 · VAZ-21061 · VAZ-2107 · VAZ-21099 · VAZ-2109 · VAZ-2108 · VAZ-2110 · VAZ-2112 · VAZ-2114 · VAZ-2115 · VAZ-2121 · VAZ-21213 · VAZ-21214 ·
The site stores technical data using cookies to improve the service.