
Advice. It is more convenient to change high-voltage wires one by one.
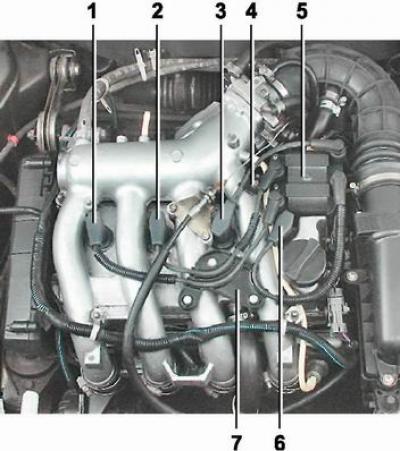
The location of high-voltage wires on the engine 2112 (1,5i 16V) [Engine trim removed.]: 1 - tip of the wire of the first cylinder; 2 - wire tip of the second cylinder; 3 - wire tip of the third cylinder; 4 - plastic bracket that secures the high-voltage wire of the third cylinder; 5 - ignition module; 6 - wire tip of the fourth cylinder; 7 - plastic bracket for fastening high-voltage wires of the first, second and fourth cylinders
Removing
1. We prepare the car for work (see "Preparing the car for maintenance and repair") and turn off the ignition.
2. Remove the engine trim (see "Decorative overlay of the engine - removal and installation").
3. We remove the tip of the wire from the candle well.
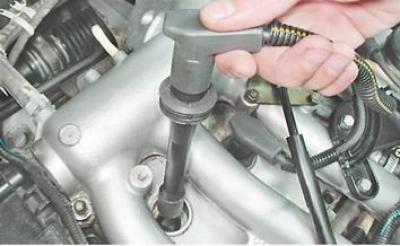
4. Disconnect the other tip of the high-voltage wire from the ignition module.

5. Remove the wire of the first cylinder.
Similarly, we remove the high-voltage wires of other engine cylinders.
6. We measure the resistance of the wires with a multimeter (see below, "High voltage wires for motors 2111 and 21114 (8v) - check and replacement").
Warning! High voltage wires are not interchangeable. It is necessary to connect the wires to the ignition module in accordance with the serial number of the cylinder (see "Engine Ignition Module 2112 (1,5i 16V) - check, removal and installation"). The insulation of the wires is marked - the serial number of the cylinder.
Installation
Install wires in reverse order.