
- couplers for suspension springs;
- tool for dismantling the suspension strut.
Disassembly
1. Remove the rack from the car (see "Front suspension strut - removal and installation").
2. We clamp the rack in a vice.
Attention! Be careful! A compressed spring has great strength and, if the tie is broken, straightening out, it can cause injury.
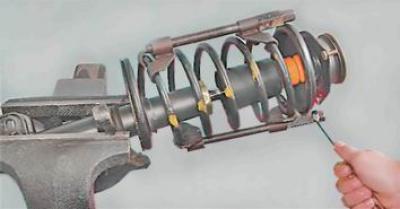
3. We install the tie springs on opposite sides and evenly, without distortions, we tighten the spring until the load is removed from the upper cup of the spring.
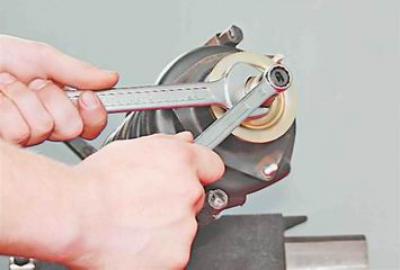
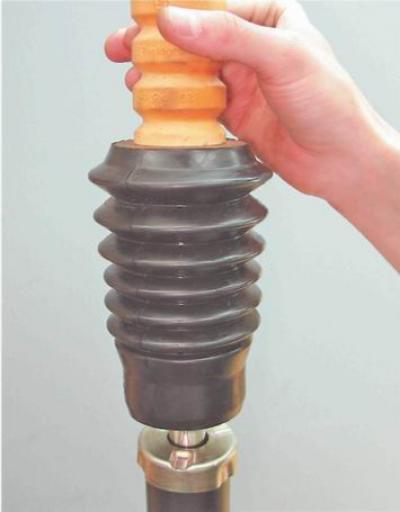
4. We install a device for disassembling the racks on the nut and shock absorber rod. holding key by 17 mm anti-rotation shock absorber rod, wrench by 27 mm unscrew the nut.
5. Remove the nut and travel stop.
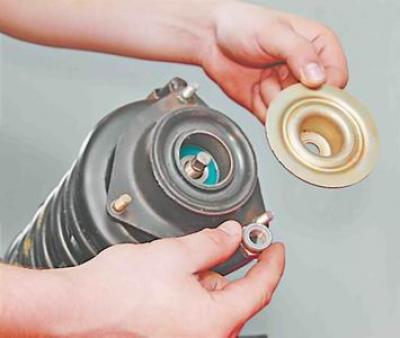
6. Remove the top support from the rack.

7. Remove the top cup of the spring.

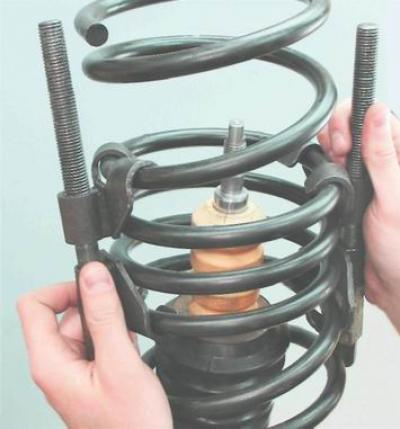
8. Remove the spring (without removing the straps).
9. Remove the compression stroke buffer and the protective cover of the shock absorber rod.
Assembly
1. Before assembling the rack, fully extending and sinking the stem by hand, make sure the shock absorber is in good condition. If dips, jerks or extraneous sounds are heard when moving the rod, replace the shock absorber.
2. Check the integrity and serviceability of all elements installed on the rack. Replace a torn or cracked shock rod guard, a damaged compression stroke stop, a cracked or loose suspension spring.
3. Front suspension springs are divided into classes according to stiffness: "A" And "IN". The class of the spring is indicated by paint on the outside of one of its coils. Class "A" - yellow color of paint; Class "IN" - green (on cars supplied for export, the marking is made in white and blue, respectively).
Warning! The front suspension must be fitted with springs of the same class.