




Contents: Removal ↓ Installation ↓
Removal
Loosen roller mounting bolt 2 and bolt 9 (Fig. 9-31). Tighten bolt 8 until it rests against the limiter. Remove the belt.
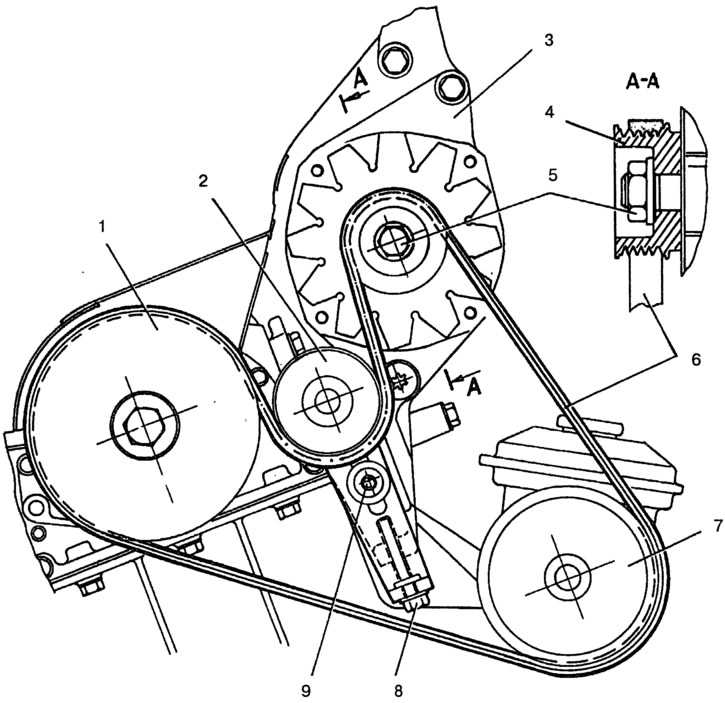
Fig. 9-31. Removing and installing the alternator belt:
1 - crankshaft pulley; 2 - tension roller; 3 - generator; 4- generator pulley; 5 - nut; 6 - alternator belt; 7 - vacuum pump pulley; 8 - tension bolt; 9 - tensioner fixing bolt.
Check: Make sure that roller 2 rotates freely, without jamming.
Installation
Place the belt over the pulleys and ensure the belt is properly positioned in the groove of each pulley.
Tension the belt in the following order:
- tighten the belt by loosening bolt 8;
- install the OUT 0000016 device;
- using bolt 8, tighten the belt until the device shows (115±10) SEEM;
- remove the device, tighten the roller mounting bolt and bolt 9;
- turn the crankshaft clockwise four turns;
- install the OUT0000016 tool, check the tension and adjust it if necessary;
- remove the device, tighten the bolts to 22 Nm.
(The original is available on the online resource VAZBOOK.RU)