
Checking the purge valve
1. We prepare the car for operations (see "Vehicle preparation for maintenance and repair").
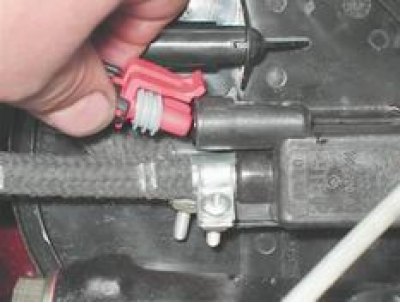
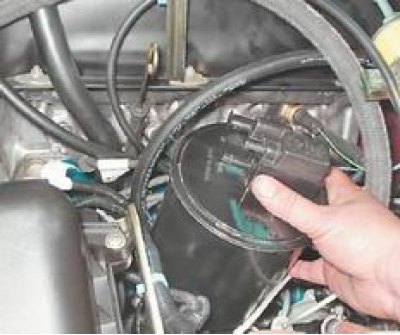
2. Having released the latch, disconnect the block of the wiring harness from the canister purge valve.
3. Connect "negative" voltmeter probe to "mass" (car body).
4. Turning on the ignition, use a voltmeter to measure the supply voltage at the output "A" wiring harness pads (terminal designations are made on the block).
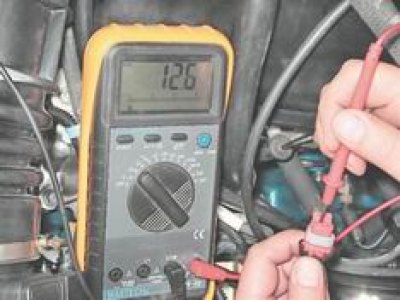
The voltage at the output must be at least 12 V. If the voltage is not supplied to the block or it is less than 12 V, the battery is discharged, the power circuit is faulty or the computer is faulty.
5. To check the valve itself, use a Phillips screwdriver to loosen the clamp that secures the hose to the canister purge valve and remove the hose.

If the hose on the nozzle is tight and cannot be disconnected, you can remove the valve from the adsorber and, by rotating the valve, remove the hose from it.
6. Prying with a screwdriver, remove the valve from the adsorber (for clarity shown on the removed adsorber).
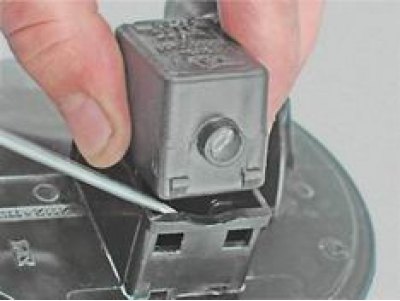
7. Apply 12 V voltage from the battery to the valve terminals ("+" to the conclusion "A", "-" to the conclusion "IN").
When voltage is applied to the terminals, the valve should open with a characteristic click. Otherwise, the valve is defective and must be replaced.
Removing the adsorber
1. Disconnect the block of the wiring harness from the adsorber purge valve and remove the hose from the nozzle (see above).
2. Using a Phillips screwdriver, loosen the clamp that secures the fuel vapor supply hose to the adsorber and remove the hose.

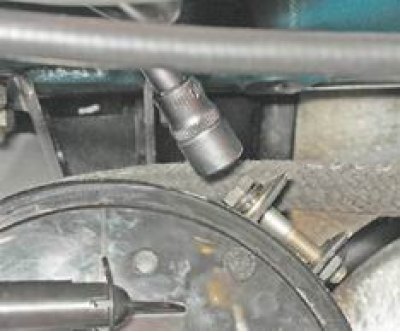
3. socket wrench by 10 mm unscrew the coupling bolt of the adsorber fastening clamp.
4. Remove the adsorber.
Installation
Installing the adsorber is carried out in reverse order.