




Contents: A jerk at the start of movement ↓ Jerks during acceleration ↓ Jerks during steady motion ↓
Necessary clarification:
- jerk — a short-term spontaneous change in engine speed regardless of the position of the gas pedal. In everyday use, as a rule, there are series of jerks;
- failure — a noticeable delay in the engine's response to pressing the gas pedal. This can be roughly considered an extreme case of jerking.
Conventionally, three types of jerks can be distinguished:
- at the moment of the start of movement;
- during acceleration;
- during steady movement, i.e. with a constant position of the gas pedal.
Attention! When using the DAAZ Solex carburetor, a very unpleasant defect occurs: when pressing the gas pedal, a strong dip occurs, the engine stalls, often with no idle speed. Movement is possible only when pressing the gas pedal to the floor or you have to continuously "pump" the pedal. The reason is clogging of the fuel jet of the main metering system of the first chamber.
For the experienced car enthusiast it is necessary to remove the top cover of the carburetor, as described above, unscrew the two air jets, unscrew the two fuel jets with a thin screwdriver and remove them from the wells with a long wooden toothpick or a pointed stick. Do not mix up the jets when reinstalling! Then, using a syringe or a clean, lint-free cloth, remove the gasoline from the float chamber and blow out the carburetor with compressed air, especially carefully the fuel jet wells.
For an inexperienced motorist it is better to contact a car service immediately. To get to the service, cut a piece of vinyl chloride tube 1-1.5 cm long (at least from the windshield washer tubes) and put it on the second chamber drive stop lever. The engine crankshaft speed will be approximately 2000 min⁻¹. Use the clutch and brake pedals to maintain a safe speed.
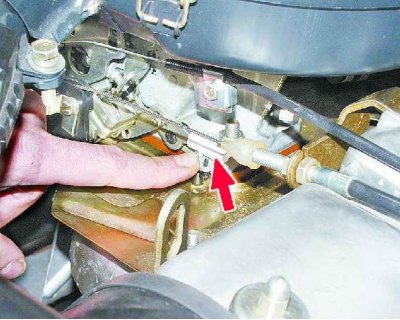
A jerk at the start of movement
At the moment of starting the movement, the extreme case of jerking - failure - often occurs. The most unpleasant sensations are associated with the delay in the engine's response to pressing the gas pedal. Sometimes the engine even stalls.
The cause of the failure may be either a malfunction of the carburetor accelerator pump or a malfunction of the vacuum corrector of the ignition distributor.
To work you will need: wrenches for "8" and "10", Phillips and slotted screwdrivers, a clean cloth, a piece of thin copper wire without insulation with a diameter of less than 0.3 mm, a compressor, a can of liquid such as WD40, and possibly a portable lamp.
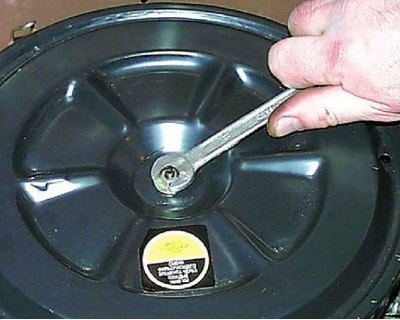
1. Remove the air filter housing cover by unscrewing the nut with a 10 mm wrench and unfastening the spring clips.

Remove the air filter. Unscrew the four nuts with an "8" wrench, use a screwdriver to loosen the clamp of the crankcase ventilation hose where it connects to the valve cover and remove the air filter housing.
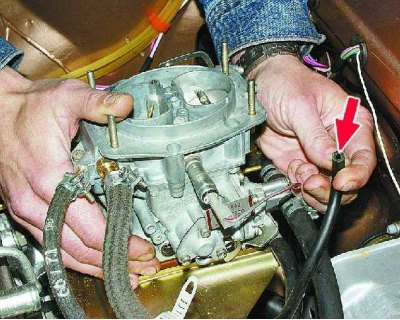
2. Disconnect the distributor vacuum corrector drive hose and, creating a vacuum with your mouth, check for leaks.
Does air pass freely?
No: see point 4.
3. Contact a car service center to replace the vacuum corrector of the ignition distributor.
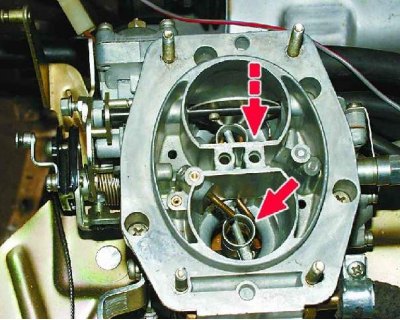
4. Look inside the carburetor. The air damper should be fully open. Press the throttle lever. Streams of fuel should appear from both tubes of the accelerator pump sprayer. The streams should be even and directed into the gap between the diffuser wall and the opening damper. If necessary, use a portable lamp.
Are there any streams?
Is the fuel spray direction correct?
No: see point 6.
5. Contact a car service for diagnostics.
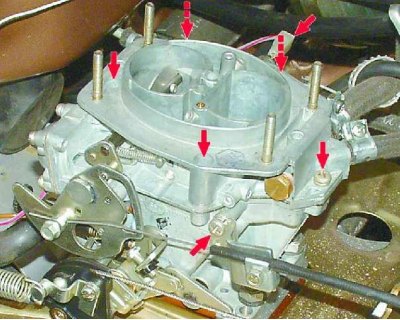
6. Without spilling fuel, remove the fuel supply hose to the carburetor and the fuel drain hose. Remove the air damper control cable and the wire from the idle speed solenoid valve. Unscrew the five screws securing the top cover of the carburetor.

Remove the carburetor cover, carefully turn it over (the mounting screws will fall out - don't lose them!) and place it with the floats facing up.
Warning! Do not damage the floats!
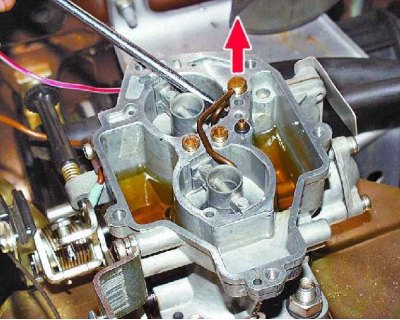
7. Using a screwdriver, carefully pry up as close as possible to the sealing point of the accelerator pump sprayer tube and, pressing from the bottom up, remove the sprayer from the socket.
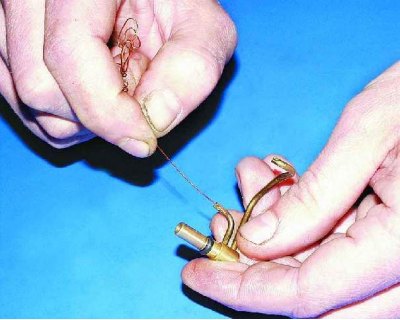
8. Clean both holes of the spray nozzle with a thin copper wire.
Blow air into the nozzle in the direction opposite to the direction of fuel flow.

9. Reinstall the spray nozzle. Without installing the carburetor cover, press the throttle lever. Fuel should flow from both tubes of the accelerator pump spray nozzle.
Are there any streams?
No: see point 11.
10. Assemble the carburetor and keep in mind that it is time to carry out its maintenance, replace the fine fuel filter or change the gas station.
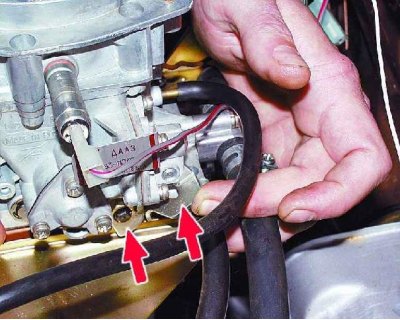
11. Check the ease of movement of the accelerator pump drive lever and the absence of play in the drive. If necessary, lubricate the parts with a liquid such as WD40, replace faulty parts. Check the operation of the accelerator pump again.
Are there any streams?
No: see point 13.
12. Assemble the carburetor and keep in mind that it is time to perform its maintenance.
13. Contact a car service for diagnostics and repair.
Jerks during acceleration
The cause of jerking may be low fuel level or clogged fuel filter in the carburetor, faulty fuel pump or clogged additional fuel filter, faulty ignition system.
To work you will need: wrenches for "8", "10" and "13", Phillips and slotted screwdrivers, a clean rag, a piece of thin copper wire without insulation with a diameter of less than 0.3 mm, a compressor, a can of liquid such as WD40, and possibly a portable lamp.
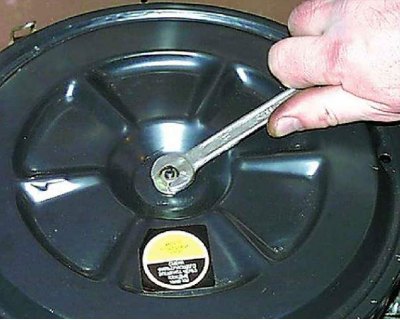
1. Remove the air filter housing cover by unscrewing the nut with a 10 mm wrench and unfastening the spring clips.
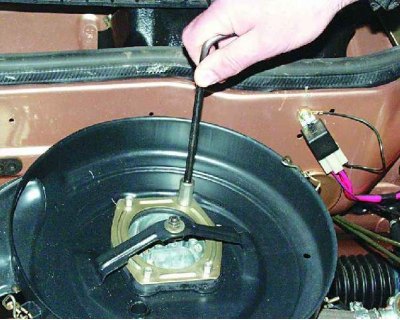
Remove the air filter. Unscrew the four nuts with an "8" wrench, use a screwdriver to loosen the clamp of the crankcase ventilation hose where it connects to the valve cover and remove the air filter housing.
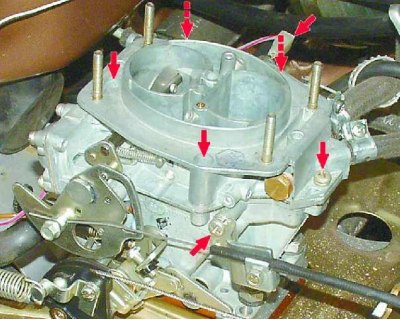
2. Without spilling fuel, remove the fuel supply hose to the carburetor and the fuel drain hose. Remove the choke control cable and the wire from the idle speed solenoid valve.
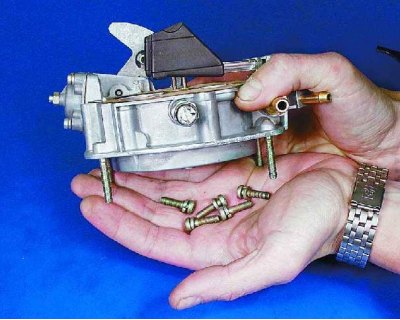
Unscrew the five screws securing the top cover of the carburetor. Remove the carburetor cover, carefully turn it over (the screws will fall out - do not lose them!) and place the cover with the floats facing up.
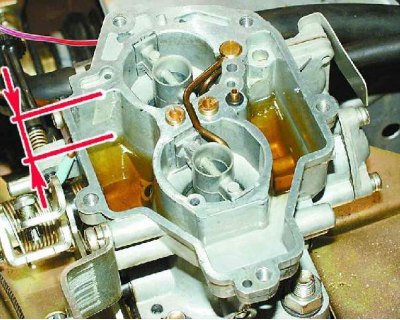
Warning! Do not damage the floats!
Look inside the carburetor. The petrol level should be approximately 22-23 mm below the joint between the cover and the carburetor body.
Is the level normal?
Yes: see point 4.
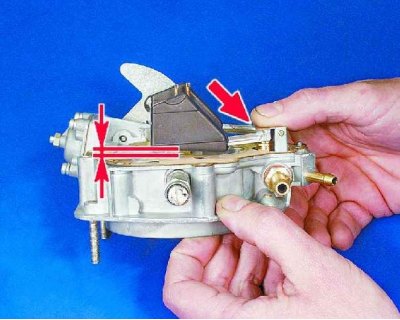
3. Adjust the fuel level by bending the float. To do this, gently press the float bracket with your thumb where it touches the carburetor needle valve. The gap between the cover gasket and the floats should be 1.5–2 mm.
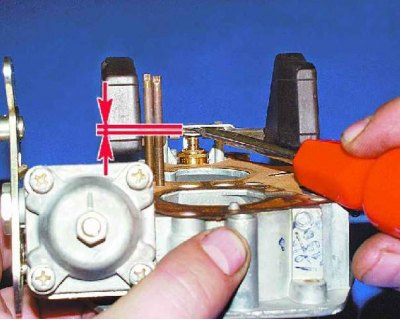
If the fuel level is high (the gap between the cover gasket and the floats is less than 1 mm), use a screwdriver to bend back the float bracket tab and increase the gap.

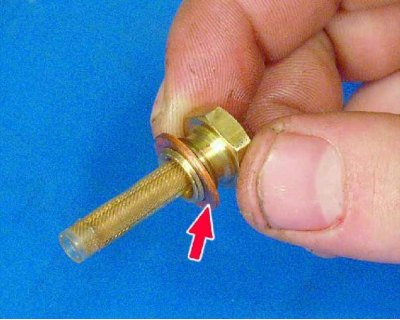
4. Using a 13 mm spanner, unscrew the carburetor fuel filter plug.
[The source is on the website: VAZBOOK.ru]
Remove the plug together with the mesh filter and take out the filter.
Warning! Do not lose the copper sealing ring!
Inspect the filter carefully.
Do you have any doubts about the cleanliness of the filter?
No: see point 6.
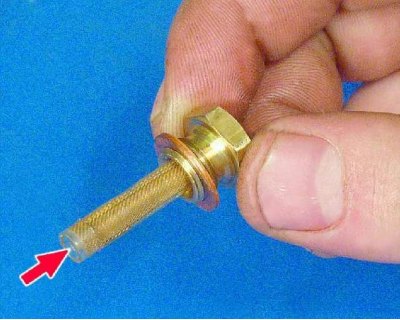
5. If in doubt, wash the filter with gasoline and blow it out with compressed air from the inside and outside. It is better to replace a heavily contaminated filter.
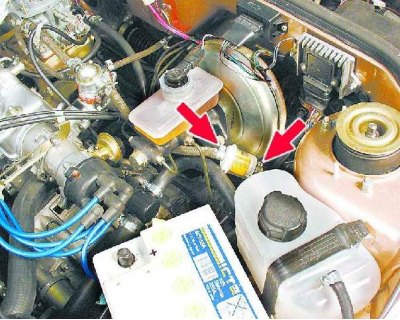
6. Check the auxiliary fuel filter.
Do you have any doubts about the cleanliness of the filter?
No: see point 8.
7. If there is the slightest doubt, it is better to replace the dirty filter.
8. Reassemble the carburetor in reverse order and take it for a test drive.
Are there any jerks left?
Yes: see point 11.
10. Have a nice trip!
11. Fuel pump malfunction - too little fuel pressure, or ignition system malfunction. Diagnostics required, contact a car service. The only thing you can try to do yourself is to replace the spark plugs, regardless of mileage and condition. Pay attention to the condition of the spark plugs - if it is abnormal, you may have to contact a car service (see "Diagnostics of engine condition by the appearance of spark plugs").
Jerks during steady motion
Such jerks are most often caused by a malfunction of the ignition system. Diagnostics are necessary, contact a car service. The only thing you can try to do yourself:
- carefully inspect the underhood space. Turn off the ignition and check the reliability of the fastening and fit of all wires and connectors at the switch, coil and distributor. Start the engine and listen to its operation - the crackling sound when the high voltage "to ground" is weak, but distinct. In complete darkness, the spark is clearly visible when the breakdown;
- replace spark plugs regardless of their condition and mileage. Pay attention to the condition of the plugs - if it is abnormal, you may have to contact a car service.