

Engine cold
At least 6 hours have passed since the engine was turned off at an outside air temperature of 20°C and at least 3 hours at -20°C, the oil temperature in the engine crankcase coincides with the ambient temperature, and to start the engine, it is necessary to use the carburetor air damper.
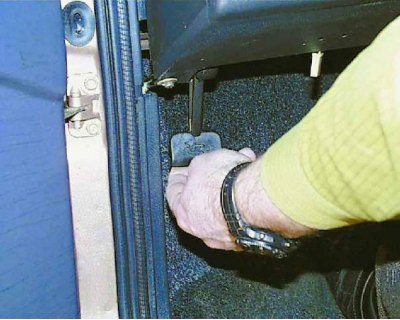 | 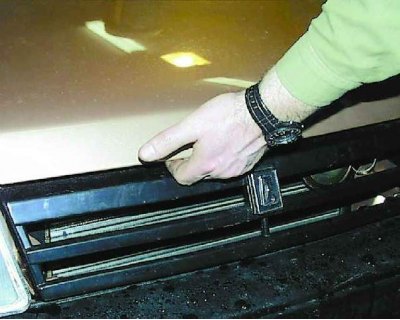 |
1. Open the hood.
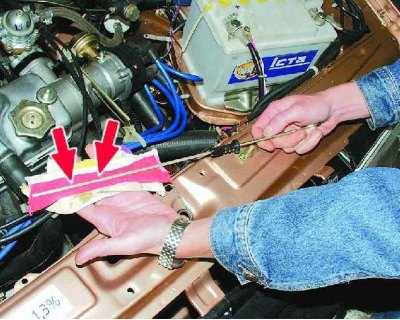
2. Measure the oil level with an oil dipstick. It must be between the MAX and MIN·marks.
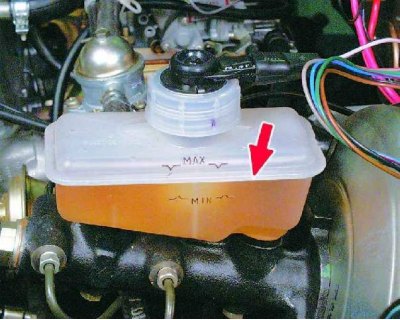
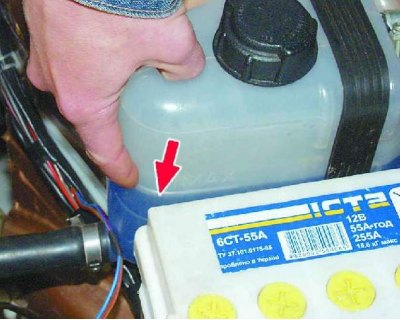
3. Check the brake and coolant levels. The level of both should be above the MIN·mark.
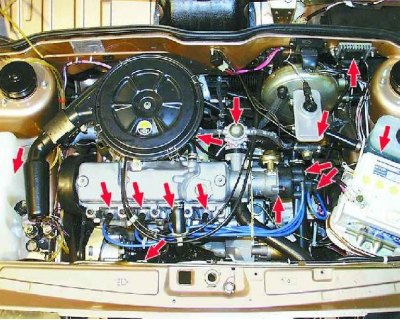

4. Carefully inspect the engine and engine compartment. Pay attention to smudges of gasoline, oil, brake and coolant. Make sure the electrical wiring is intact. Check the fit of the high-voltage wires on the ignition coil, the distributor sensor cover, and the spark plugs.
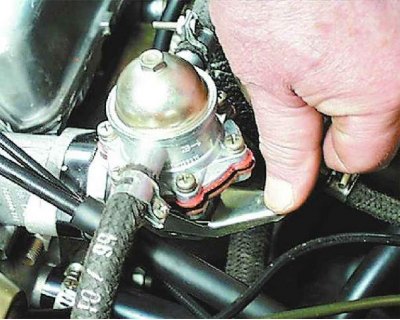
5. If the car has been idle for several days, pump gasoline into the carburetor with the manual fuel pump lever.
6. Without closing the hood (cover the hood in case of rain or snow), get behind the wheel.
Tip: It's best to close the hood after the engine starts. Before that, it is advisable to once again inspect the engine, make sure that there are no leaks of fuel, oil, coolant, as well as extraneous sounds in its operation.
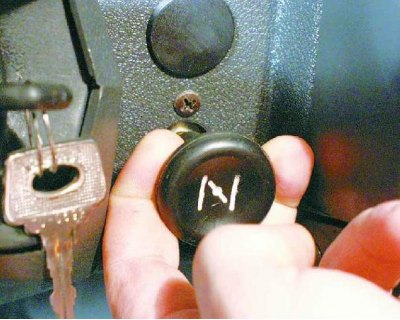
7. Pull the carburetor choke control fully out.
8. Turn the ignition key and start the engine.
If the engine does not start, there are three main reasons:
- start system does not work;
- the ignition system does not work;
- the power system is not working.
Engine warm or hot
The oil temperature in the crankcase is higher than the ambient temperature and it is not necessary to use the carburetor choke to start the engine.
1. Without touching the choke control knob, turn the ignition key and turn on the starter. Simultaneously with the inclusion of the starter, begin to gently press the accelerator pedal until the engine starts.
If the engine does not start, there are three main reasons:
- start system does not work;
- the ignition system does not work;
- the power system is not working.
Faults in the starting system
Malfunctions in the starting system are manifested in the abnormal operation of the starter. There are five main starter malfunctions:
1. The starter does not turn on. The reason is a violation of the contact connections, an open or short circuit in the starter switching circuits, a malfunction of the additional starter switching relay, a malfunction of the traction relay.
2. When the starter is turned on, multiple clicks are heard. The reason is a malfunction of the holding winding of the traction relay, the battery is very discharged, the contact connections in the starter circuit are loose.
3. The starter turns on, but its armature either does not rotate or rotates slowly. The reason is the battery is discharged, the contact connections are broken, the contacts of the traction relay are burned, the collector is dirty or the brushes are worn out, the interturn or short circuit in the windings.
4. The starter turns on, its armature rotates, but the flywheel remains stationary. The reason is the weakening of the starter attachment to the clutch housing, damage to the teeth of the flywheel or drive gear, slipping of the drive freewheel, breakage of the lever, drive ring or buffer spring of the starter drive.
5. The starter does not turn off after starting the engine. The reason is a malfunction of the starter freewheel, sintering of the contacts of the traction relay. In the event of such a malfunction, stop the engine immediately!
6. These malfunctions require qualified intervention by car service specialists. Beforehand, you can only check the degree of discharge of the battery using a voltmeter on the instrument panel and the tightness of the contact connections in the starter circuit.

Checking the ignition system
Your vehicle is equipped with a non-contact high energy ignition system. A voltage of about 40,000 V is applied to high-voltage wires, and although it is not life-threatening at a low current value, a possible electric shock when checking the ignition system can lead to serious consequences. Therefore, if you take on a high-voltage wire with the ignition on, use a thick rubber glove or, in extreme cases, pliers with insulated handles.
Before checking the ignition system, place the shift lever in neutral and leave the parking brake applied ("handbrake").
To check, you will need screwdrivers - slotted and Phillips, pliers with insulated handles and a tester or a 12 V control lamp with two wires connected to it. You can also use the car "carrying", if you have it.
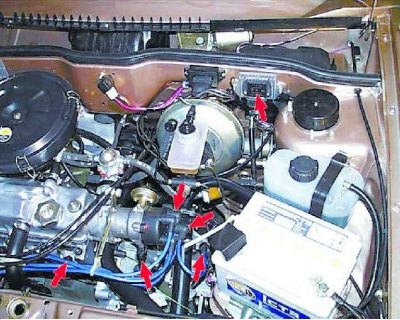
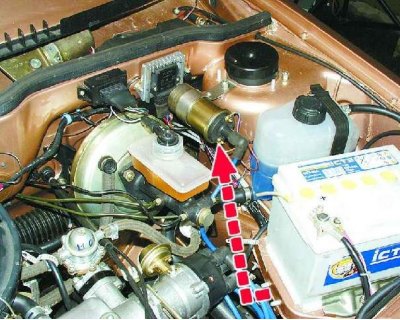
1. With the ignition off, check the integrity and fit of the high-voltage wires in the ignition distributor cover, as well as the fit of the high-voltage wire in the ignition coil.
Tip: As soon as possible, move the ignition coil from its original place to the cup of the left A-pillar (see dotted arrow). The coil will be less filled with water when driving through deep puddles and access to it will be simplified.
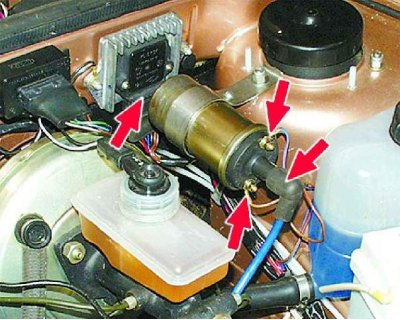
2. Check the wires from the distributor to the switch and their connections. Also check the wires connecting the switch and the ignition coil.
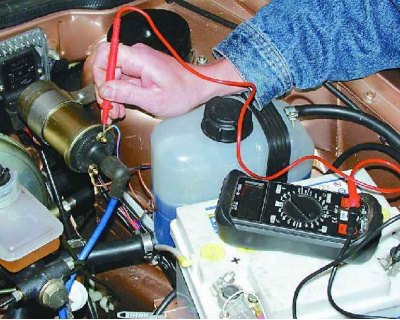
3. Turn on the ignition. Check if current is supplied to the ignition system. Connect one wire of the tester or test lamp to the terminal " B" coils, and the other to "mass".
Voltage over 11V? (Is the control lamp on?)
Yes: see point 5.
4. Malfunction in the ignition switch or in the wiring from the lock to the coil. In order to get to the nearest car service, you can apply emergency power to the ignition system. To do this, connect an additional wire to the terminal " B" ignition coils and terminal " battery. Fasten the wires securely. Keep in mind that now, in order to turn off the engine, you will need to disconnect the additional wire from " " battery.
Warning! If, when connected to the terminal " a strong spark will be noticed in the battery, this method will have to be abandoned - apparently, closes "to ground" wiring.
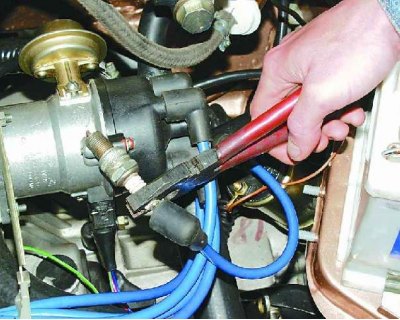
5. Remove the center wire from the distributor cap. Insert a spare spark plug into the end of the wire and press it with the metal part against "mass" car. Turn the engine crankshaft with the starter. Be sure to use a thick rubber glove or pliers with insulated handles.
Warnings!
- Never test the ignition system for "spark" between wire end and "weight", it may cause severe damage to the Switch.
- Do not remove the terminals from the battery and the connector from the switch while the engine is running.
Is there a spark between the spark plug electrodes?
Yes: see point 7.
6. There may be a malfunction of the switch, the Hall sensor in the distributor, or the ignition coil.
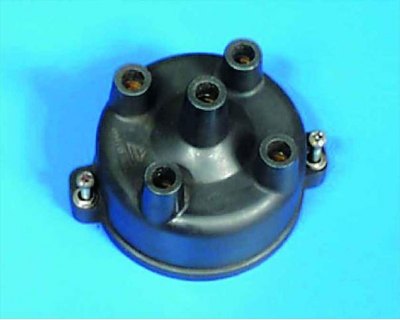
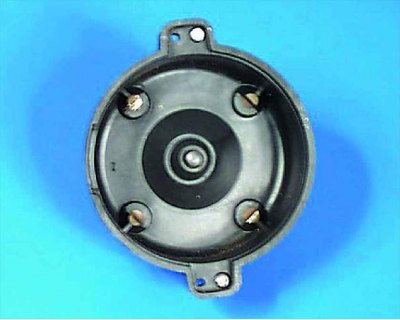
7. Remove the distributor cover by unscrewing the two screws. Carefully inspect the distributor cap outside and inside for damage (cracks, chips, destruction of the carbon contact inside the cover).
Any damage?
No: see point 9.
8. Replace cover.
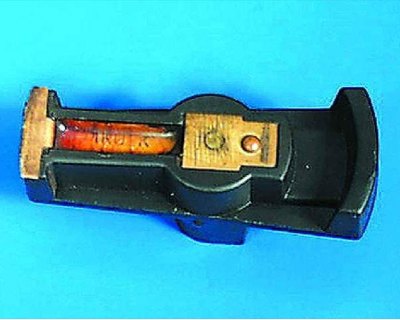
9. Check if the rotor is damaged (slider) distributor. Sometimes the noise suppression resistance in the rotor fails. There are also cases of breakdown of the rotor housing "to ground".
At the same time turn the engine crankshaft with the starter.
Warning! If the distributor rotor does not rotate when the engine is turned by the starter, contact a car service. The timing belt may break or the distributor drive may break.
Any doubts? Replace rotor.
Tip: The resistance can be temporarily replaced with a ballpoint pen spring.
10. Once again, taking precautions, check for spark. Try starting the engine.
Is the engine running?
No: see point 12.
11. Bon Voyage!
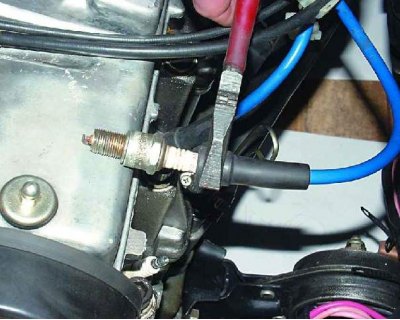
12. Check for spark at spark plugs. Remove the high voltage wire from any spark plug. Insert a spare spark plug into the end of the wire and press it with the metal part against "mass" car. Be sure to use a thick rubber glove or pliers with insulated handles. Turn the engine crankshaft with the starter.
Is there a spark?
No: see point 14.
13. Replace spark plugs with new ones. You can first try to install not new ones, but proven ones, as they say, from a working machine.
14. Replace high voltage wires with new ones. You can first try to install not new, but proven, "from a working machine".
Checking the power supply system of the carburetor engine
You will need
- screwdrivers - slotted and cross
- spanners (better cap) on "8", "10", "13"
- empty plastic bottle
- compressor or air pump
- rag
Attention! When checking the power system, do not smoke or use open flames!
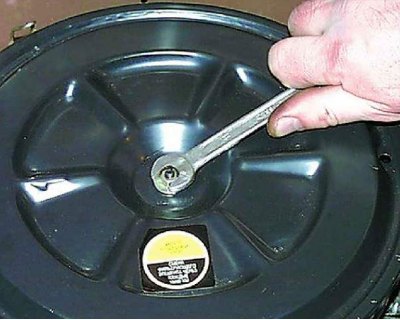
1. Remove the air filter housing cover by unscrewing the nut with a spanner "10" and unfasten the spring clips.
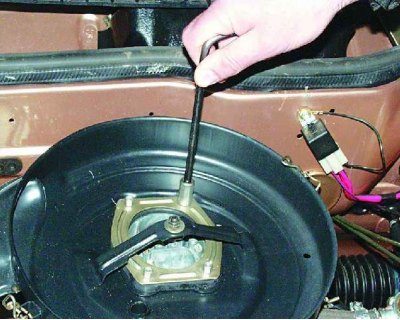
Remove the air filter. Loosen the four nuts with a spanner "8", use a screwdriver to loosen the crankcase ventilation hose clamp at the connection to the valve cover and remove the air filter housing.

2. Look inside the carburetor. The air damper of the primary chamber must be completely closed if the engine cold, and fully open if the engine warm or hot. In the first case, open the air damper. Press the carburetor throttle actuator with your hand.
A trickle of gasoline appeared from the sprayer of the accelerator pump?
No: see point 4
3. Perhaps there is gasoline in the carburetor. Sit behind the wheel, gently pressing the pedal "gas", turn on the starter and start the engine.
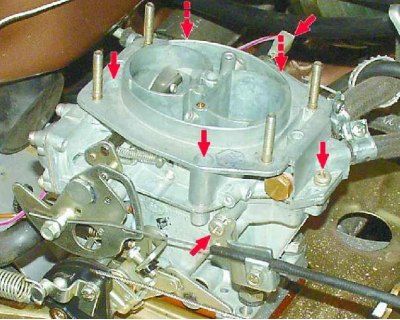
4. In order to be completely sure that there is gasoline in the carburetor, it is necessary to unscrew the five screws securing the top cover of the carburetor, the screw securing the choke control cable sheath bracket and remove the wire from the idle speed solenoid valve.
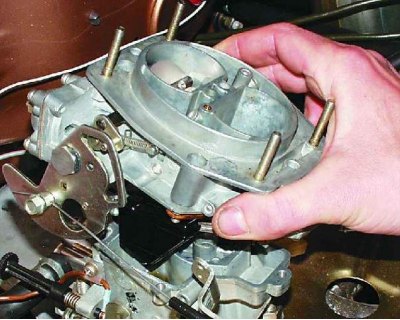
Very carefully, without allowing lateral movement, lift the carburetor cover.
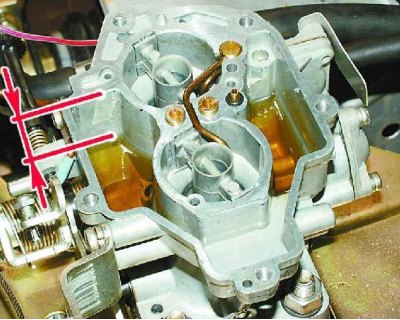
5. Look inside. The gasoline level should be about 22-23 mm below the cap connector and carburetor body.
Is the level normal?
No: see point 7.
6. Put the carburetor cover back in place and press diagonally with 2-3 screws. Sit behind the wheel, gently pressing the pedal "gas", turn on the starter and start the engine.
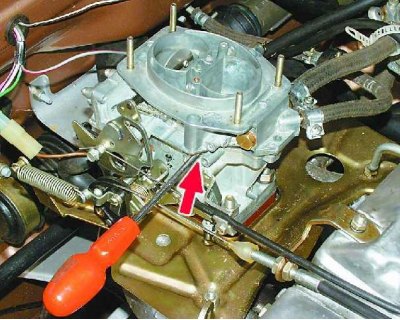
7. Replace the carburetor cover without securing it. Gently insert a screwdriver into the cover and housing slot. Try manually pumping up gas. If it fails, turn the crankshaft a little with the starter and try again. If the carburetor began to fill up intensively with gasoline, put the carburetor cover back in place and press it with 2-3 screws diagonally. Try starting the engine. If the engine is started, go to car service - the carburetor needle valve hangs.
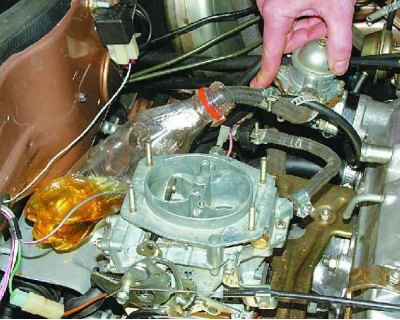
8. If manually it is not possible to pump up gasoline, assemble the carburetor and use a screwdriver to loosen the rubber hose clamp that supplies gasoline to the carburetor. Turning the hose from side to side, pull it off the carburetor fitting. Dip the end of the hose into an empty plastic bottle so you don't flood the engine with gasoline. Press the fuel pump manual primer lever. Turn the motor shaft slightly with the starter and try again.
Is gasoline supplied from the hose?
No: see point 10
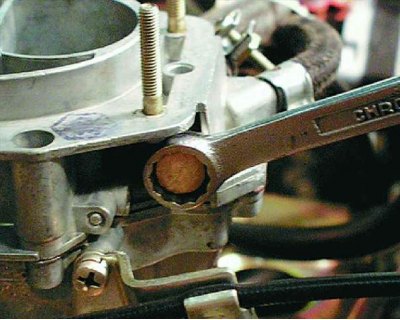
9. Key on "13" unscrew the carburetor fine filter holder.
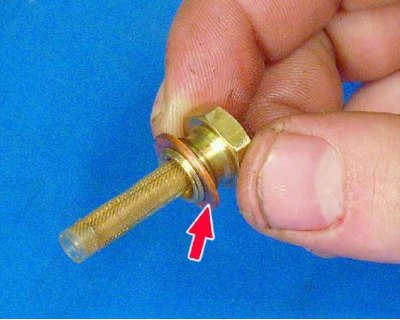
Carefully, being careful not to damage, remove the fine filter from the carburetor cover.
Warning! Don't lose the copper O-ring!
Inspect the filter carefully. If it is clogged with dirt, replace it or, in extreme cases, try washing it with gasoline and blowing it with compressed air.
10. There are three possible reasons:
- A) the fuel pump does not work;
- b) malfunction of the fuel pump drive;
- V) no fuel from the gas tank, clogged with dirt or frozen (winter) fuel line from the fuel tank.
Troubleshooting go to car service.