




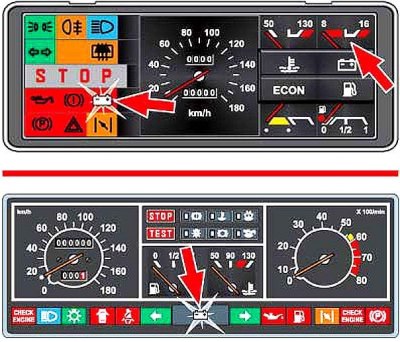
There are two sources of current in a car – a battery and a generator. The battery is used to start the engine and to supply the starter and other consumers with 12 V electric current when the engine is not running. When the engine is running, the main source of current – the generator – supplies all consumers with electric current, including the ignition system, and charges the battery.
If the red battery charging lamp is on on the dashboard, it means that the current is not flowing from the generator to the on-board network and the battery's energy reserve is being used up. This reserve is limited and depends on the capacity. If the battery was fully charged, you can drive to the garage without the generator, but it is better to try to fix the problem on the spot.
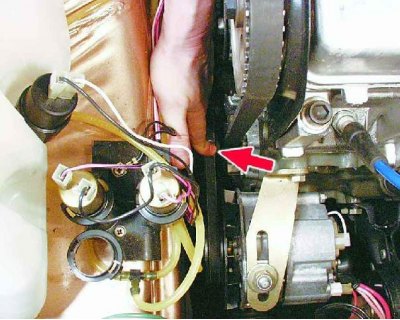
1. Check if the alternator drive belt is broken.
If the belt is intact, check its tension. Press the belt with your thumb from above and see how much it bends. Normal tension is provided when the belt bends by 10-15 mm.
Is the belt tension normal?
Yes: see point 3.
2. Using a 17 mm wrench, loosen the nut that secures the generator to the adjusting bracket, insert a mounting blade between the generator and the engine cylinder block, and use this "lever" to move the generator away from the engine. Tighten the generator mounting nut.
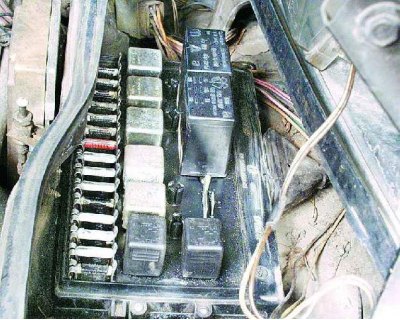
3. Check if the appropriate fuse has blown. The location of the fuses and their ratings are indicated in this manual (see the section "Electrical equipment malfunctions"), in the vehicle repair manual, a separate electrical diagram, on the cover of the fuse box and on the fuses themselves.
Is the fuse blown?
No: see point 6.
4. Replace the fuse.
Warning! Do not install fuses with a higher rated current: this may cause damage to electrical equipment and even fire.
Start the engine and check if the battery charging light goes out.
The charging light went out?
No: see point 6.
5. Have a nice trip!
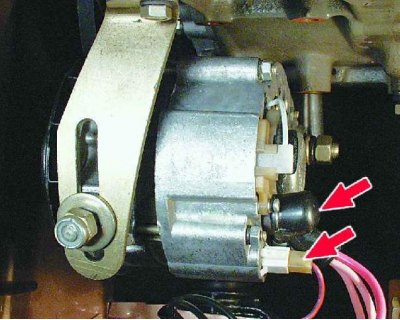
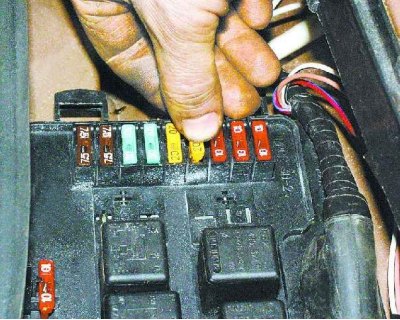
6. Check the wire that goes from the generator to the positive terminal of the battery. There are two wires connected to it: the thicker one connects the battery to the starter, the thin one to the generator. The wire may be torn, broken inside the insulation, or have oxidized or unreliable contacts. Fix the problem and start the engine.
Is there a charger?
No: see point 8.
7. Have a nice trip!
8. If after the measures taken the charging lamp continues to light with the engine running, then the possible cause of the malfunction lies in the generator itself. There may be several reasons, and to eliminate them it is better to use the help of a specialist, and you can only hope that the energy reserve in the battery is enough to get to the car service.
Tip: To reduce current consumption when driving a vehicle with a faulty alternator, if possible, turn off the radio, unnecessary lights, heater fan, windshield heater, etc.
Advice: Experienced car enthusiasts can be advised to check the generator voltage regulator.
The operation of the voltage regulator consists of continuously automatically changing the excitation current of the generator so that the generator voltage is maintained within specified limits when the rotation speed and load of the generator change.
Check on the car
To check, you need a DC voltmeter with a scale of up to 15–30 V and an accuracy class of at least 1.0.
After 15 minutes of engine operation at medium speed with the headlights on, measure the voltage between terminal "30" and the generator ground. The voltage should be within 13.6–14.6 V.
The article is taken from the website: vazbook
If systematic undercharging or overcharging of the battery is observed and the regulated voltage does not fall within the specified limits, the voltage regulator must be replaced.
Checking the removed regulator
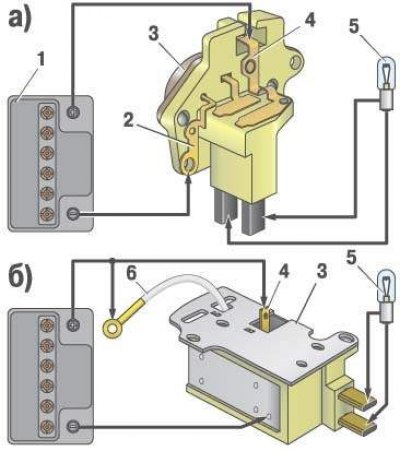
- a) voltage regulator test circuit for pre-1996 models.
- b) circuit for testing the output voltage regulator after 1996.
The regulator (pos. 3), removed from the generator, is checked according to the diagram provided. It is better to check the regulator used before 1996 together with the brush holder, since in this case you can immediately detect breaks in the brush terminals and poor contact between the terminals of the voltage regulator and the brush holder.
Between the brushes, connect a lamp (pos. 5) 1–3 W, 12 V. To terminals "B" (pos. 4), "B" (pos. 6) and to the regulator body or the "ground" terminal (pos. 2), connect a power source (pos. 1), first with a voltage of 12 V, and then with a voltage of 15–16 V.
If the regulator is working properly, then in the first case the lamp should light up, and in the second case it should go out.
If the lamp lights up in both cases, then there is a breakdown in the regulator; if it does not light up in both cases, then either there is a break in the regulator, or there is no contact between the brushes and the terminals of the voltage regulator.