
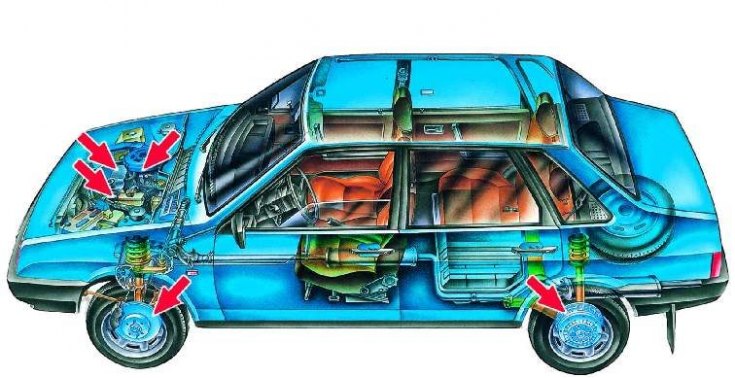
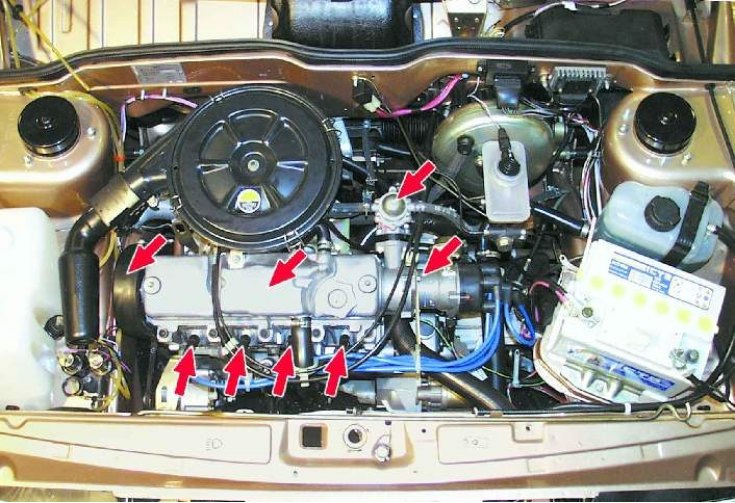
1. Engine malfunction - a decrease in compression in one or more cylinders, a change in the valve timing when the camshaft drive belt jumps, additional air leaks between the carburetor and the combustion chamber in the engine. Coking of the exhaust system.
2. Malfunction of the power system - clogging of the entire system, fuel filters, carburetor. Insufficient fuel pump supply. Incorrect carburetor adjustment (mixture too lean or too rich). The use of low-quality fuel.
3. Malfunction of the ignition system - failure of the spark plug, breakdown of the high-voltage circuit of the system, incorrect setting of the ignition timing.
4. Clutch slip due to wear or misadjustment.
5. Malfunction of the brake system - braking of one or more wheels on the go, incorrect adjustment of the parking brake.
6. Insufficient tire pressure.
7. Car overload.
Full diagnostics of the car must be carried out by highly qualified craftsmen using special diagnostic equipment, therefore go to car service.
You can independently carry out the following work:
1. Check and adjust the air pressure in the tires.
2. Check the operation of the service brake system and parking brake. It is not necessary to remove the wheels for this. Find a flat stretch of road and, in dry, calm weather, drive to determine coastdown car. The car must be fully fueled, only the driver is in the cabin. Accelerate the vehicle to 50 km/h, level off the speed, and then disengage the gear and coast to a complete stop. Make another run in the opposite direction. The overrun should be about 500 m.
3. Check the operation of the carburetor and ignition system as described above.
4. Try increasing the ignition timing. To do this, having previously noted the initial position of the distributor, turn it one division of the scale clockwise, as viewed from the side of the distributor cover.
Attention! Take a test drive. If, after increasing the ignition timing during a sharp acceleration, detonation appears, you will hear ringing metallic knocks lasting more than 2 s (the so-called tapping of fingers), the ignition timing will have to be reduced to the original value. Engine operation with detonation is strictly unacceptable!
5. Check clutch operation.
The initial check is carried out on a flat, obstacle-free area. Set the choke control knob to a high idle speed - approximately 1500 min–1. Depress the clutch, engage first gear and depress the brake pedal. Then begin to slowly release the clutch pedal. If the engine stalls, the clutch is working properly and does not slip.
In this case, check the adjustment of the clutch actuator. (See subsection "Clutch drive adjustment" below.)
If these measures do not give the desired effect, contact a car service for a complete diagnosis of the car.
Clutch drive adjustment

1. Park the vehicle on level ground and try to start in first gear by gently releasing the clutch pedal. Try to determine at what position of the clutch pedal your car starts to move.
Does the car start to move about half way through the clutch pedal?
No: see point 3.
2. Clutch adjusted correctly.
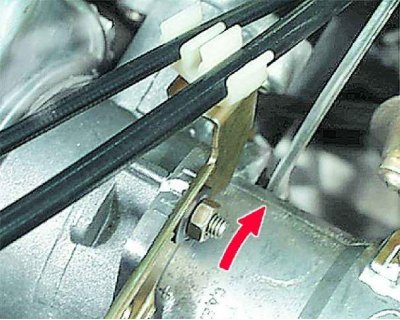
3. If the car starts to move at the end of the clutch pedal travel, then it does not have free play and needs to be adjusted. The clutch of front-wheel drive VAZ vehicles is actuated by a cable connected to the clutch pedal. To adjust this clutch, just open the hood.
4. There are two nuts on the threaded part of the cable, with which the cable is attached to the bracket. These nuts can be used to adjust the travel of the clutch pedal.
5. To increase the free play of the clutch pedal, you need to slightly unscrew the nut inside the bracket, and tighten the nut located outside.
6. If the thread is rusted and the nut won't come loose, moisten it with any thread-breaking fluid (type WD40). If there is no such composition at hand, you can moisten the threads with brake fluid or engine oil, which are always in the car.
7. After adjusting the clutch, be sure to check it, as described earlier.
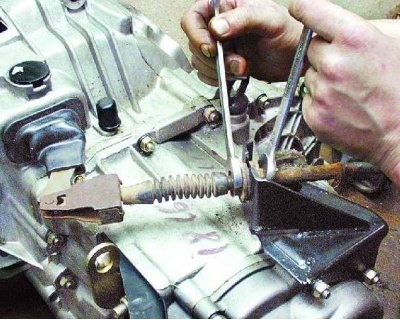
8. If the clutch on your car is adjusted correctly, the full travel of the pedal when moving it from the highest position to the stop at the bottom should be 125–135 mm.
9. If the adjustments did not help and the clutch continues to slip, then it is faulty and needs to be replaced. It is better to entrust such work to specialists, since appropriate tools and skills are needed.