
English Русский
Български
Беларускі
Український
Српски
Hrvatski
Română
Polski
Slovenský
Magyar
| Articles | Contacts | Sitemap |   
Repair and maintenance Lada Repair and maintenance Mazda Repair and maintenance Mitsubishi Repair and maintenance Toyota Repair and maintenance Land Rover Repair and maintenance Hyundai Repair and maintenance Nissan
VAZbook.ru


Main     1111   2101   2105   2106   2107   2109   2110   2115   2121  
VAZ-2108 (1984-2003) VAZ-2109 (1984-1997) VAZ-21099 (1990-2004)
  • Main
  • «Sputnik»
  • VAZ-21099
  • Power unit
  • Power and exhaust system
  • Defect detection of carburetor parts

Defect detection of carburetor parts (VAZ-21099)

            0

Wash the carburetor filter in gasoline and blow it out with compressed air.

Attention! If the floats are not positioned correctly, the carburetor will not operate properly. Therefore, be sure to check the float installation using the template (see Fig. "Adjusting the fuel level in the float chamber").


Warning! Do not clean the jets with metal objects. It is allowed to use thin copper wire. The diameter of the wire should be smaller than the diameter of the hole in the jet. Otherwise, the jet calibration will be disrupted.
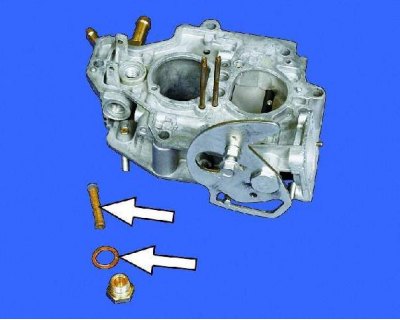

Warning! Do not clean the jets with metal objects. It is allowed to use thin copper wire. The…


1. If the filter mesh is torn or cannot be washed, replace the filter. Replace a tightly compressed or damaged sealing ring.
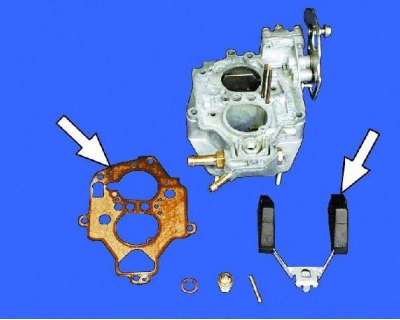
1. If the filter mesh is torn or cannot be washed, replace the filter. Replace a tightly compressed…


2. Inspect the floats and gasket. If these parts are damaged, be sure to replace them.
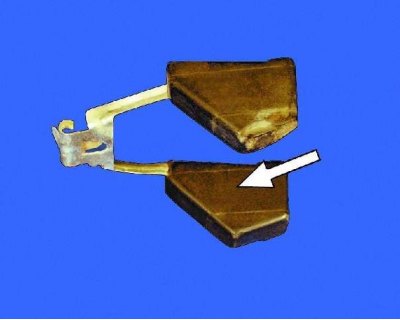


2. Inspect the floats and gasket. If these parts are damaged, be sure to replace them.


3. If traces of the floats touching the chamber wall are visible, bend the float bracket, then check the installation of the floats using the template.
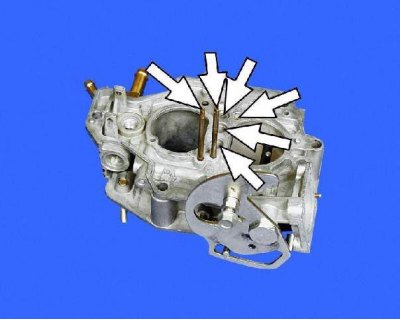
3. If traces of the floats touching the chamber wall are visible, bend the float bracket, then…


4. Blow out the channels and holes in the carburetor cover with compressed air. Inspect the mating surfaces of the cover: if there is damage, replace it.
4. Blow out the channels and holes in the carburetor cover with compressed air. Inspect the mating…


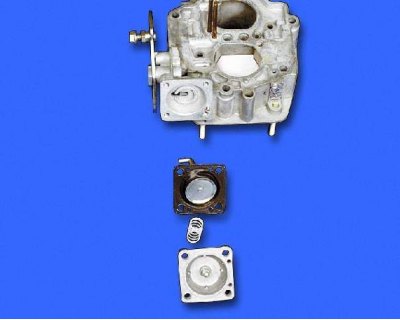
5. Inspect the trigger components. Replace a worn or torn diaphragm, and replace the spring if it is broken or cracked.

5. Inspect the trigger components. Replace a worn or torn diaphragm, and replace the spring if it…


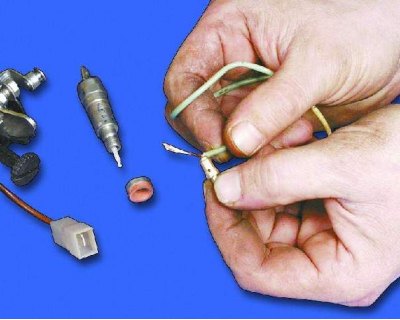
6. Blow out the idle fuel jet with compressed air. If the jet is not blown out, clean its hole with a thin copper wire. Clean the other jets in the same way.
6. Blow out the idle fuel jet with compressed air. If the jet is not blown out, clean its hole with…


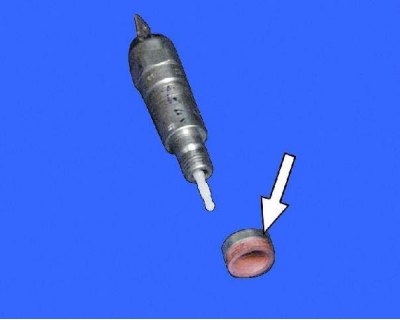
7. Inspect the sealing ring. If it is torn, cracked or the rubber has lost its elasticity, replace it.
7. Inspect the sealing ring. If it is torn, cracked or the rubber has lost its elasticity, replace…


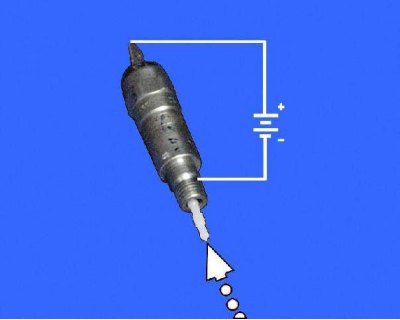
8. Check the electromagnetic valve. To do this, connect the wire from the "+" terminal of the battery to the valve terminal, and the wire from the "-" terminal to the valve body. The valve needle should be pulled into the body. If this does not happen, replace the valve.
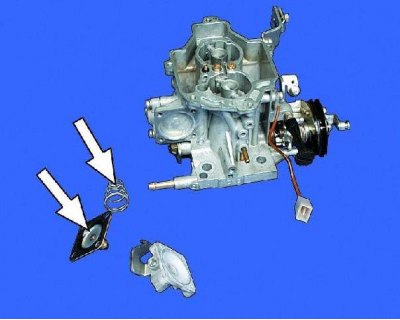
8. Check the electromagnetic valve. To do this, connect the wire from the «+» terminal of the…


9. Inspect the accelerator pump components. Replace a worn or torn diaphragm. Replace the spring if it is broken or damaged.
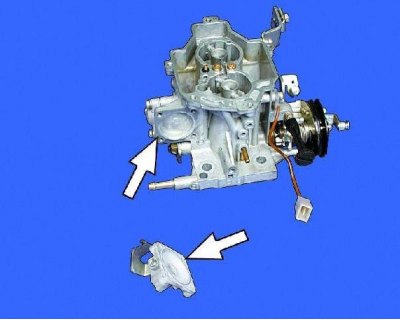
9. Inspect the accelerator pump components. Replace a worn or torn diaphragm. Replace the spring if…


10. Inspect the mating surfaces of the accelerator pump cover and carburetor body. Replace parts with damaged surfaces.
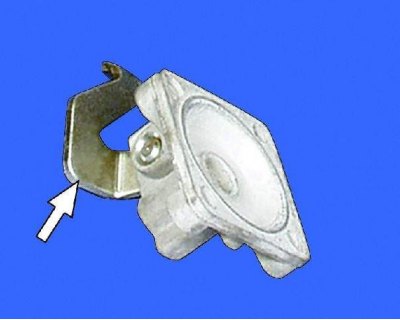
10. Inspect the mating surfaces of the accelerator pump cover and carburetor body. Replace parts…


11. Check the ease of movement of the lever in the accelerator pump cover. The lever should turn freely, without jamming.

The original can be viewed on the portal [vazbook.ru]
11. Check the ease of movement of the lever in the accelerator pump cover. The lever should turn…


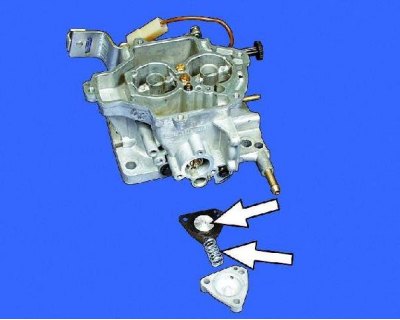
12. Inspect the power mode economizer components. Replace a worn or torn diaphragm. Also replace a broken or damaged spring.
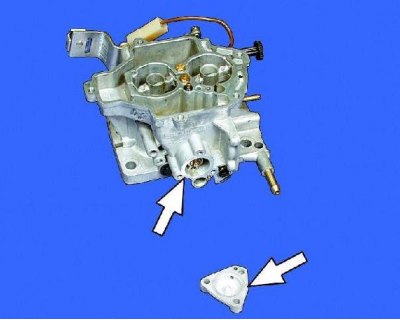
12. Inspect the power mode economizer components. Replace a worn or torn diaphragm. Also replace a…


13. Inspect the mating surfaces of the economizer cover and carburetor body. Replace parts with damaged surfaces.
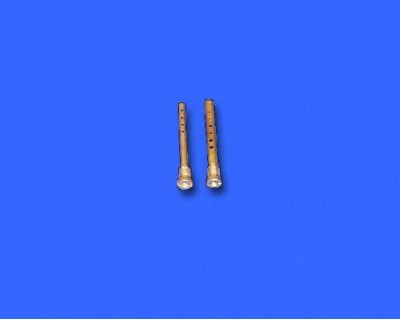
13. Inspect the mating surfaces of the economizer cover and carburetor body. Replace parts with…


14. Wash and clean the holes of the emulsion tubes with acetone or gasoline.
14. Wash and clean the holes of the emulsion tubes with acetone or gasoline.


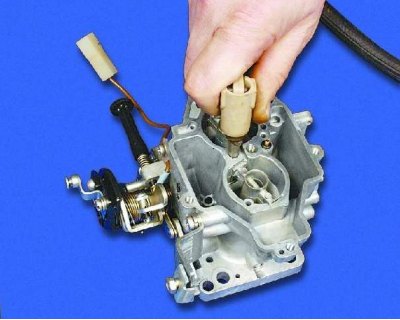
15. Blow with compressed air (you can use a tire pump) hole for accelerator pump nozzle...
15. Blow with compressed air (you can use a tire pump) hole for accelerator pump nozzle...


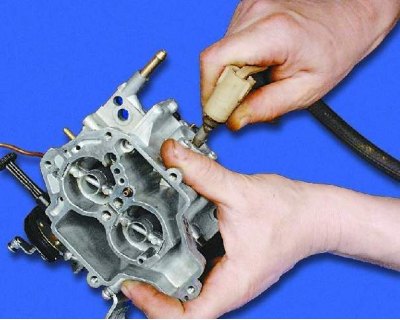
16....accelerator pump jet on one side...
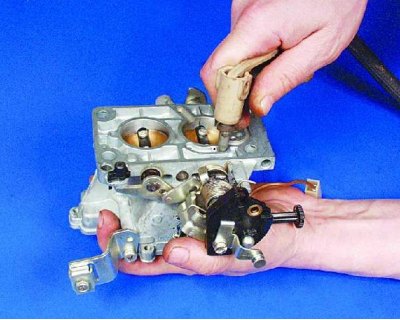
16....accelerator pump jet on one side...


17....and on the other hand...
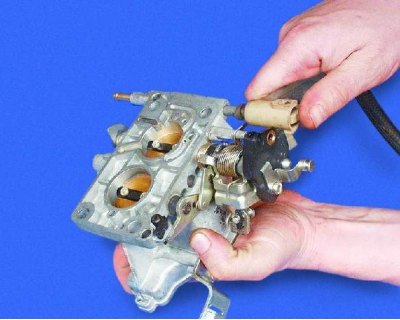
17....and on the other hand...


18....hole for adjusting the mixture quality (composition).


This article is available at russian, bulgarian, belarusian, ukrainian, serbian, croatian, romanian, polish, slovak, hungarian
The text was reviewed by the specialist: Grigory Vologodtsev

Share with friends:

Previous articles
VAZ-21099: Power and exhaust system
Next articles

Disassembling the carburetor
Removal and installation the carburetor
Assembling the carburetor
Adjusting the air damper drive
Adjusting the throttle actuator
Adjusting engine idle speed
Adjusting the starting device

More articles from other manuals on VAZ cars:
➠ Engine parts defect detection VAZ-11113 (1996-2003)
➠ Disassembling and checking the carburetor cover parts VAZ-21061 (1976-2006)
➠ Engine defect detection VAZ-2115 (1997-2012)
➠ Cleaning and checking the technical condition of carburetor parts VAZ-21213 (1994-2006)
➠ The structure of the car body and its parts VAZ-2101 (1970-1983)
Link in different formats to this page


Visitor comments

No comments yet


How much will 11 + 44 ?


VAZ-21099 (1990-2004) 
  • General information
  • Specifications
  • User manual
  • Maintenance
  • Car care
  • Troubleshooting
  • Power unit
  • Engine repair
  • Cooling and lubrication system
  • Power and exhaust system
  • Transmission
  • Car gearbox
  • Clutch and drive shafts
  • Chassis
  • Car suspension
  • Steering
  • Brake system
  • Body
  • Exterior
  • Interior
  • Doors and locks
  • Electrical equipment
  • Equipment and devices
  • Lighting and signaling
  • Engine electrics
  • Ignition system


VAZ-2109 (1984-1997) 
  • General information
  • Vehicle operation
  • Vehicle device
  • Power unit
  • Engine repair
  • Cooling and lubrication system
  • Supply system
  • Transmission
  • Clutch
  • Gearbox and drive
  • Chassis
  • Car suspension
  • Steering
  • Brake system
  • Body
  • Body elements
  • Electrical equipment
  • Engine electrics
  • Equipment and devices


VAZ-2108 (1984-2003) 
  • General information
  • Introduction to guide
  • Power unit
  • Engine repair
  • Cooling and lubrication system
  • Power and exhaust system
  • Transmission
  • Clutch and drive shafts
  • Car gearbox
  • Chassis
  • Front suspension
  • Rear suspension
  • Steering
  • Brake system
  • Body
  • Exterior
  • Interior
  • Doors and glass
  • Electrical equipment
  • Equipment and devices
  • Engine electrics
  • Ignition system


VAZbook.ru © 2017 · Mobile version · Contact with administration · Sitemap: EN BG BY UA RS HR RO PL SK HU · Site search · News and articles VAZ-1111 · VAZ-11113 · VAZ-2101 · VAZ-21011 · VAZ-2104 · VAZ-2105 · VAZ-21051 · VAZ-2106 · VAZ-21061 · VAZ-2107 · VAZ-21099 · VAZ-2109 · VAZ-2108 · VAZ-2110 · VAZ-2112 · VAZ-2114 · VAZ-2115 · VAZ-2121 · VAZ-21213 · VAZ-21214 ·
The site stores technical data using cookies to improve the service.