




Contents: Removal ↓ Installation ↓
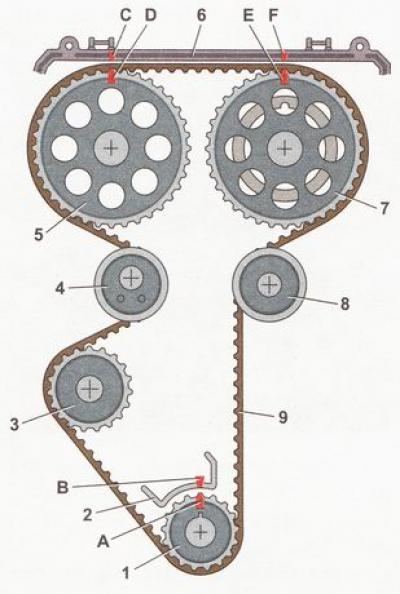
Camshaft drive diagram on VAZ 2110, VAZ 2111, VAZ 2112 cars: 1 - toothed pulley of the engine crankshaft; 2 - lug on the oil pump cover; 3 - toothed pulley of the coolant pump; 4 - tension roller; 5 - toothed pulley of the exhaust camshaft; 6 - rear belt cover; 7 - toothed pulley of the intake camshaft; 8 - guide roller; 9 - toothed belt; A - TDC mark on the crankshaft toothed pulley; B - mark on the oil pump cover; C, F - mark on the back cover; D - mark on the toothed pulley of the exhaust camshaft; E - mark on the toothed pulley of the intake camshaft
Removal
1. Prepare the car for work (see "Preparing a car for maintenance and repair").
2. Remove the crankshaft pulley (see "Crankshaft pulley - removal, installation, replacement").
3. Remove the front cover (see "Front Timing Belt Cover - Removal and Installation") and mark the direction of rotation of the belt.
4. Install the crankshaft pulley mounting bolt in place.
5. Turning the crankshaft with a 17 mm socket wrench by the pulley mounting bolt, set the piston of the first cylinder to the TDC position of the compression stroke. In this case, the marks on the crankshaft pulleys and camshafts will align with the installation marks on the oil pump housing and the rear cover of the timing mechanism.
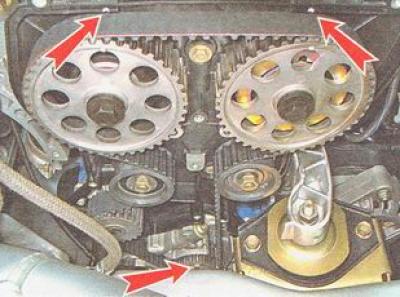
Note: To remove the timing belt, simply unscrew the tension roller nut a few turns and loosen the belt tension. However, it is easier to remove and put the timing belt on the pulleys when the tension roller and guide roller move freely on the studs.
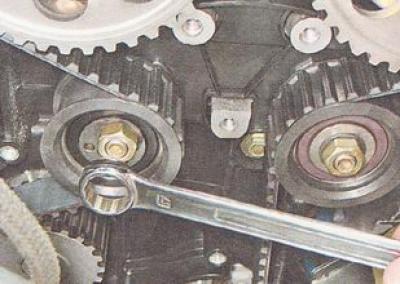
6. Using a 17 mm wrench, unscrew the nuts securing the tension and guide rollers.
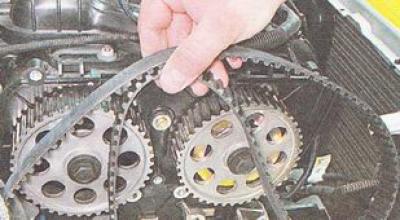
7. Remove the timing belt.
Recommendation: Check the condition of the tension and guide rollers (see "Timing Belt Tensioner and Guide Rollers - Removal and Installation").
Installation
1. Put the timing belt on the toothed pulley of the crankshaft (in accordance with the direction of rotation mark, if the belt is not new), making sure that the crankshaft pulley mark is aligned with the mark on the oil pump housing.
View the original on the internet resource www.vazbook.ru
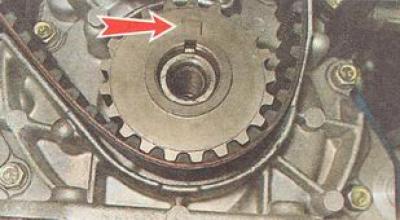
2. Pass the left branch of the timing belt along the outer side of the coolant pump pulley and the inner side of the tension roller. Pass the right branch of the timing belt along the inner side of the guide roller.
Note. If there is a device for fixing the camshaft pulleys, install it and put the timing belt on the pulleys, preventing its right branch and the section between the camshaft pulleys from sagging. If there is no device, it should be taken into account that after removing the timing belt, the inlet camshaft pulley will turn one tooth clockwise under the action of their springs, and the outlet camshaft pulley will turn one tooth counterclockwise.
3. Using a 17 mm wrench, turn the intake camshaft pulley counterclockwise until the marks on the pulley and cover align. Having eliminated the slack in the right branch of the timing belt, put the timing belt on the exhaust camshaft pulley.
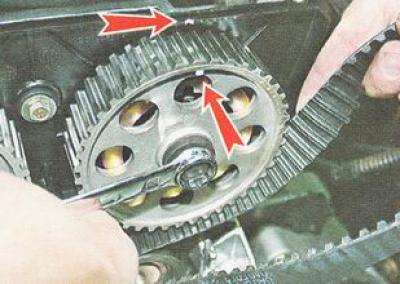
Without giving the timing belt the opportunity to jump over the pulley teeth, we allow the pulley to return to its original position (turn one tooth to the right).
4. Using a 17 mm wrench, turn the exhaust valve pulley, setting it to a position similar to the position of the intake valve pulley (the pulley mark is located one tooth to the right of the mark on the cover).
Holding the pulley in this position, we put the timing belt on its upper part, preventing the timing belt from sagging between the pulleys and from jumping over the teeth of the intake valve pulley.
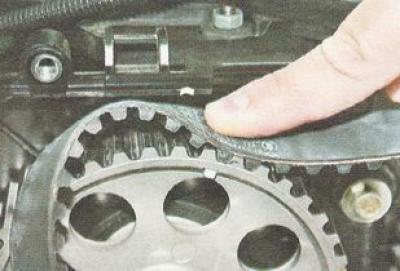
5. Turning the pulleys with a 17 mm wrench, tighten the right branch of the timing belt, preventing the crankshaft pulley from turning, and completely place the timing belt on the exhaust camshaft pulley.
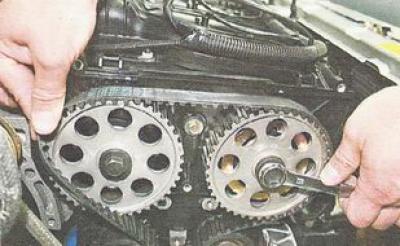
6. Check the alignment of the marks on all three pulleys in the TDC position of the compression stroke of the first cylinder (see fig. Camshaft drive diagram).
7. Tension the timing belt (see "Timing belt - checking condition and adjusting belt tension") and tighten the roller mounting nuts.
8. Using a 17 mm wrench, turn the engine crankshaft two full turns on the pulley mounting bolt, then again check the alignment of the crankshaft and camshaft pulley marks with the timing marks on the engine. If necessary, repeat the installation of the timing belt.
We carry out further assembly of the engine in the reverse order of disassembly.
See also "Timing Belt Tensioner and Guide Rollers - Removal and Installation".