




Contents: Removal ↓ Installation ↓
To perform the work you will need a ball joint puller.
Removal
1. Prepare the car for work (see "Preparing the car for maintenance and repair").
2. Remove the front wheel (see "Wheel - replacement").
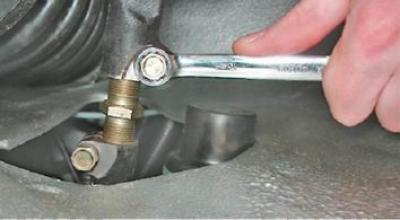
3. With a spanner by 13 mm loosen the tightening of the outer tie rod end clamp bolt.
4. Using pliers, straighten and remove the cotter pin from the ball joint hole.
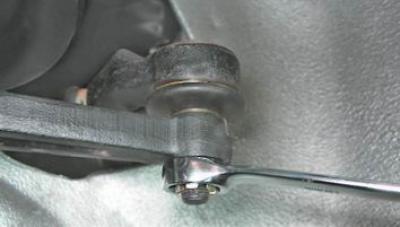
5. With a spanner by 19 mm we unscrew the crown nut of the finger.
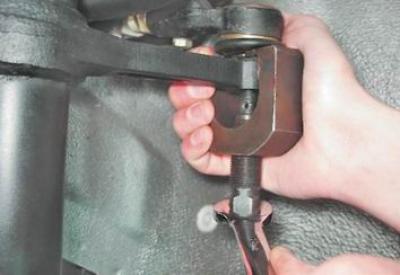
6. Using a puller, press the pin out of the hole in the front suspension strut pivot arm.
7. Rotate the outer tip to remove it from the adjusting insert.
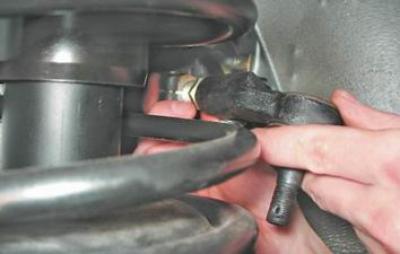
Advice: If you need to maintain the wheel alignment, count the number of turns made.
Installation
1. Cover the threaded part of the adjusting insert with plastic grease.
2. Screw the new tip onto the adjusting insert.
Advice: To maintain the wheel alignment angle, screw the new tip onto the adjusting insert with the same number of turns that were made when unscrewing the old tip.
3. Insert the pin into the hole of the strut pivot arm and tighten the crown nut.
4. Tighten the nut to a torque of 27.1-33.4 N·m (2.8-3.4 kgf·m) and align the hole in the pin with the nearest slot in the nut.
5. We cotter the nut and spread the ends of the cotter pin in different directions.
6. Tighten the tie rod end clamp bolt to a torque of 19.1-30.9 N·m (2.0-3.1 kgf·m).