




Note: It is convenient to perform the work in an inspection pit. But if necessary, you can remove and install the spring and shock absorber of the rear suspension by placing the car on a flat horizontal surface.
Recommendation: Replace shock absorbers and springs in pairs.
To complete the work you will need an assistant, as well as:
- inspection pit or overpass;
- stand.
Removal
1. Prepare the car for work and hang the rear part of the car on stands (see "Preparing the car for maintenance and repair").
Note: If there is no pit or overpass, remove the rear wheel of the car from the side of the shock absorber being replaced (see "Wheel - replacement").
2. Remove the side trim of the trunk from the side of the shock absorber being removed (see "Tailgate - Removal and Installation").
Recommendation: It is better to perform the following operation using a special device for disassembling the suspension strut (see "Front suspension strut - disassembly and assembly"), since it is not always possible to hold the rod with an open-end wrench.
3. Hold the shock absorber rod with an open-end wrench by 6 mm, with a spanner by 17 mm unscrew the rod nut.
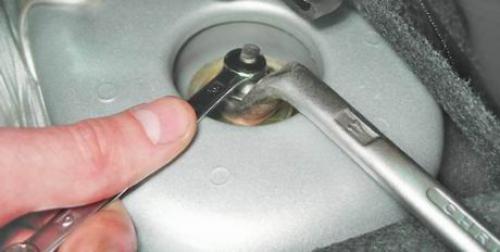
4. Remove the support washer and the upper cushion for mounting the shock absorber rod from the shock absorber rod.
5. With two keys by 19 mm we unscrew the nut of the bolt securing the lower end of the shock absorber to the rear axle beam and remove the bolt.
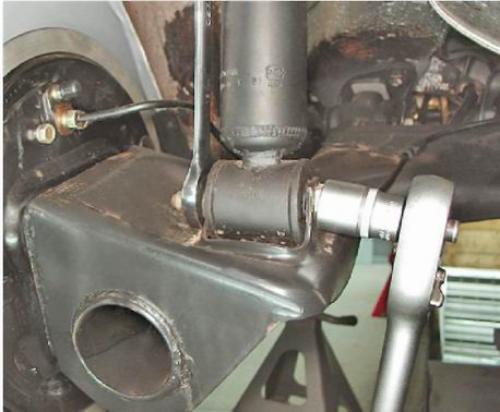
6. Move the lower end of the shock absorber towards the rear of the car and remove the shock absorber.
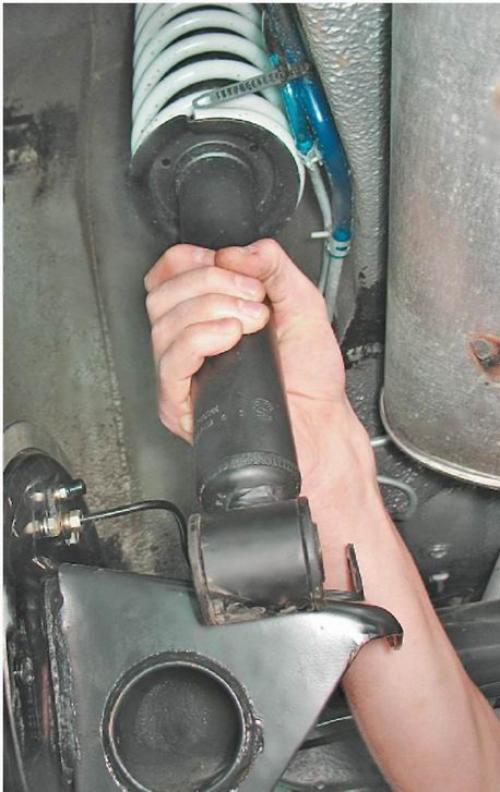
7. Remove the spring and its gasket from the shock absorber, and, if necessary, remove the lower cushion and spacer sleeve from the shock absorber rod.
Installation
Note: The rear suspension of the car should be equipped with springs of the same class. Class A is marked with white marks, and class B - with black marks (for vehicles supplied for export, marking in yellow and green respectively).
1. Before installing the shock absorber, secure the rubber gasket to the spring with insulating tape or scotch tape.
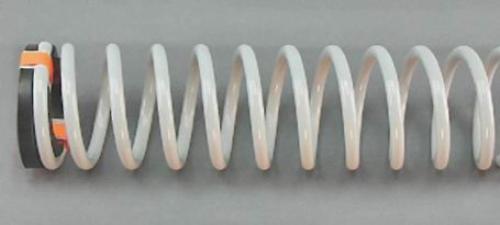
2. Install the spring on the shock absorber and fully extend the shock absorber rod. Put the spacer sleeve and lower cushion on the rod (if they are not on the stock).
Warning! Orient the shock absorber so that the end of the lower spring coil faces the wheel.
3. Insert the shock absorber rod into the hole in the body cup, while the assistant puts a special washer on the upper cushion of the rod and tightens the rod nut by several turns.
4. Raise the lever until the holes in the shock absorber and the beam bracket align. Install the lower shock absorber mounting bolt and tighten its nut (without delay).
Note. If you don't have an assistant, you can first secure the shock absorber to the rear suspension beam. Then, placing a stop under the rear lever, smoothly lower the car using the jack, making sure that the shock absorber rod enters the body hole, and only then put on the upper cushion with the washer and tighten the nut.
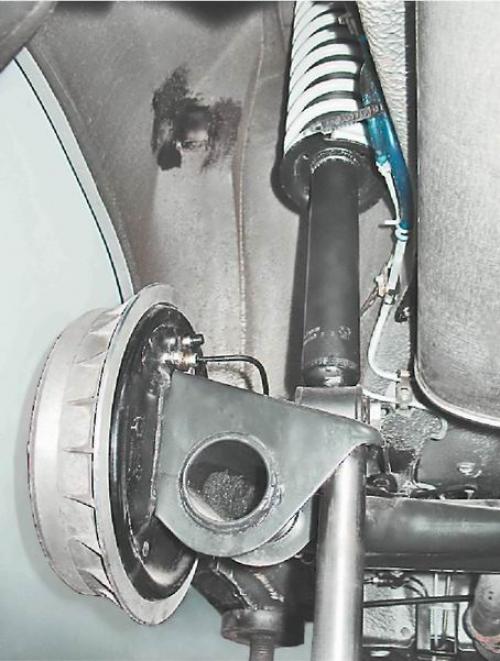
5. Install the removed wheel (if the work was carried out without an inspection pit) and lower the car onto its wheels. Press the rear of the car several times to self-install the suspension elements.
6. Tighten the shock absorber rod mounting nut to a torque of 50-61.7 N·m (5.1-6.3 kgf·m).
7. Tighten the nut of the lower shock absorber mounting bolt to a torque of 66.6-82.3 N·m (6.8-8.4 kgf·m).