
Attention! Loosen and tighten the wheel bolts only with the vehicle on the ground. Bolt tightening torque 65-95 Nm (6.5-9.5 kgf·m).
Attention! The use of gasoline, diesel fuel or any other mineral solvents for cleaning brakes is unacceptable.
Attention! The minimum allowable thickness of the overlays is 1.5 mm. If you have any doubts that the thickness of the friction lining is within the permissible range or its surface is oily, or there is a suspicion that the friction lining is loosely connected to the base, be sure to remove, check and, if necessary, replace the pads. Linings should not have deep grooves and chips.
Attention! When installing old pads, replacing the inner and outer pads with each other, as well as between the left and right wheels, is unacceptable. This can lead to uneven braking.
Attention! The surface of the friction linings should not be oily, have deep scratches and chips. The pad must be firmly connected to the base of the block. If during the next check the thickness of the pads approaches the minimum allowable, then such pads are still operational, but their service life will soon end. Choose for yourself either immediately replace the pads, or constantly monitor their thickness.
Attention! Brake pad sets must be replaced on both sides of the vehicle at the same time.
Attention! Press the piston into the cylinder carefully so that it does not warp. To do this, install both worn brake pads (it is better if only one base remains from the inner) and the bracket body in place. Gently move the piston with a large screwdriver or pry bar, pressing down on the inner pad and leaning against the brake disc.
Attention! If the brake fluid level in the reservoir is at "MAX" or approaches it, then pump out some of the fluid from the tank. Otherwise, it will overflow when installing new pads.
1. Brake the vehicle with the parking brake and place chocks under the rear wheels. Raise and support the front of the vehicle. Remove the wheel.
2. Wash with warm water and detergent and dry the brake mechanism.

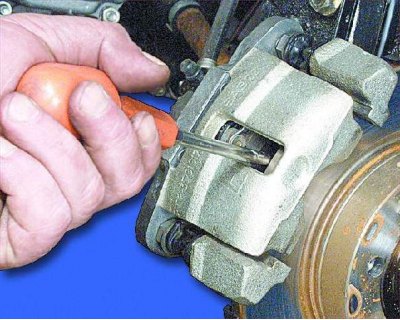
3. Visually check the condition of the pads through the hole in the brake caliper housing.
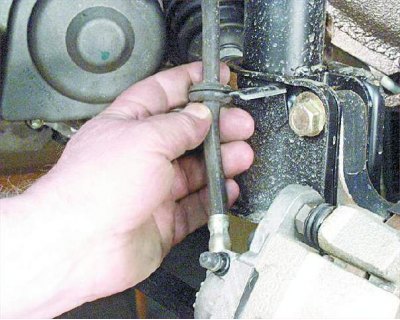
4. Take out from an arm a rubber sealant together with a hose.
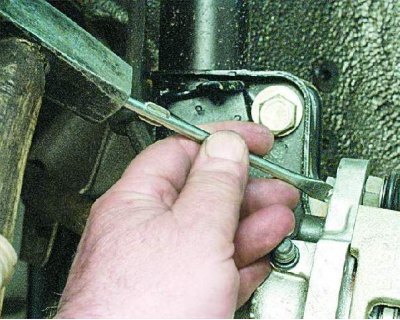
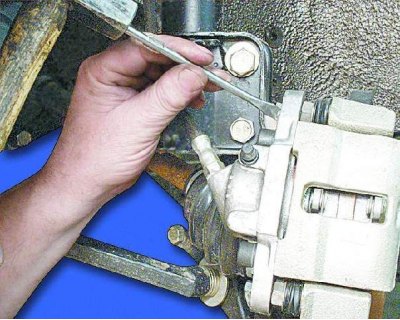
5. Use a screwdriver to bend the tab of the lock washer of the upper bolt of the guide pin.
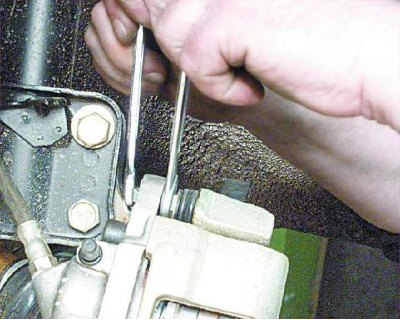
6. Loosen the upper bolt of the guide pin, while holding it with a hexagon wrench.
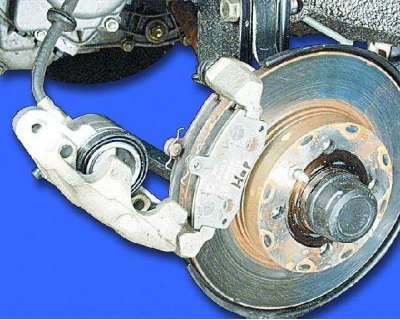
7. Rotate the brace body down around the axis of the lower pin.
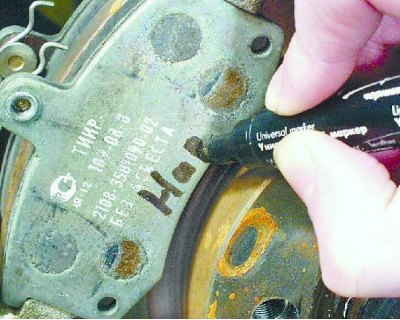
8. Mark the brake pads if you intend to reinstall them.
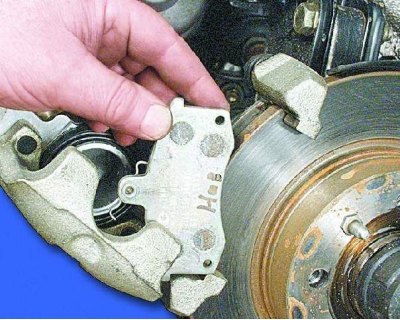
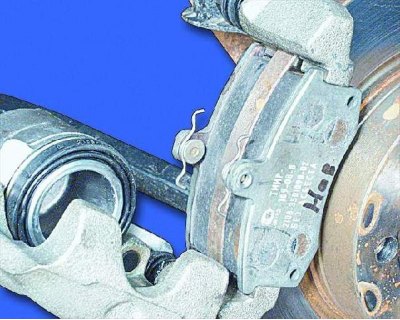
9. Remove the brake pads.
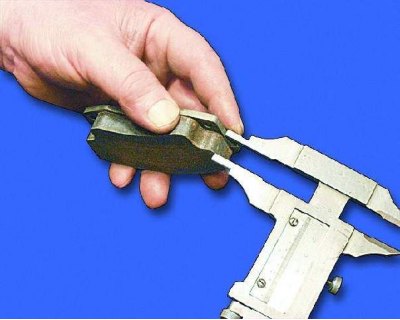
10. Check the thickness and condition of the friction linings of the brake pads.
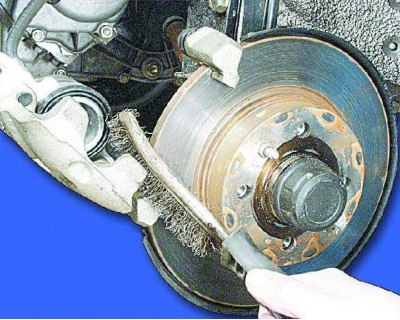
11. Remove dirt and rust from the brake parts, especially the brake pad seats.
12. If you are installing new brake pads, press the piston into the cylinder.
13. Install new brake pads. Make sure the pressure springs are parallel to the top edge of the brake pads. Old pads must be installed in accordance with the previously made markings.

14. Rotate the bracket body and tighten the upper bolt of the guide pin with a torque of 31-38 Nm (3.1- 3.8 kgf·m), while holding it with a hexagon wrench.
15. Bend the tab of the lock washer with a screwdriver.
16. Install the wheel and lower the car to the ground. Then press the brake pedal several times to set the piston to the working position. Check the brake fluid level in the reservoir and top up if necessary.