
Recommendation. At each maintenance of the car, the condition of the anthers of the drive joints should be checked. When the boot breaks, the dirt that gets into the inner cavity of the hinge completely disables the CV joint after several hundred kilometers of the car. A defective CV joint must be replaced as an assembly. If the anther rupture was detected before the CV joint failed, then the joint can be disassembled and flushed, replacing the CV joint boot and grease.
To carry out repairs, you will need:
- special pliers for installing clamps for fastening anthers of CV joints (see point 9 "Special tools and fixtures") or sliding pliers;
- sliding pliers for removing retaining rings;
- grease for CV joints 40 cm3;
- new CV joint boot;
- new locking and retaining rings of the hinge.
CV joint removal
1. Remove the front wheel drive assembly (see "Drive wheel drive - removal and installation").
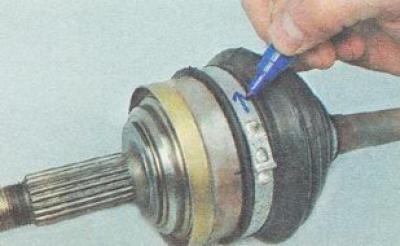
2. The ends of all four collars of the inner and outer hinges on both shafts are directed in the direction opposite to the rotation of the drives when moving forward. To ensure correct assembly, if the clamps are to be reused, we mark them with a marker to indicate the direction of rotation.
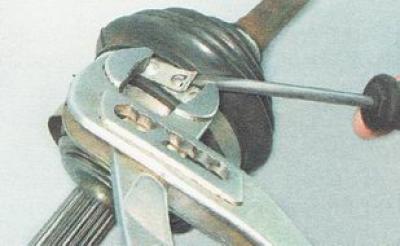
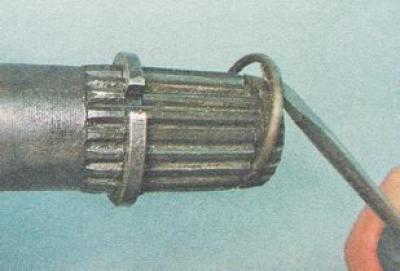
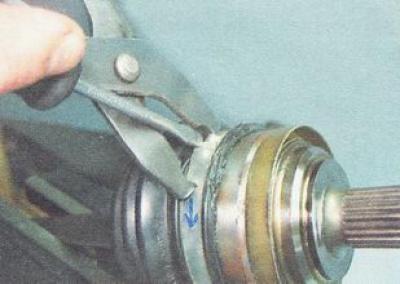
3. With large sliding pliers or special tongs, we compress the large clamp and, using a slotted screwdriver, disconnect the lock of the clamp holding the CV joint boot.
4. In the same way, remove the small collar of the anther of the outer hinge.

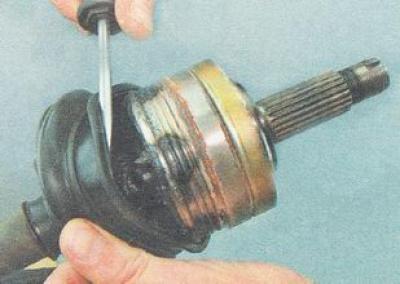
5. We fix the drive shaft in a vice. With a slotted screwdriver, pry off and remove the CV joint boot from the outer hinge housing.
6. Cut off the CV joint boot with a knife.
Warning. If the CV joint is reused, then it is impossible to strike the separator or the hinge housing.
7. Striking the inner race of the CV joint through a soft metal drift, we compress the outer hinge from the drive shaft.
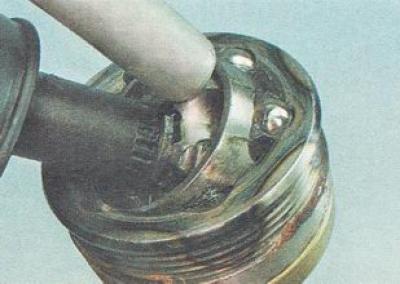
8. Using a slotted screwdriver, pry off and remove the retaining ring from the splines of the drive shaft.
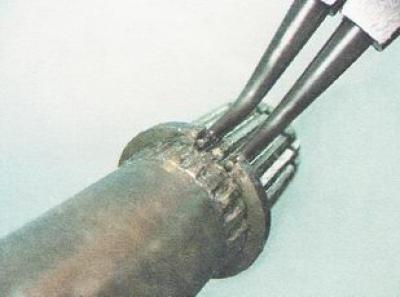
9. Using expanding tongs, remove the thrust ring.
10. We wash the hinge in kerosene, wipe it with a clean cloth and let it dry.
CV joint installation
1. In order not to damage the new CV joint boot during installation, we wrap the shaft splines with tape or tape.
2. We put a new CV joint boot on the shaft, move the boot to the center of the shaft and remove the adhesive tape.
Helpful advice. Do not use a socket head to install the thrust ring. The internal chamfer, found on almost all heads, will compress the ring, which will not allow it to be installed on the shaft.
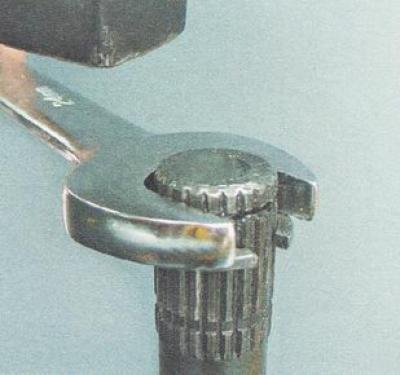
3. We fix the drive shaft in a vice in a vertical position. Using a 24 mm open-end wrench as a mandrel, install a thrust ring on the splined end of the shaft.
4. Install the retaining ring in the same way.
5. Lubricate the shaft splines with grease for CV joints.
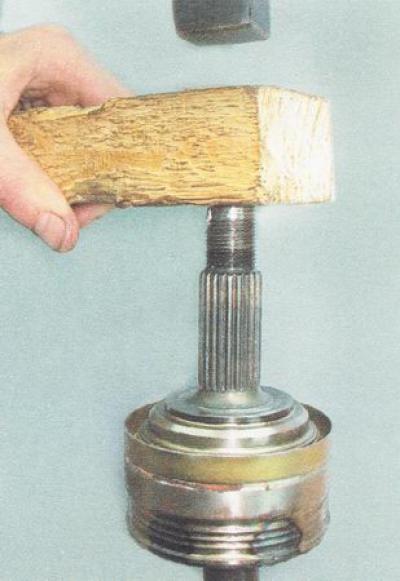
6. Install the hinge on the splined end of the shaft. Through a wooden spacer we press the hinge onto the shaft until it is fixed with a retaining ring.
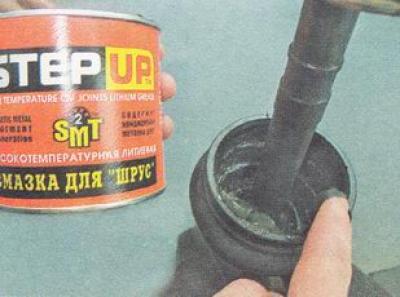
Warning. For the outer hinge, 40 cm3 is required. lubricants.
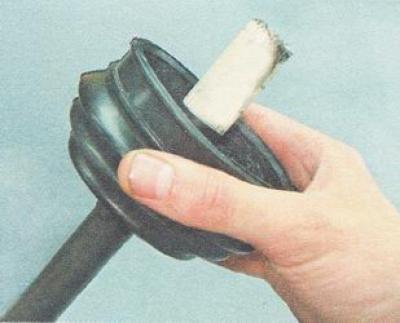
7. Fill the hinge with grease for constant velocity joints. The rest of the 40 cm cube. put the amount of lubricant into the boot of the CV joint.
8. We shift the boot of the CV joint towards the hinge so that the large sealing belt of the boot is completely put on the hinge body, and the small sealing belt fits into the groove of the shaft.
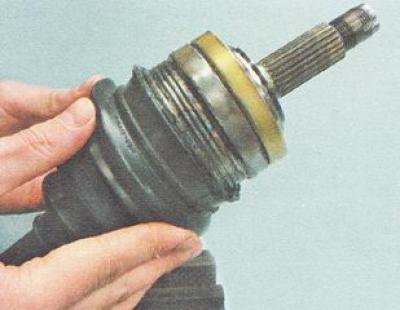
9. Lifting the sealing belt of small diameter with a slotted screwdriver, we release excess air from the inner cavity of the anther.
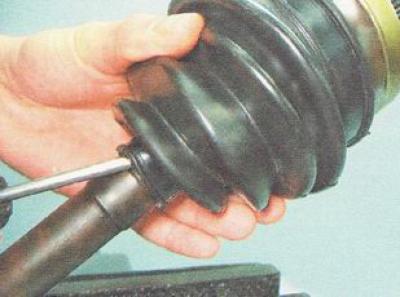
10. Using sliding pliers or special pliers for installing clamps and a slotted screwdriver, install the large and small boot clamps. We install the collars of the anther of the CV joint, taking into account the direction of rotation of the drive. The outer end of the clamps must point in the direction opposite to the forward rotation of the drive.
Recommendation. Before installing the assembled actuator, be sure to install a new retaining ring on the splined shank of the inner joint.
11. Install the front wheel drive on the car (see «Installation», items 1-5 "Drive wheel drive - removal and installation").