
- unscrewing the plug 8 (pic. 2-80) filling pipe 11, drain the gasoline;
- remove the rear seat, unscrew the screws securing the right and left upholstery of the wheel arches and remove the right upholstery;
- unscrew the fastening screws, remove the cover of the fuel tank compartment;
- remove the hoses connecting the fuel tank to the filler pipe, disconnect the wires and hose from the fuel level sensor, unscrew the mounting bolts and remove the tank.
Installing the fuel tank is carried out in the reverse order.
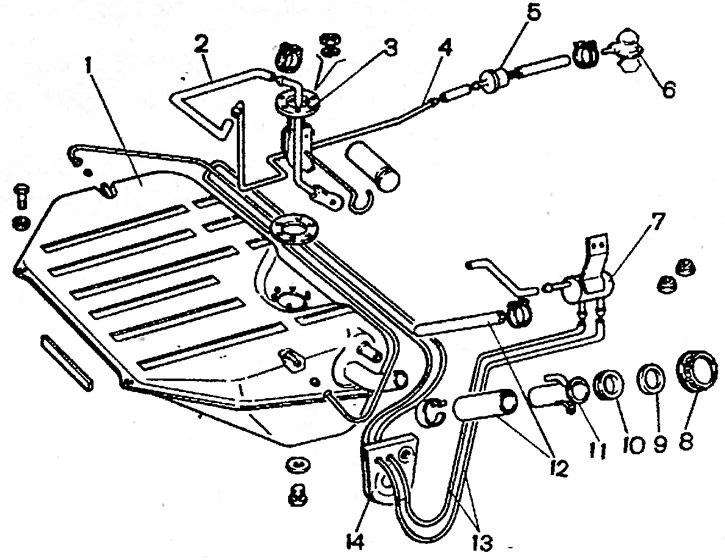
Pic. 2-80. Fuel tank and fuel line details: 1 - fuel tank; 2 - hose; 3 - fuel level sensor; 4 - fuel line; 5 - fine filter; 6 - fuel pump; 7 - separator, 8 - plug; 9 - gasket, 10 - filler pipe seal; 11 - filling pipe, 12 - connecting hoses; 13 - ventilation hoses; 14 - seal
Cleaning and control
Remove the fuel level sensor. Flush the tank with detergent to remove dirt and deposits («Lobomid», «ML», «MS») Then rinse and steam the tank from gasoline residues with a jet of hot water.
Carefully inspect the fuel tank along the joint line, make sure there are no leaks, if necessary, solder the leak with soft solder.
Warning. You can only solder a well-washed fuel tank that does not contain gasoline vapors, which can ignite when soldered.