
- screwdriver
- grease
- fine sandpaper
Before you start: Remove the windshield wiper (see subsection 8.8.1.).

The wiper marking is located on the cover of the gearbox housing.
Data for checking the wiper motor on the stand:
- rotational speed of the motor shaft at a supply voltage of 14 V, load torque of 1.47 N/m (0.15 kgf/m) and ambient temperature (25±10) °С – not less than 50 min–1;
- current consumption at a given load torque - no more than 3.5 A.
When repairing the wiper, the manufacturer allows the replacement of the gear gear, cleaning of the collector and the rotor shaft. For all other malfunctions, it is recommended to replace the gearmotor assembly.
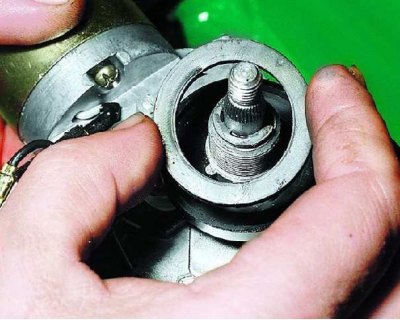
1. Remove the rubber seal from the gearmotor housing...
2....plastic bushing and...
3....thrust bracket.

4. Loosen the four screws securing the wiper cover.
5. Remove the wiper cover with gasket.
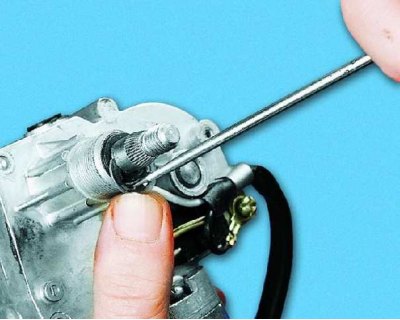
6. Remove the circlip from the wiper shaft...
7....two metal washers and...
8....sealing ring.
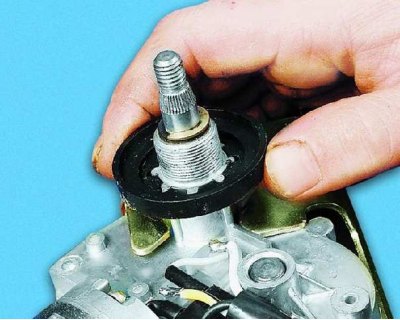
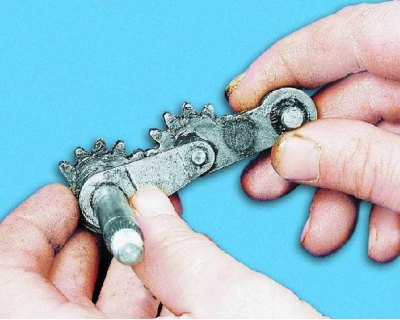
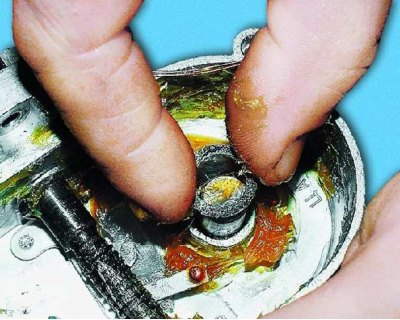
9. Remove the crank assembly from the gearbox housing.
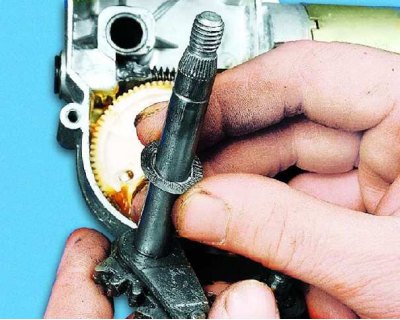
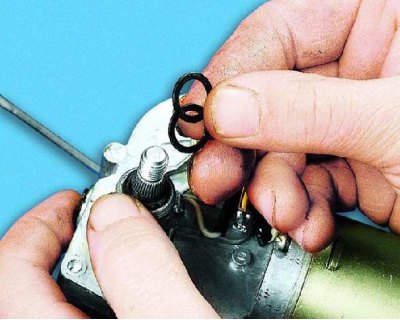
10. Remove the flat washers from the gearbox shaft and...
11....from the connecting rod axis.
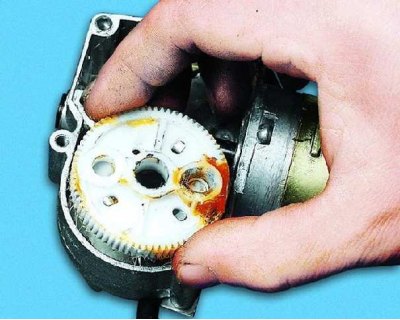
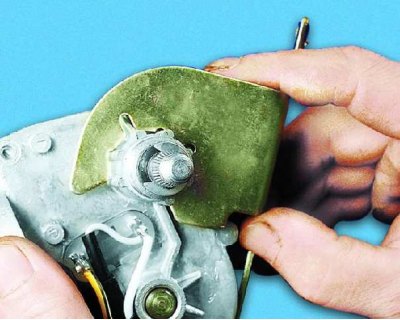
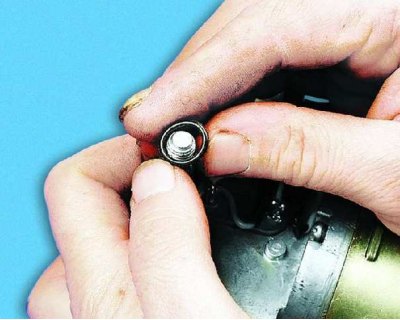
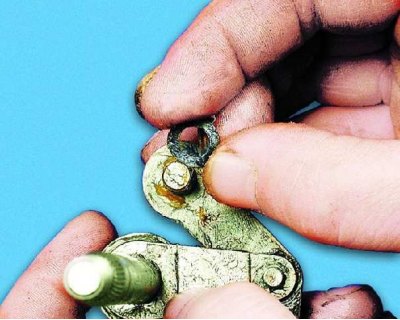
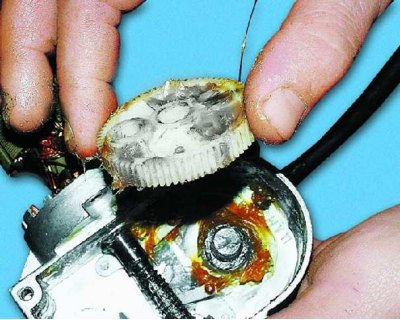
12. Remove the plastic gear from the housing.
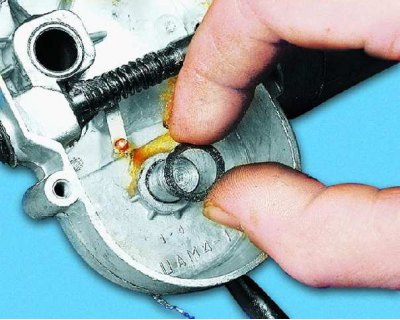
13. Remove the flat washer from the pinion shaft.
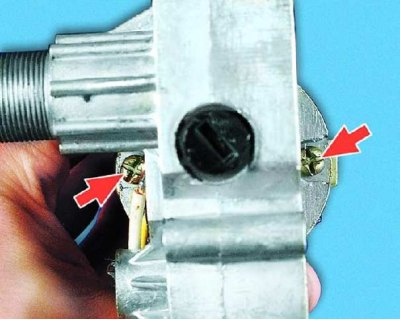
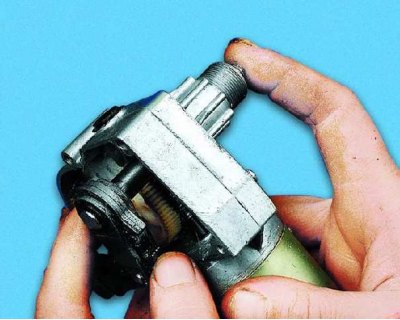
14. Loosen the two screws securing the motor housing.

15. Please note: spring washers are installed under the screws.

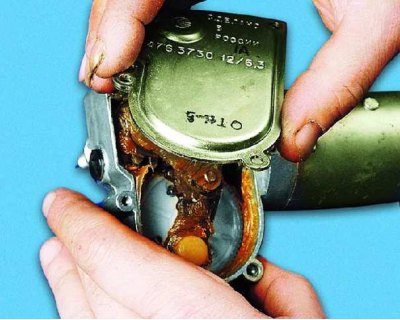
16. Remove two cage nuts.
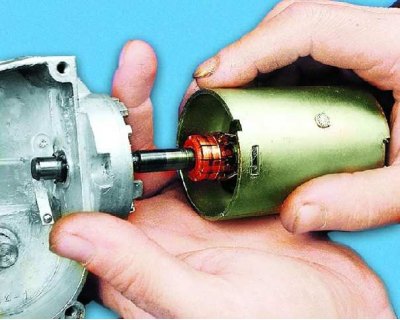
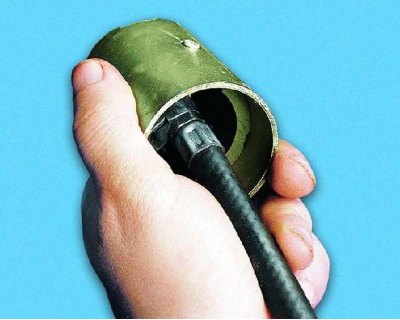
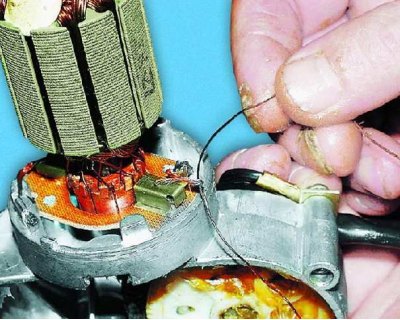
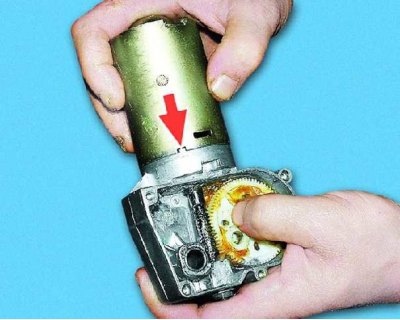
17. Remove the motor from the gearbox housing.
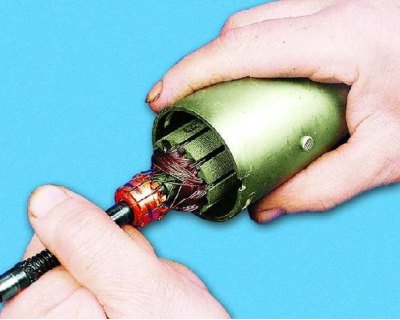
18. Remove the motor rotor from the housing.
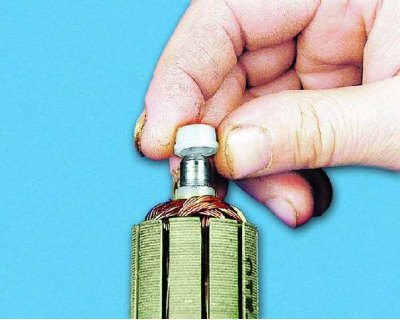
19. Remove the plastic support sleeve from the rotor shaft. Replace worn bushing.
20. Replace the crank assembly if the sector teeth are broken, or if the splines or threads on the shaft are damaged.
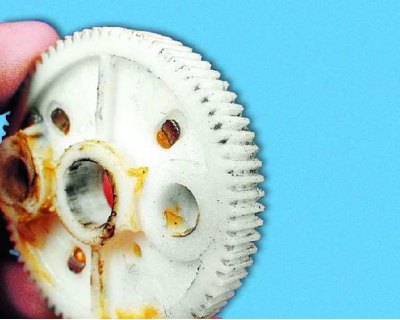
21. Replace gear with severely worn or damaged teeth.
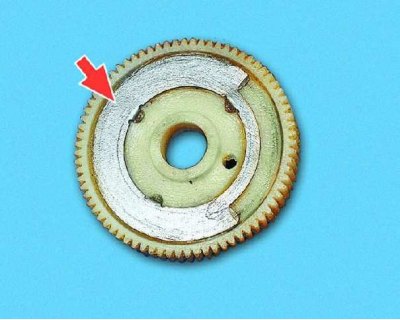
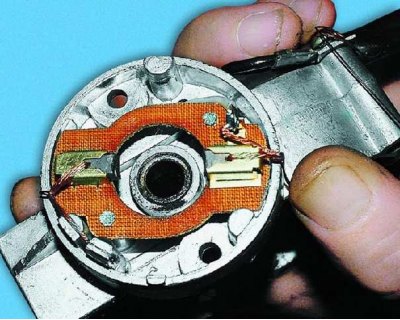
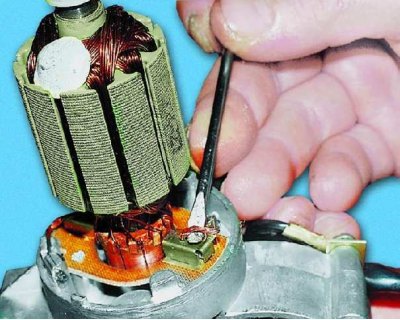
22. Inspect the contacts of the self-stopping mechanism on the pinion. Clean oxidized contacts. Replace gear with damaged contacts.
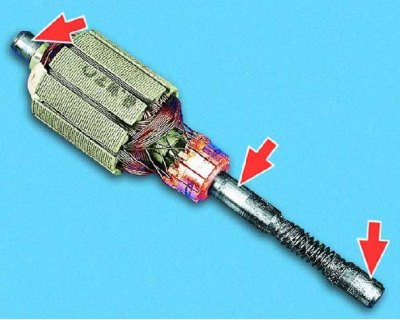
23. Examine the rotor shaft. If traces of seizing are found on the shaft journals, clean them with fine sandpaper.
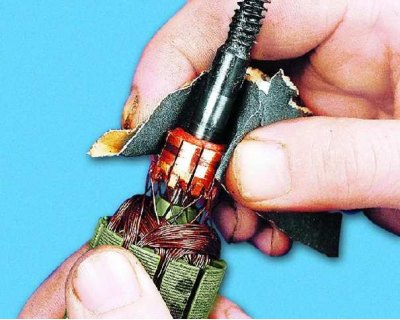
24. Clean the collector with a fine sandpaper if it is dirty or has marks, scratches and other damage on it. After that, carefully wipe the collector with a clean cloth, if possible, blow it with compressed air. If the collector is worn or burnt, replace the rotor.
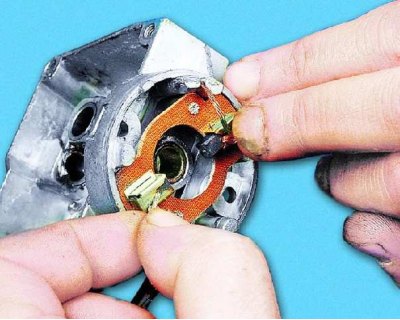
25. Check the ease of movement of the brushes in the brush holder. They should move freely, without jamming.
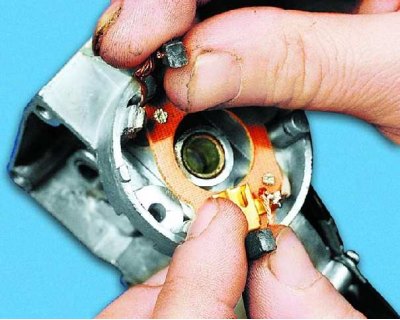
26. Replace worn or chipped brushes.
27. Replace broken or loose brush springs.
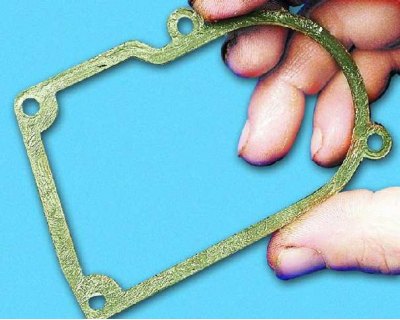
28. Replace damaged gearbox housing cover gasket.
29. Before assembling the wiper, clean and blow compressed air into the cavity of the motor housing to remove coal dust.
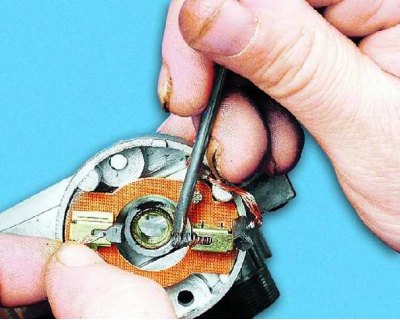
30. Dip the brushes all the way into the brush holder and fix them with a wire in this position.
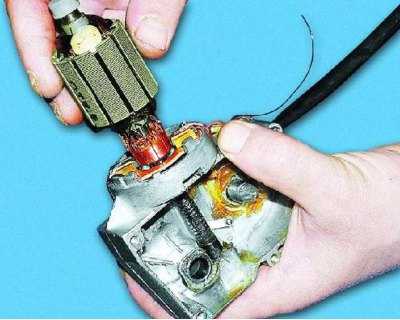
31. Carefully insert the rotor into the gearbox housing.
32. Install a flat washer on the pinion axle.
33. Install the reduction gear with the slip ring inside the housing.
34. Remove the wire holding the brushes.
35. Adjust the brush ends so that they do not touch the motor housing ("masses").
36. Install the motor housing and fix it with screws. The housing is installed in one position: the protrusion on the gearbox housing must fall into the slot on the motor housing.
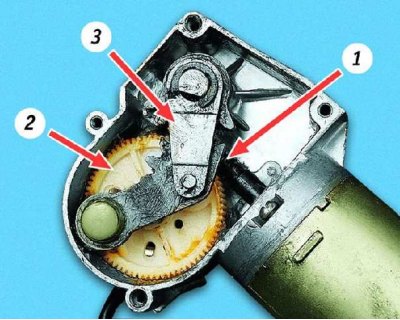
37. Assemble the wiper in the reverse order of disassembly, lubricating with grease the worm 1 of the rotor shaft, the gear 2 of the gearbox and the crank assembly 3.