
- keys "on 10", "at 13" And "at 22"
- screwdriver
- hammer
- circlip pliers
Remove the gearbox and drain the oil from it if this has not already been done.
To replace the clutch housing, remove the bearing and clutch release fork (see subsections 11.2.2. and 11.2.3.), and also press out the oil seals of the input shaft and axle shafts.
Attention! If at least one of the following parts was replaced during the repair of the gearbox: clutch housing or gearbox housing, differential housing or differential bearings, then it is necessary to select an adjusting ring for differential bearings (see subsection 11.1.7.).
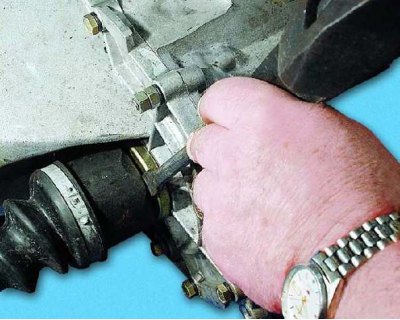
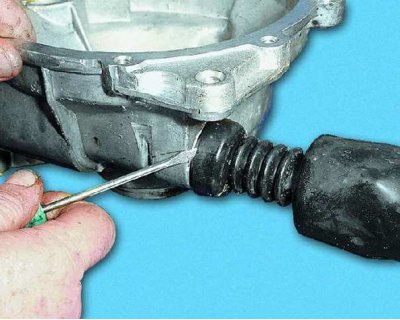
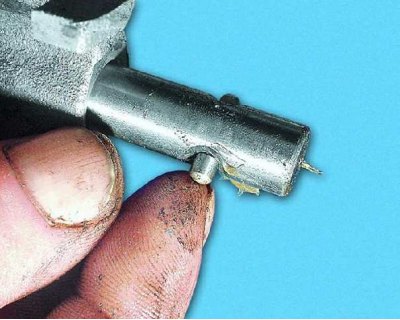
1. Insert a screwdriver between the reflector and the hinge body and, hitting it with a hammer...
2.... knock out the shank of the inner hinge of the wheel drive from the gearbox.
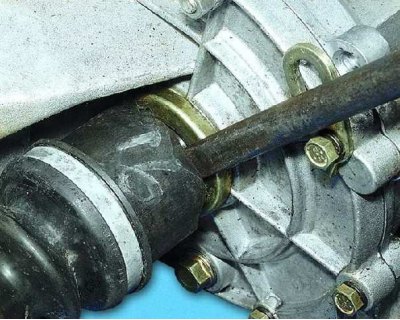
3. Remove the oil flinger ring. In the same way, disconnect the second drive from the gearbox.

4. Remove the oil level indicator from the gearbox housing.

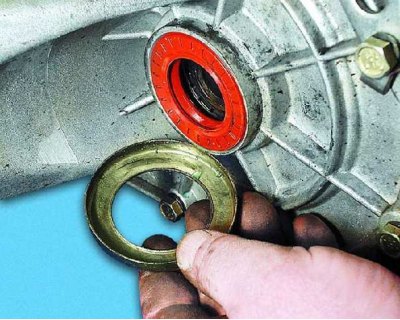
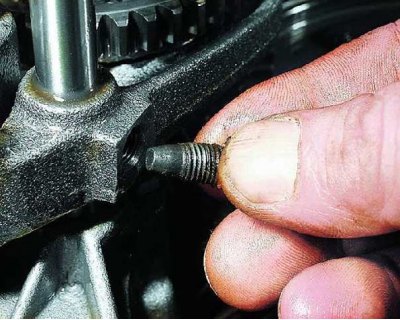
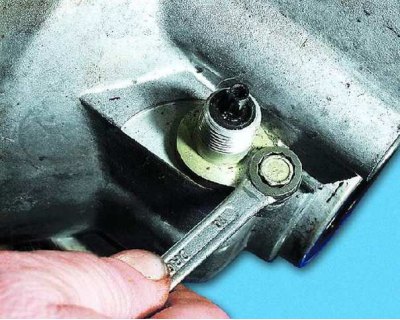
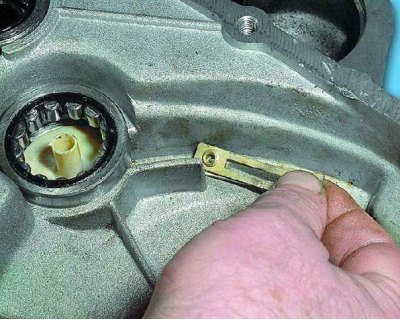
5. Remove the reverse light switch from the crankcase.
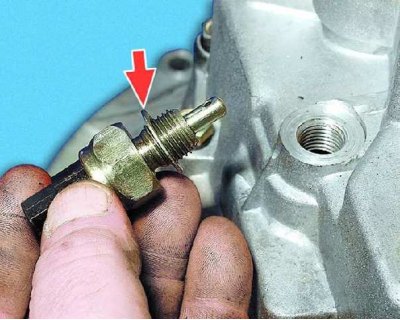
6. Please note: there is an aluminum sealing ring under the switch.
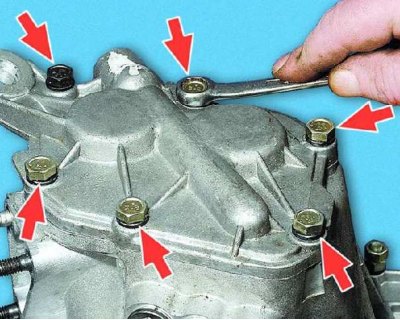
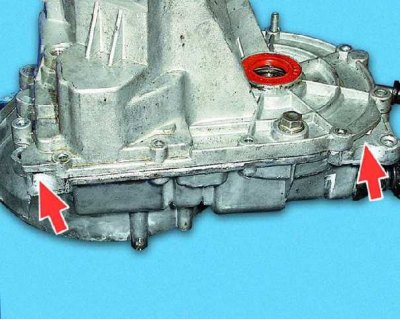
7. Remove the six bolts securing the rear cover of the gearbox.
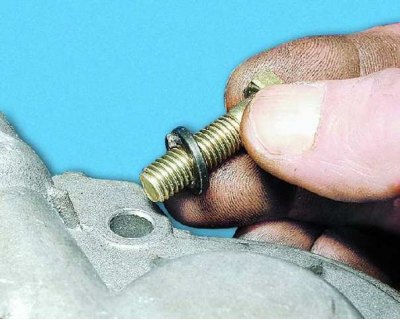
8. Please note that there is a spring washer under the head of each bolt.
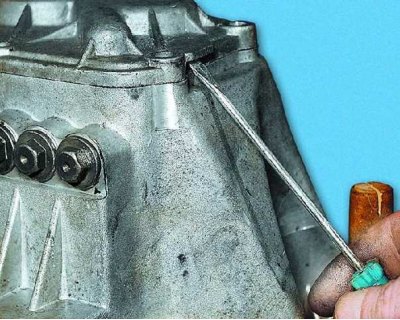
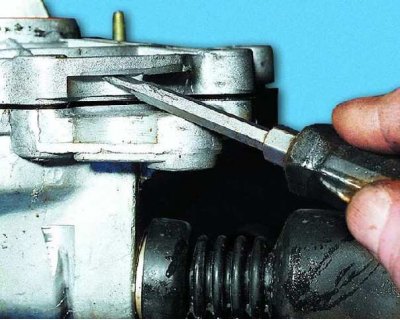
9. Prying with a screwdriver...
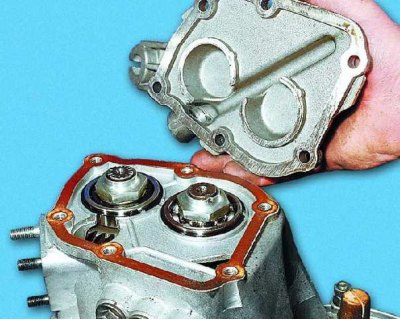
10.... separate the rear cover from the gearbox housing.

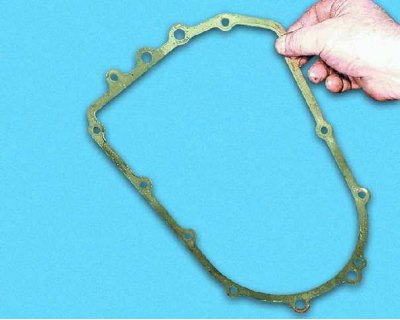
11. Carefully remove the back cover gasket.
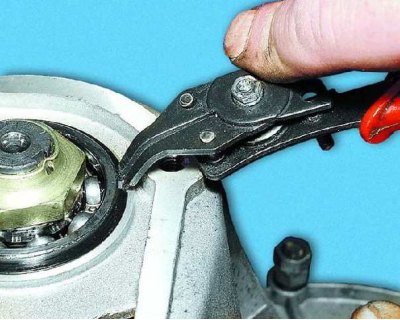
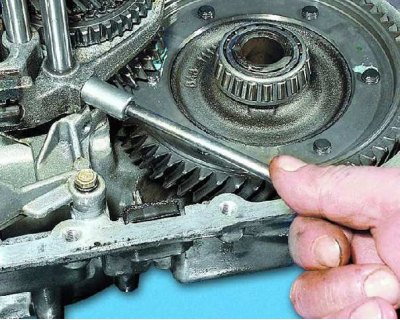
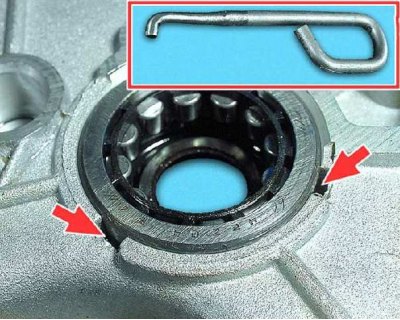
12. Remove the circlip from the output shaft rear bearing.
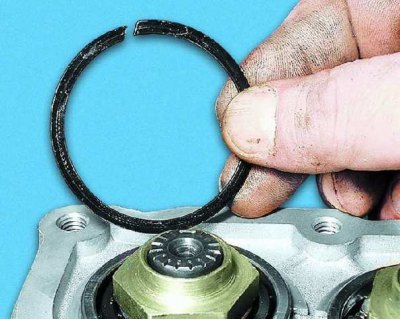
13. In the same way, remove the circlip from the input shaft rear bearing.
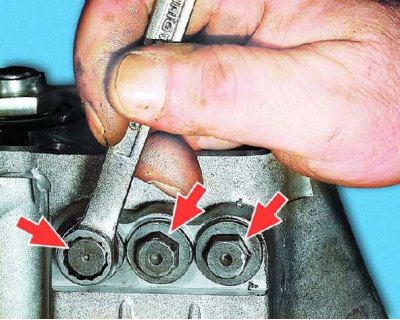
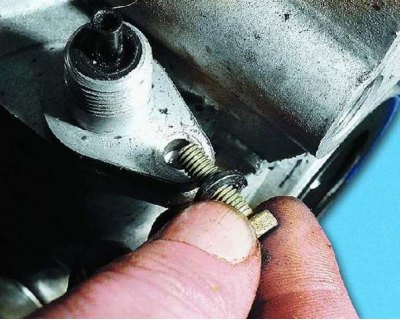
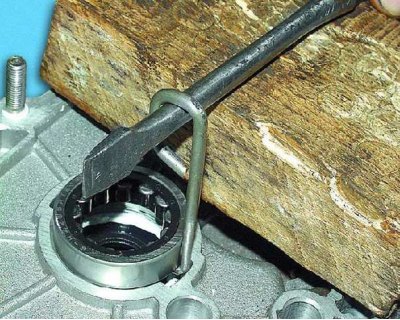
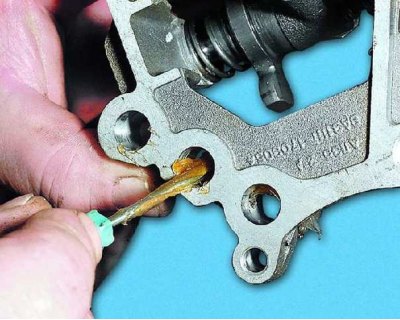
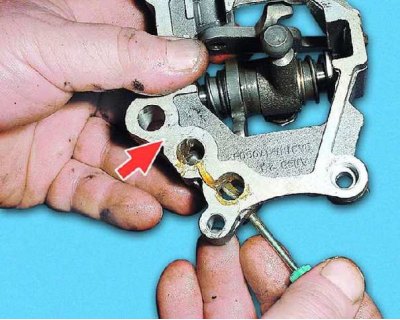
14. Turn out three plugs of clamps.
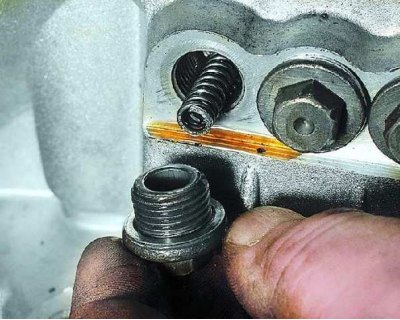
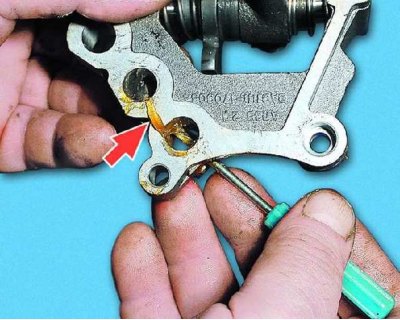
15. Carefully remove the plugs so as not to lose the detent springs.
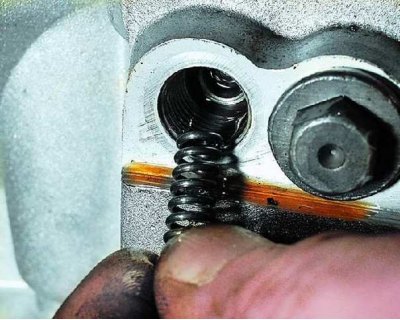
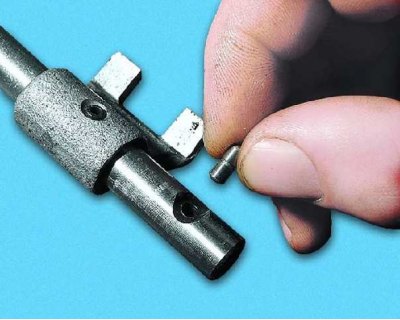
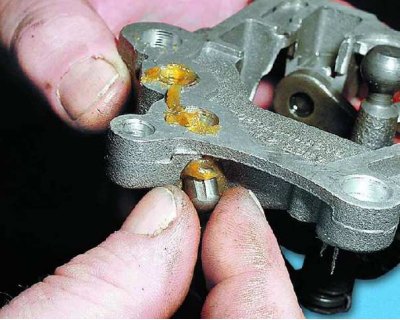
16. Remove the retainer springs.
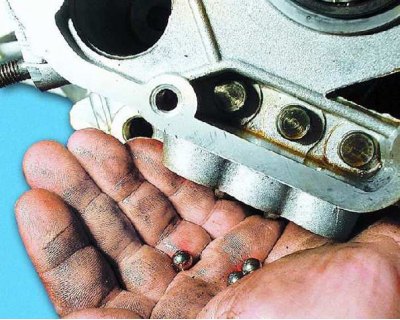
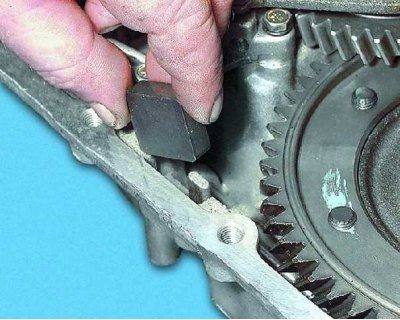
17. Carefully tilt the gearbox and remove the retainer balls.
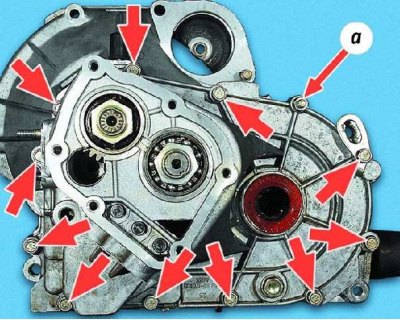
18. Turn away eleven bolts and a nut and fastenings of cases of a transmission and coupling.
19. Note that there is a spring washer under each bolt head and nut.
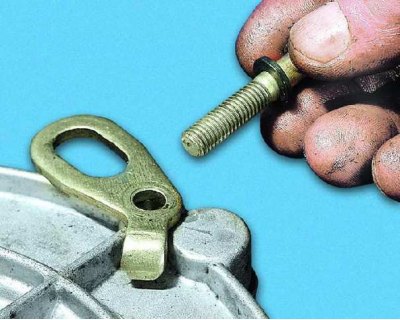
20. Remove the eye attached under one of the bolts.
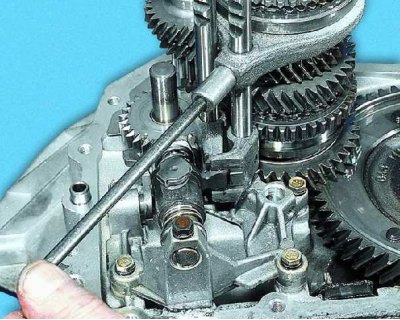
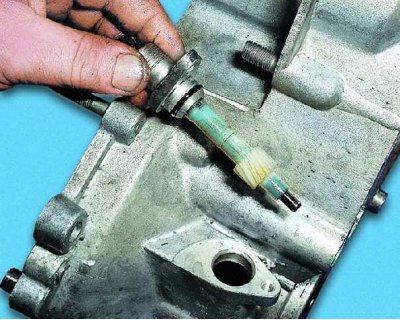
21. To separate the gearbox and clutch housings, insert a screwdriver alternately into the three grooves (the third groove is on the other side of the gearbox) And...
22....separate the gearbox housing from the clutch housing.
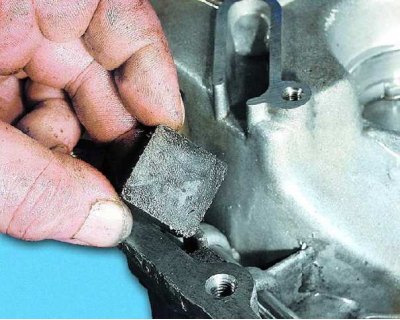
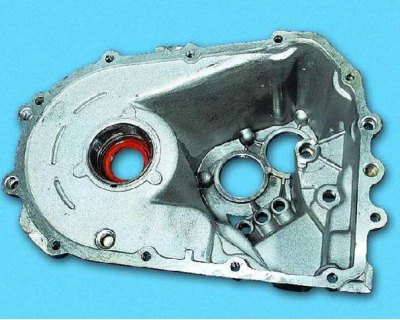
23. Remove the gearbox housing from the clutch housing.
24. Carefully remove the seal.
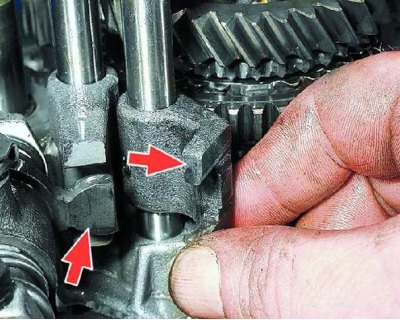
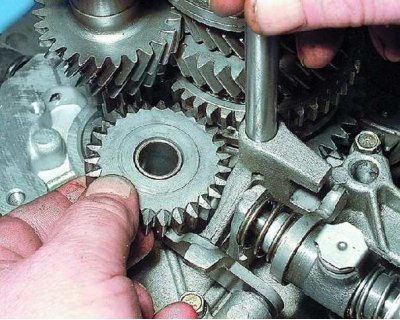
25. Remove the 1st and 2nd shift fork mounting bolt.
26. Please note: the forks are attached with special bolts.
27. Remove the shift rod for 1st and 2nd gears.
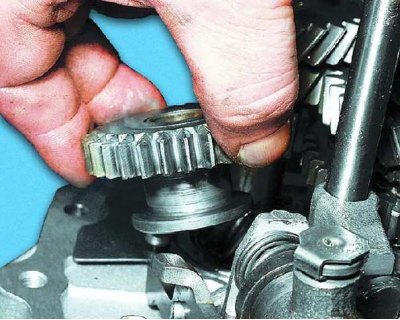
28. Remove the 1st and 2nd shift fork.
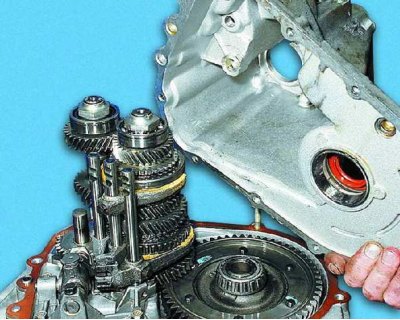
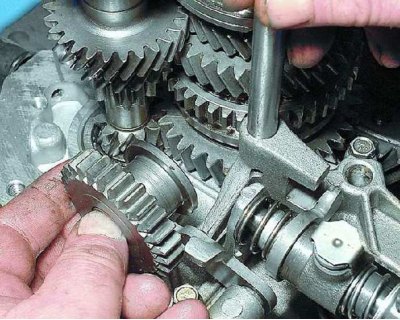
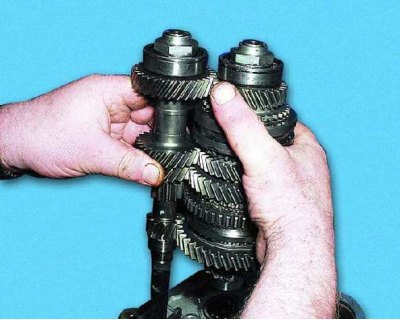
29. Remove the 3rd and 4th shift fork mounting bolt.
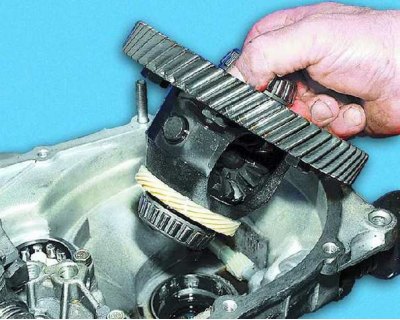
30. Rotate the 3rd and 4th shift rod to disengage the shift rod carrier from the gear selector lever.
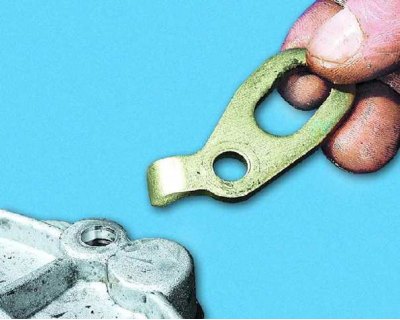
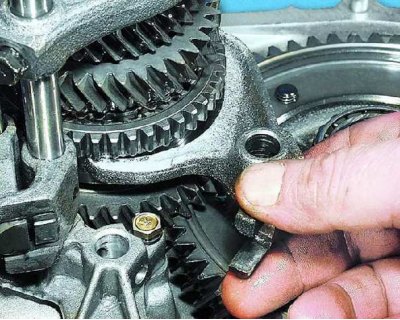
31. Remove the stem with a fork.
32. Remove the blocking cracker from the stem bore.
33. Remove the reverse gear shaft.
34. Remove the reverse gear.
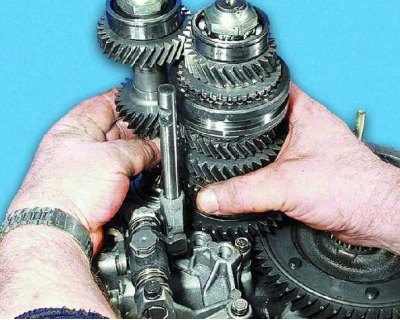
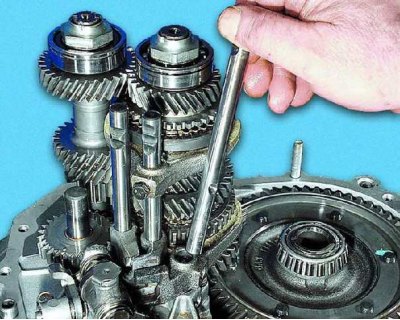
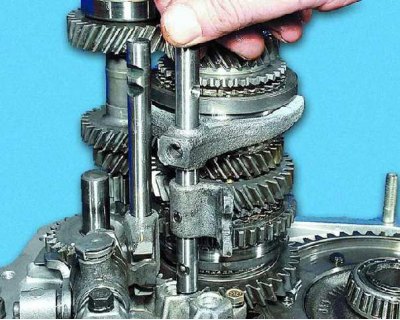
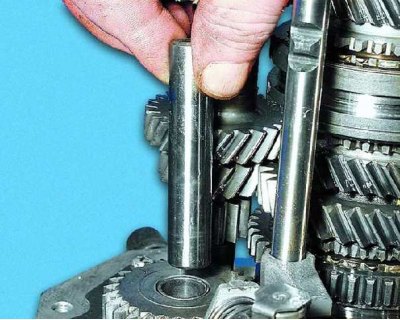
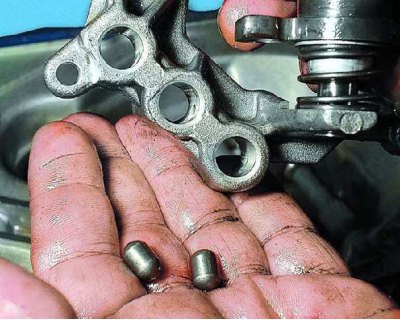
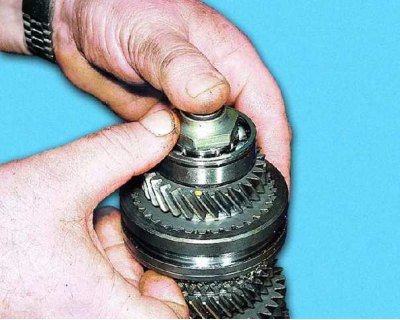
35. Slightly shaking, take out at the same time the primary and secondary shafts.
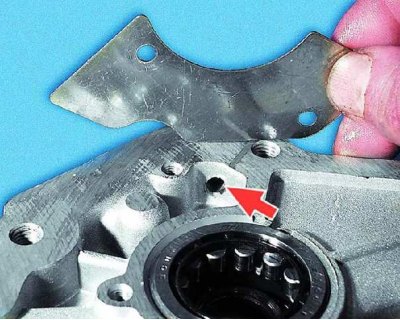
36. Remove the differential from the clutch housing.
37. Remove the reverse gear lever and...
38.... remove his leash from the hole of the reverse gear fork.

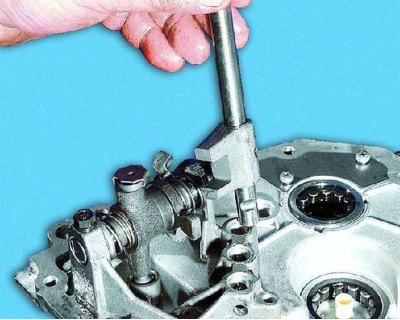
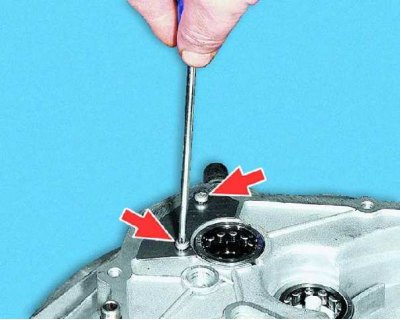
39. Remove the four bolts securing the gear selector (spring washers are installed under the bolts).
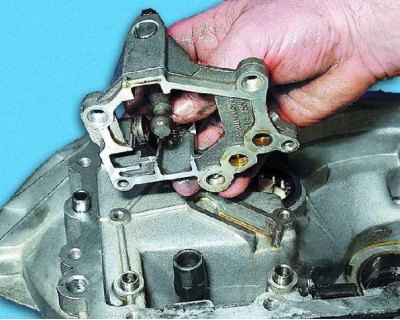
40. Remove the gear selector.
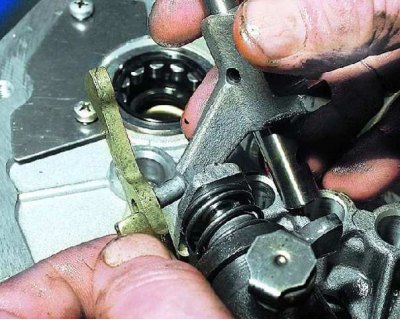
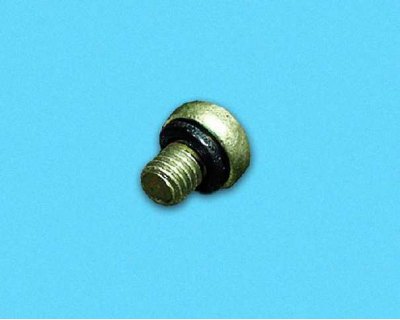
41. Remove two plungers from the holes in the mechanism.
42. Loosen the two screws securing the protective plate.
43. Please note that there is a spring washer under the head of each screw.
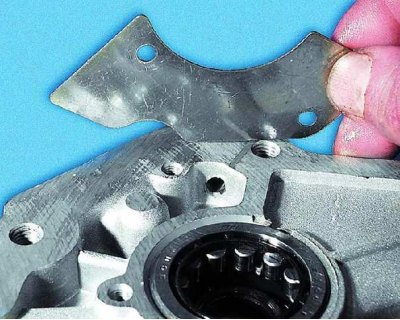
44. Remove the protective plate.
45. Loosen the speedometer drive housing bolt.
46. Please note: there is a spring washer under the bolt head.
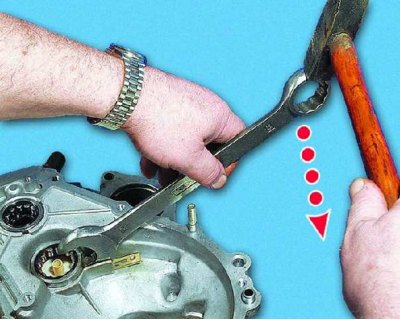
47. Remove the speedometer drive assembly with the driven gear.
48. Remove the magnet from the clutch housing.
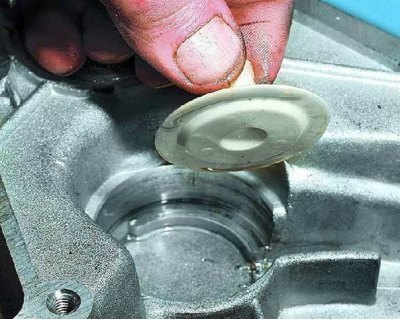
49. If it is necessary to remove the gear selection rod, use a screwdriver to pry off the edge of the protective cover of the rod and slide it off the rod support sleeve...
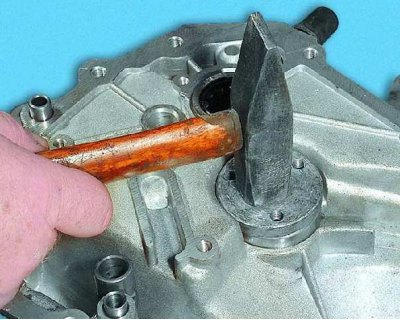
50.... unscrew lever 1 from the stem (it is fixed with special glue TB-1324) select gear and remove rod 2 from the clutch housing.
51. If it is necessary to replace the rod hinge, slide the protective cover off it and...
52.... unscrew the hinge bolt (it is fixed with special glue TB-1324).
53. If necessary, press out the output shaft front bearing. To do this, place metal plates of a suitable size and...
54.... using a wrench, press the bearing out of the crankcase, taking care not to damage the oil sump.
55. Remove the oil sump, if damaged, replace.
56. Press the bearing with a suitable mandrel, applying pressure only to the outer race of the bearing (do not forget to pre-install the oil sump).
57. To press out the input shaft bearing, make a hard wire hook. Insert a hook into one of the two slots in the crankcase and slide it under the bearing. Then...
58....with a screwdriver (placing a wooden block) press the bearing out of the crankcase by applying force to the opposite end of the screwdriver with hammer blows and alternately rearranging the hook in the grooves.
59. Inspect the clutch housings and gearboxes. They should not have cracks or chips. There should be no nicks, scratches, dents, etc. on the mating surfaces.
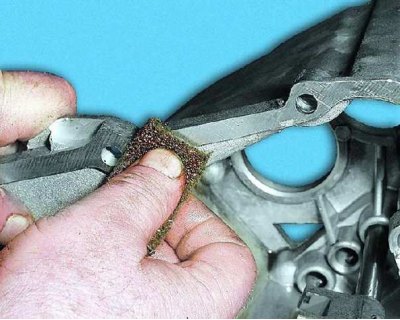
60. Remove minor damage with sandpaper. If the defect persists, replace the part.
61. Check the bearing seats in the clutch housing and...
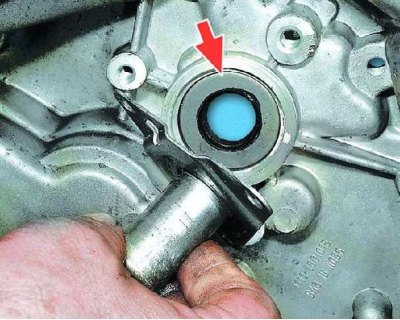
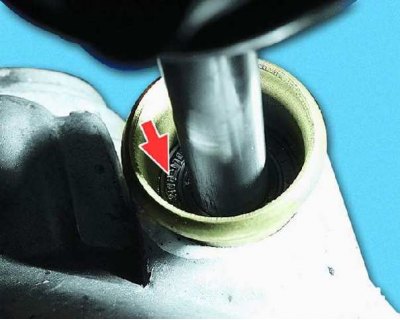
62.... the gearbox housing. These surfaces must not show signs of wear or damage. Otherwise, replace the crankcases.
63. Rinse and blow out the breather with compressed air.
64. Examine the back cover. It should not have cracks or chips. There should be no nicks, scratches, dents, etc. on the mating surface.
65. Check the condition of the ball bearings. If the raceways, cage or balls are damaged, or if play is found in the bearing (the radial clearance in it should not exceed 0.05 mm) replace the bearing.
66. Check the condition of the shift rods. Replace bent stems, as well as stems with scuffs, burrs, or gouges for retainers. Replace the forks if they are bent or their tabs are worn out.
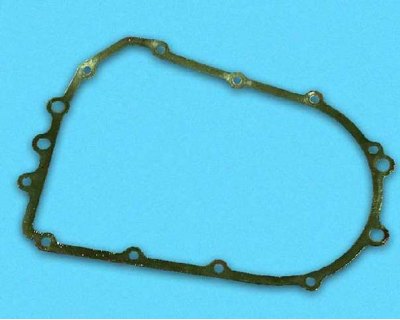
67. Check: the rods must slide freely in the holes in the crankcase and the gear selector.
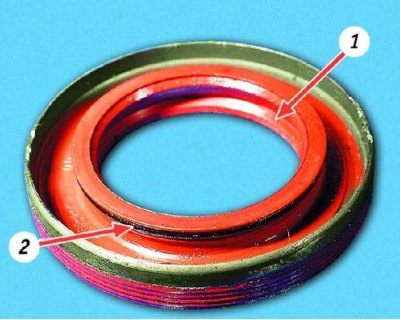
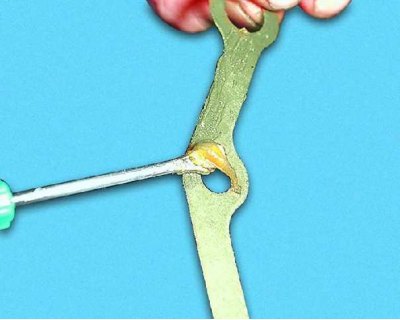
68. Check up a condition of epiploons of semiaxes. They should be free of warpage and tears. The working edge 1 must be even, without tears, dents and rubber sagging, and the spring 2 must be intact and unstretched. Replace defective seals (see subsection 11.1.9.).
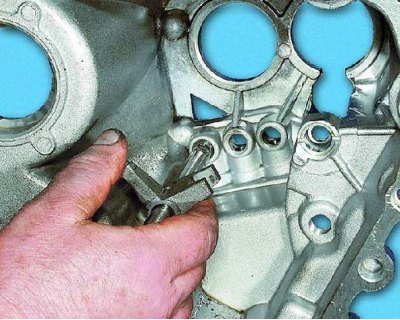
69. Check (replace if necessary) input shaft seal and...
70.... gear selector shaft seal (see subsection 11.1.9.).
71. Check up reliability of inclusion of transfers and ease of movement of couplings of synchronizers. Otherwise, repair or replace synchronizers.

72. Clean the magnet of wear particles. Replace the magnet if it is cracked or has lost its magnetic properties.
73. Replace torn or heavily compressed crankcase and rear cover gaskets. It is recommended to replace the gaskets regardless of their condition.

74. Assemble the gearbox in the reverse order of disassembly, having previously cleaned the mating surfaces of the crankcases from the remnants of the old gasket.
75. When installing locking plungers, generously lubricate the access hole with grease.
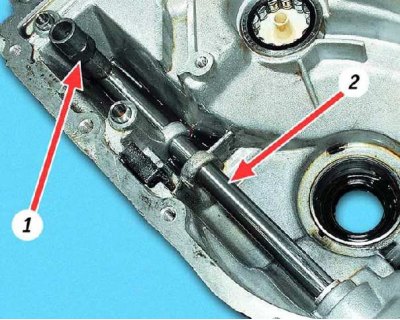
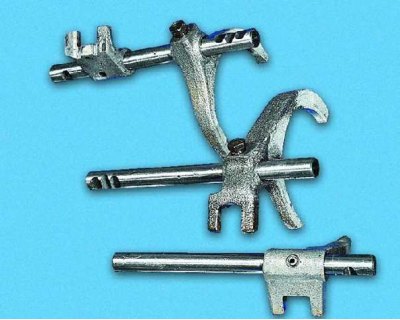
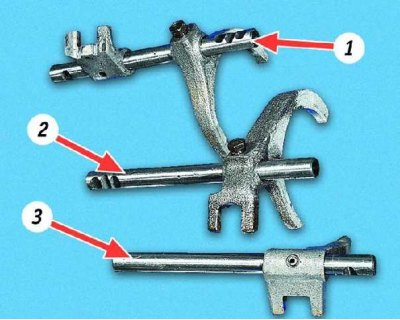
76. Insert the plunger into the hole and...
77....push it into place between the far and middle stem holes (hold the plunger underneath with your finger as it passes through the stem bores).
78. Also install the second plunger between the middle and near holes for the rods.
79. When installing the gear selection mechanism, make sure that the gear selector knob fits into the gear selector lever socket. Pre-lubricate the lever head with grease.
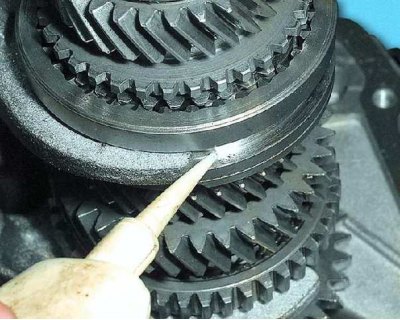
80. When installing the reverse gear intermediate gear, install it with a groove on the reverse gear engagement fork and...
81....turn 90°, making sure that the yoke stays in the groove of the gear.
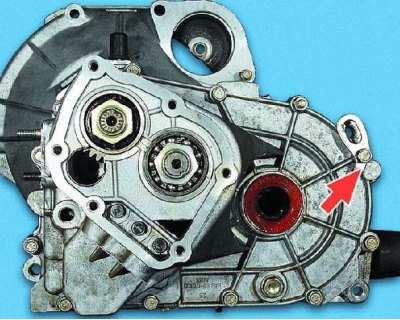
82. Pay attention to how the forks are installed on the gearshift rods: 1 - a rod with a shift fork for 3rd and 4th gears, 2 - a rod with a shift fork for 1st and 2nd gears, 3 - a reverse gear engagement rod.
83. When installing the 3rd and 4th shift rod, do not forget to insert a blocking cracker into its hole.
84. Before installing the shafts, engage the teeth of their gears and, in this position, install them in the clutch housing.
85. Don't forget to replace the magnet.
86. For ease of installation "glue" gasket to the clutch housing with grease.
87. Lubricate all moving parts liberally with gear oil.
88. When connecting the clutch housing and gearbox, install long bolts in the through holes. Under the bolt indicated by the arrow, install the eye.
89. Tighten and lock the shaft bearing nuts if the shafts were disassembled. After final assembly of the gearbox, check the gear engagement by moving the gear selector rod.