
English Русский
Български
Беларускі
Український
Српски
Hrvatski
Română
Polski
Slovenský
Magyar
| Articles | Contacts | Sitemap |   
Repair and maintenance Lada Repair and maintenance Mazda Repair and maintenance Mitsubishi Repair and maintenance Toyota Repair and maintenance Land Rover Repair and maintenance Hyundai Repair and maintenance Nissan
VAZbook.ru


Main     1111   2101   2105   2106   2107   2109   2110   2115   2121  
VAZ-1111 (1988-1996) VAZ-11113 (1996-2003)
  • Main
  • «Oka»
  • VAZ-11113
  • Transmission
  • Car gearbox
  • Differential repair

Differential repair (VAZ-11113)

            0

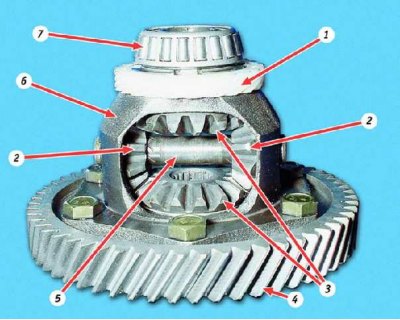
Differential: 1 – speedometer drive pinion; 2 – satellite; 3 – axle gears; 4 – driven gear of the…

Differential: 1 – speedometer drive pinion; 2 – satellite; 3 – axle gears; 4 – driven gear of the main transmission; 5 – satellite axis; 6 – differential housing; 7 – differential bearing


You will need:
  • key "17"
  • universal puller
  • snap ring pliers
  • bearing press mandrel
  • beard
  • hammer

Remove the differential from the gearbox (see subsection 11.1.2., operations 1–36).

One of the reasons for increased noise in the gearbox may be wear or breakage of differential parts.

Increased axial clearance of axle gears (more than 0.1 mm) can be eliminated by installing support washers of greater thickness.

For reference: the moment of resistance to differential rotation should not exceed 15 N/m (1.5 kgf/m).
For reference: the moment of resistance to differential rotation should not exceed 15 N/m (1.5…


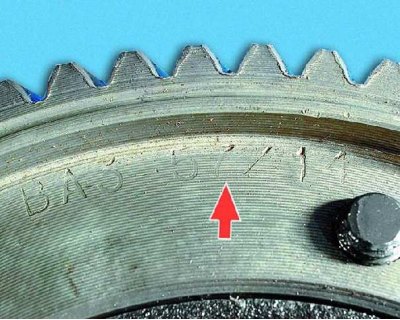
Attention! The main gear pinions are selected in pairs at the manufacturer's plant based on noise and contact patch. Therefore, when replacing the driven pinion, also replace the driving pinion (they are sold in pairs). The driven gear is marked with the number of teeth of the driven/driven gear. To check, count the number of teeth of the drive gear.


Caution! When pressing with a puller, bearings can be damaged. Therefore, remove bearings only if replacement is necessary.


Attention! If during the gearbox repair process at least one of the following parts was replaced: clutch housing or gearbox housing, differential housing or differential bearings, then it is necessary to select a differential bearing adjusting ring (see subsection 11.1.7.).

Attention! If during the gearbox repair process at least one of the following parts was replaced:…


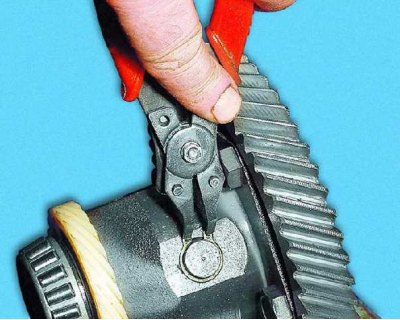
1. Remove the retaining ring from the satellite shaft.
1. Remove the retaining ring from the satellite shaft.


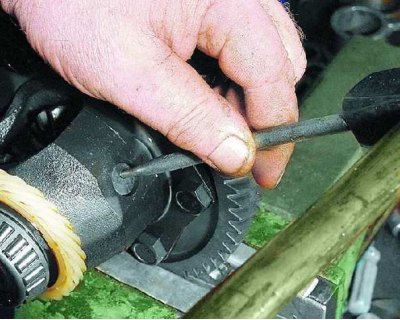
2. Using a punch, knock the satellite axle out of the differential housing.
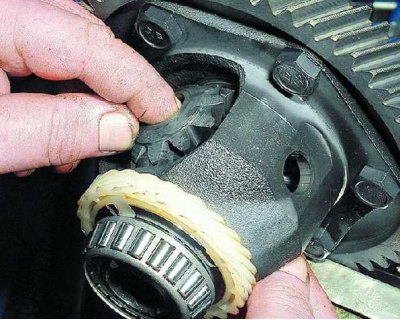
2. Using a punch, knock the satellite axle out of the differential housing.


3. By turning the satellites in the differential housing by 90°...
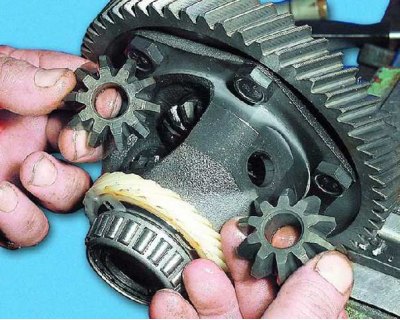

3. By turning the satellites in the differential housing by 90°...


4....remove both satellites from the housing.
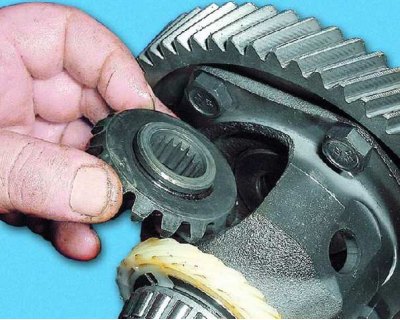
4....remove both satellites from the housing.


5. Remove the axle gear from the housing and...
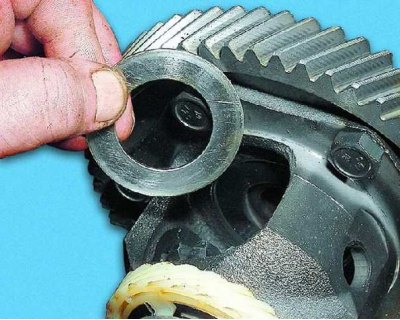
5. Remove the axle gear from the housing and...


6....a support washer installed underneath it.
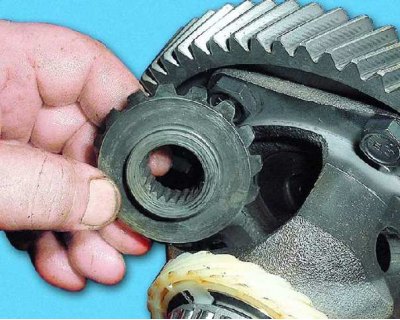
6....a support washer installed underneath it.


7. Remove the second axle gear together with the washer.
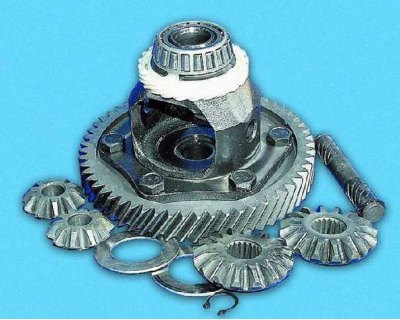
7. Remove the second axle gear together with the washer.


8. Inspect the working surfaces of the satellites and their axles, the axle gears and the spherical surfaces of the differential housing that contact them. Remove minor irregularities using fine-grained sandpaper. Replace parts with significant defects.
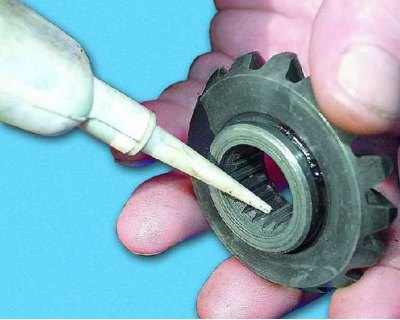
8. Inspect the working surfaces of the satellites and their axles, the axle gears and the spherical…


9. Assemble the differential in the reverse order of disassembly, after lubricating all parts with transmission oil.
9. Assemble the differential in the reverse order of disassembly, after lubricating all parts with…


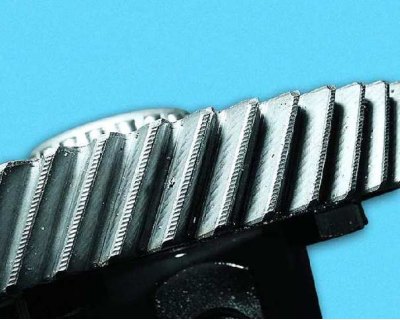
10. If there are chips, flaking or significant wear of the teeth, replace the gear. To do this...
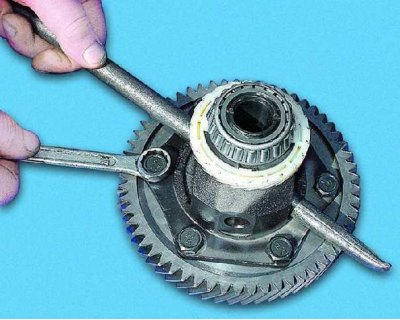
10. If there are chips, flaking or significant wear of the teeth, replace the gear. To do this...


11....unscrew the bolts securing the driven gear to the differential housing. We recommend removing the axle gears so that you can hold the differential housing with a mounting blade rather than clamping the gear in a vice.
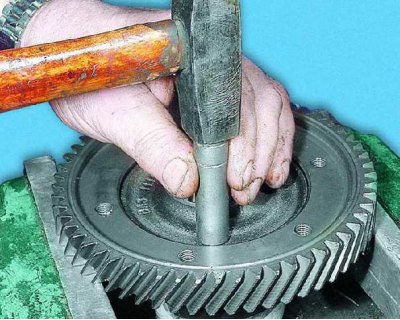
11....unscrew the bolts securing the driven gear to the differential housing. We recommend removing…


12. Place the gear in the jaws of a vice and press the differential housing out of the driven gear.
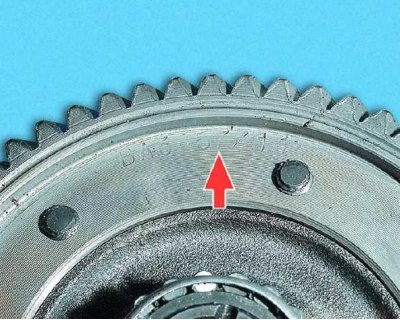
12. Place the gear in the jaws of a vice and press the differential housing out of the driven gear.


13. Install the driven gear on the differential housing in the reverse order of removal. The tooth markings on the gear should be facing outward. Tighten the gear bolts evenly crosswise.
13. Install the driven gear on the differential housing in the reverse order of removal. The tooth…


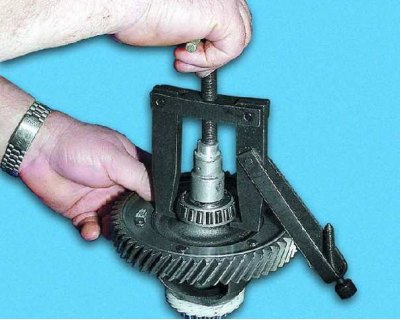
14. If there are cavities on the treads and rolling elements, traces of rolling element indentation on the treads, or damage to the separators, the bearings must be replaced. To do this, use a puller to press them off the differential. In this case...
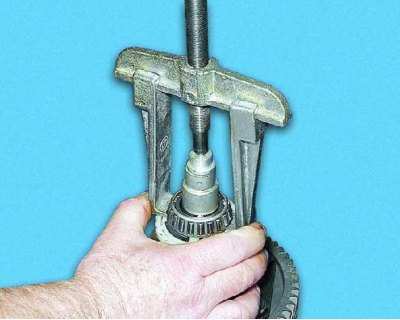
14. If there are cavities on the treads and rolling elements, traces of rolling element indentation…


15....press the bearing on the speedometer drive gear side by the separator (to avoid damaging the gear). If there is an inner bearing race left on the differential case, knock it off with a chisel or saw it off.
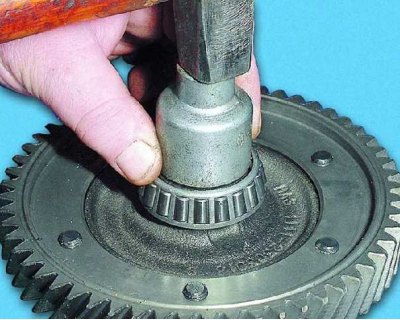
15....press the bearing on the speedometer drive gear side by the separator (to avoid damaging the…


16. Press the new bearings in until they stop using a suitable mandrel, applying force only to the inner bearing races.
16. Press the new bearings in until they stop using a suitable mandrel, applying force only to the…


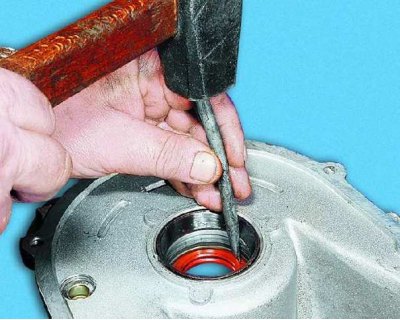
17. Press out the outer bearing rings from the gearbox and clutch housings using a special puller. If there is no puller, carefully press out the axle shaft seals first (for more details, see subsection 11.1.9.). Then...
17. Press out the outer bearing rings from the gearbox and clutch housings using a special puller.…


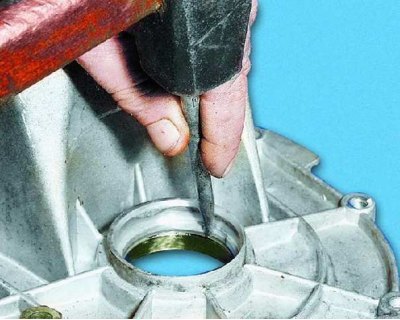
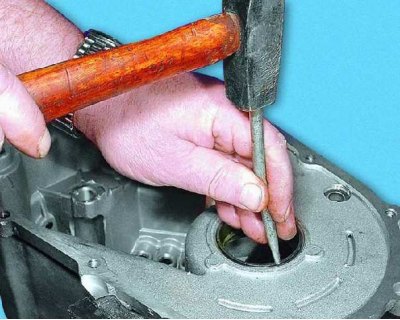
18....from the outside of the crankcases, use a punch to press out the outer bearing rings.
18....from the outside of the crankcases, use a punch to press out the outer bearing rings.


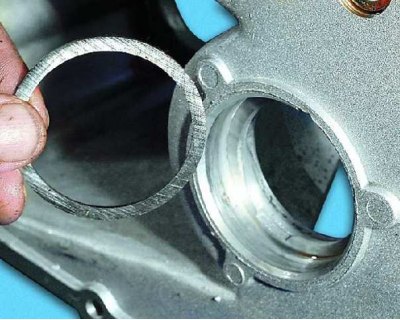
19. There may be an adjusting ring under the ring installed in the gearbox housing, which must be re-fitted before pressing in new rings (see subsection 11.1.7.).
19. There may be an adjusting ring under the ring installed in the gearbox housing, which must be…


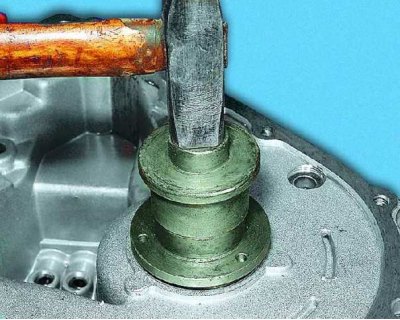
20. Press the new rings into the housings until they stop using a suitable mandrel. Do not change the rings relative to the bearings. If there is no mandrel, press the rings as far as possible using a flat metal plate, and then...
20. Press the new rings into the housings until they stop using a suitable mandrel. Do not change…


21....using a punch, press the rings down to the stop with even blows around the entire circumference.
21....using a punch, press the rings down to the stop with even blows around the entire…


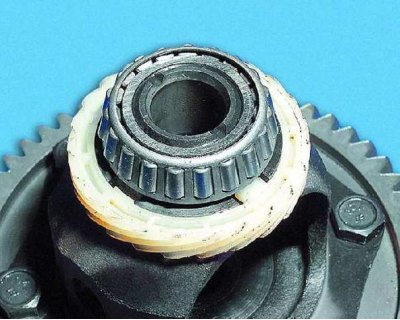
22. To replace the speedometer drive gear, knock it off with a chisel or saw it off. Then press the bearing off with a puller, install the new gear and press the bearing in.


This article is available at russian, bulgarian, belarusian, ukrainian, serbian, croatian, romanian, polish, slovak, hungarian
The text was reviewed by the specialist: Grigory Vologodtsev

Share with friends:

Previous articles
VAZ-11113: Car gearbox
Next articles

Primary shaft repair
Synchronizer repair
Secondary shaft repair
Disassembly and assembly of the gearbox
Removal and installation the gearbox
Selecting the differential bearing adjusting ring
Gear selection mechanism repair
Replacing gearbox seals
Replacing the gear shift lever axle bushings
Gear Shift Lever Repair

More articles from other manuals on VAZ cars:
➠ Differential repair VAZ-2115 (1997-2012)
➠ Checking the technical condition and repair of pistons and… VAZ-2101 (1970-1983)
➠ Main gear, differential, axle shafts of VAZ-2104 and VAZ-2105… VAZ-2105 (1979-2010)
➠ Preparing the car for maintenance and repair VAZ-2106 (1976-2006)
➠ Preparing the car for maintenance and repair VAZ-2107 (1982-2012)
Link in different formats to this page


Visitor comments

No comments yet


How much will 12 + 45 ?


VAZ-1111 (1988-1996) 
  • General information
  • Vehicle description
  • Vehicle device
  • Vehicle operation
  • Maintenance
  • Applications
  • Power unit
  • Engine repair
  • Cooling system
  • Lubrication system
  • Supply system
  • Transmission
  • Clutch
  • Transmission
  • Chassis
  • Front suspension and wheels
  • Rear suspension
  • Steering
  • Brake system
  • Body
  • Exterior
  • Interior
  • Electrical equipment
  • Engine electrics
  • Equipment and devices


VAZ-11113 (1996-2003) 
  • General information
  • Introduction to the guide
  • User manual
  • Maintenance
  • Power unit
  • Engine repair
  • Cooling and lubrication system
  • Fuel system
  • Exhaust system
  • Transmission
  • Car gearbox
  • Clutch and drive shafts
  • Chassis
  • Front suspension
  • Rear suspension
  • Steering
  • Brake system
  • Body
  • Exterior
  • Interior
  • Doors and locks
  • Electrical equipment
  • Equipment and devices
  • Lighting and signaling
  • Engine electrics
  • Ignition system


VAZbook.ru © 2017 · Mobile version · Contact with administration · Sitemap: EN BG BY UA RS HR RO PL SK HU · Site search · News and articles VAZ-1111 · VAZ-11113 · VAZ-2101 · VAZ-21011 · VAZ-2104 · VAZ-2105 · VAZ-21051 · VAZ-2106 · VAZ-21061 · VAZ-2107 · VAZ-21099 · VAZ-2109 · VAZ-2108 · VAZ-2110 · VAZ-2112 · VAZ-2114 · VAZ-2115 · VAZ-2121 · VAZ-21213 · VAZ-21214 ·
The site stores technical data using cookies to improve the service.